
Trew Landscape Blog
Landscape Lighting Placement: A Homeowner's Planning Guide
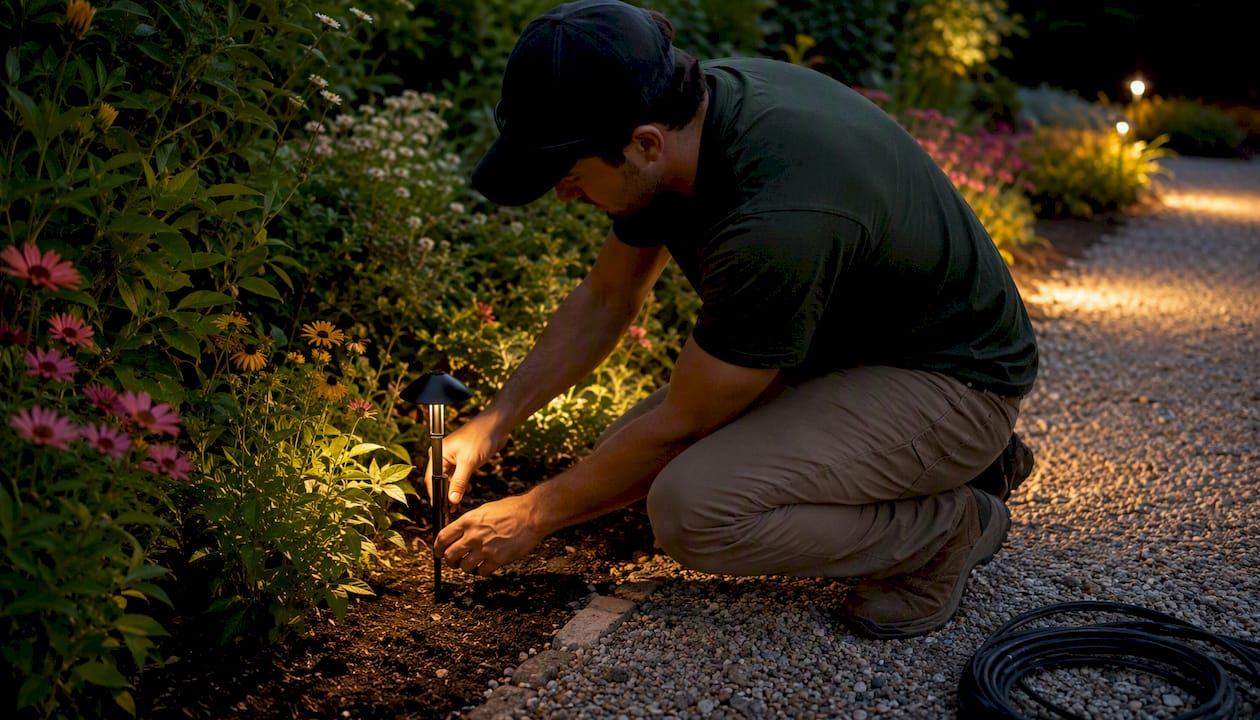
Landscape Lighting Placement: A Homeowner's Planning Guide ! Hand installing landscape path light at dusk Place landscape lights to guide movement, highlight one to three focal points, and layer depth from the foreground to the background.
Landscape Lighting Placement: A Homeowner’s Planning Guide
Place landscape lights to guide movement, highlight one to three focal points, and layer depth from the foreground to the background. Outdoor lighting design is placement-first: distance, beam spread, and fixture height determine results far more than which fixture you buy. Dark Sky principles and NEC transformer guidelines shape the safety and neighbor-friendliness of the plan. Trew Landscape LLC publishes this guide to give homeowners a practical, test-before-you-bury workflow.
Start here before buying a single fixture:
- Walk the property after dark and note where you stumble, where it feels unsafe, and where the yard disappears into shadow
- Flag every path edge, step, and grade change with a stake or a piece of tape
- Pick your top one to three focal points: a specimen tree, a stone wall, an architectural feature
- Set up a temporary mock-up with solar stakes or clip-on spotlights and live with it for two or three nights before committing to wire placement
Key Takeaways
Effective landscape lighting placement comes down to three things: guiding movement safely, accenting one to three focal points, and layering depth so the yard reads as three-dimensional after dark.
| Point | Details |
|---|---|
| Path light spacing | Space 6–10 ft apart on straight runs, staggered on alternating sides; tighten to 5–6 ft on curves. |
| Uplight distance | Place 1–3 ft from small trees, 3–6 ft from large ones, aimed at 30–45 degrees upward. |
| Layer all three types | Combine ambient, task, and accent lighting; intentional dark gaps between pools improve drama. |
| Test before you bury | Run temporary wiring and live-test for two or more nights before committing to final fixture positions. |
| Trew Landscape LLC | Offers design-to-install landscape lighting in Kansas City, including site walk, written layout, and transformer sizing. |
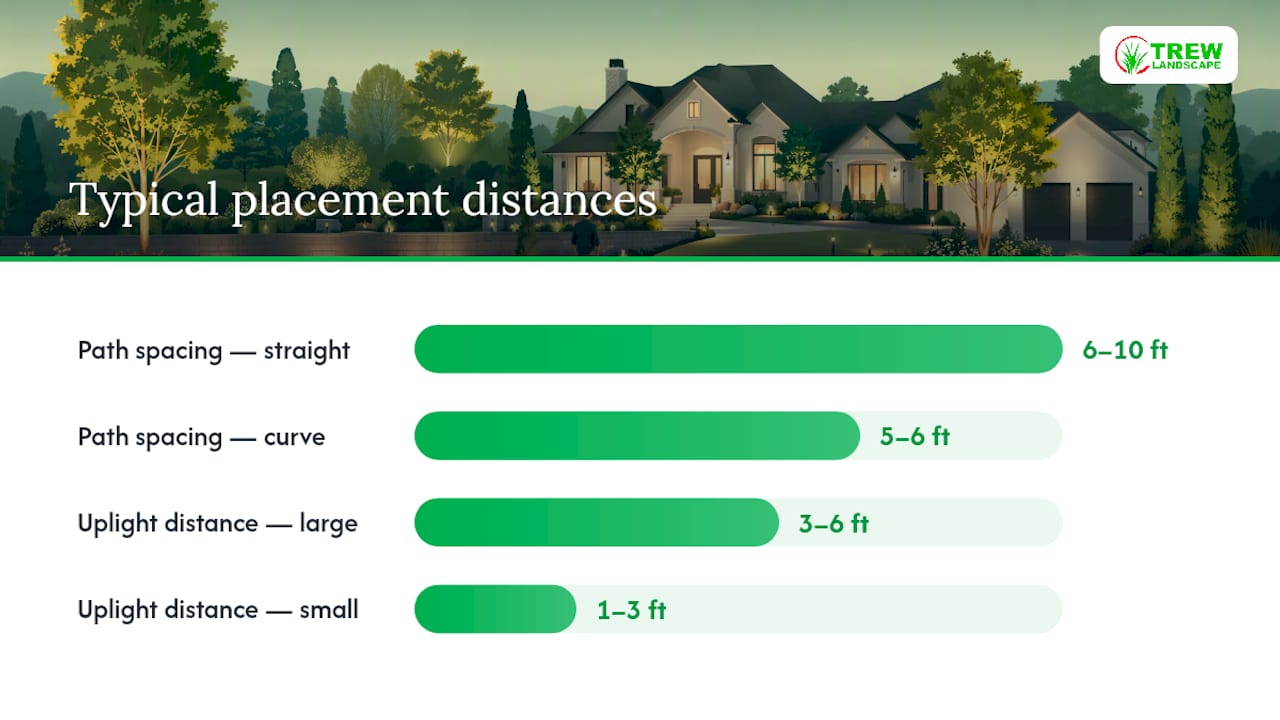
Table of Contents
- What good landscape lighting placement actually looks like
- Do’s and don’ts for placement decisions
- Where to place each fixture type
- Spacing, aiming angles, and fixture-to-subject distances
- How to layer lights for depth and visual hierarchy
- Safety, wiring basics, and code notes
- Step-by-step planning and mock-up checklist
- Common placement mistakes and how to fix them
- When to hire a professional installer
- What placement priorities actually matter most
- Professional landscape lighting design and installation in Kansas City
- Sources
- FAQ
What good landscape lighting placement actually looks like
The most common mistake homeowners make is treating outdoor lighting as decoration rather than composition. Good placement answers three questions: Where does someone need to see to move safely? What do you want them to notice first? What creates the sense that the yard has depth after dark?
Path and step lighting handles the safety layer. Accent lighting on trees, walls, and architectural features handles the focal layer. Ambient fill from downlights or string lights handles the depth layer. When all three work together, the yard reads as a three-dimensional space at night instead of a flat strip of lit ground.
Do’s and don’ts for placement decisions
These rules apply whether you are doing a mock-up with solar stakes or handing a plan to an installer.
- Do stagger path lights on alternating sides of the walkway. Lining them up on both sides creates a runway effect that looks institutional, not residential.
- Don’t place fixtures where the bulb is visible from a normal sightline. You should see light on a surface, not the source itself. Tuck fixtures behind plantings, inside ground covers, or below grade.
- Do light every step and grade change. A single missed step in the dark is a liability. Step lights mounted into the riser face or adjacent wall are the cleanest solution.
- Don’t aim uplights at eye level. A spotlight aimed horizontally creates glare that ruins night vision and annoys neighbors. Aim upward at 30–45 degrees from the base of the subject.
- Do use warm color temperatures. Fine Homebuilding recommends 2700K–3000K for residential landscapes to preserve comfort, reduce wildlife impact, and keep the night sky darker.
- Don’t over-light. More fixtures do not mean better results. Intentional darkness between pools of light creates drama and contrast.
- Do shield fixtures so light projects only where intended. Full-cutoff or hooded fixtures prevent light trespass onto neighboring properties.
- Don’t skip the nighttime walk-through. Testing at night before burying wires is the single most effective way to catch glare, hot spots, and dark gaps before they become permanent.
- Do plan for transformer placement early. A transformer mounted too far from the fixture runs increases voltage drop and dims your lights over time.
- Don’t mix color temperatures across zones. Warm and cool fixtures in the same sightline look mismatched and cheap.
Where to place each fixture type
Every fixture type has a job. Placing the wrong fixture in the wrong spot, or placing the right fixture at the wrong distance, produces flat or glaring results. Here is how to site each one correctly.
Path and stake lights
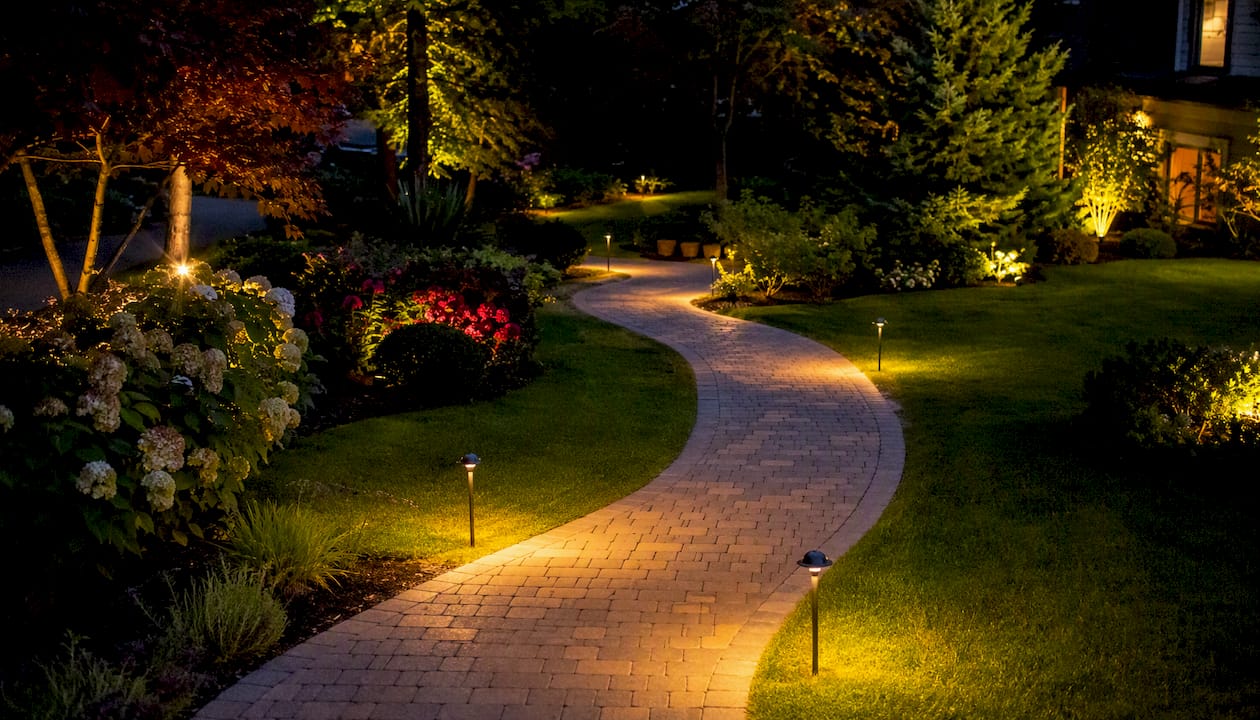
Space path lights 6–10 feet apart on straight runs, staggered on alternating sides. Tighten to 5–6 feet on curves and in the final 10–15 feet before an entry door, where foot traffic concentrates. Mount the fixture head 12–18 inches above grade so the light pools on the ground rather than shining into approaching eyes. The goal is overlapping pools, not a dotted line.
Spotlights and uplights for trees and vertical features
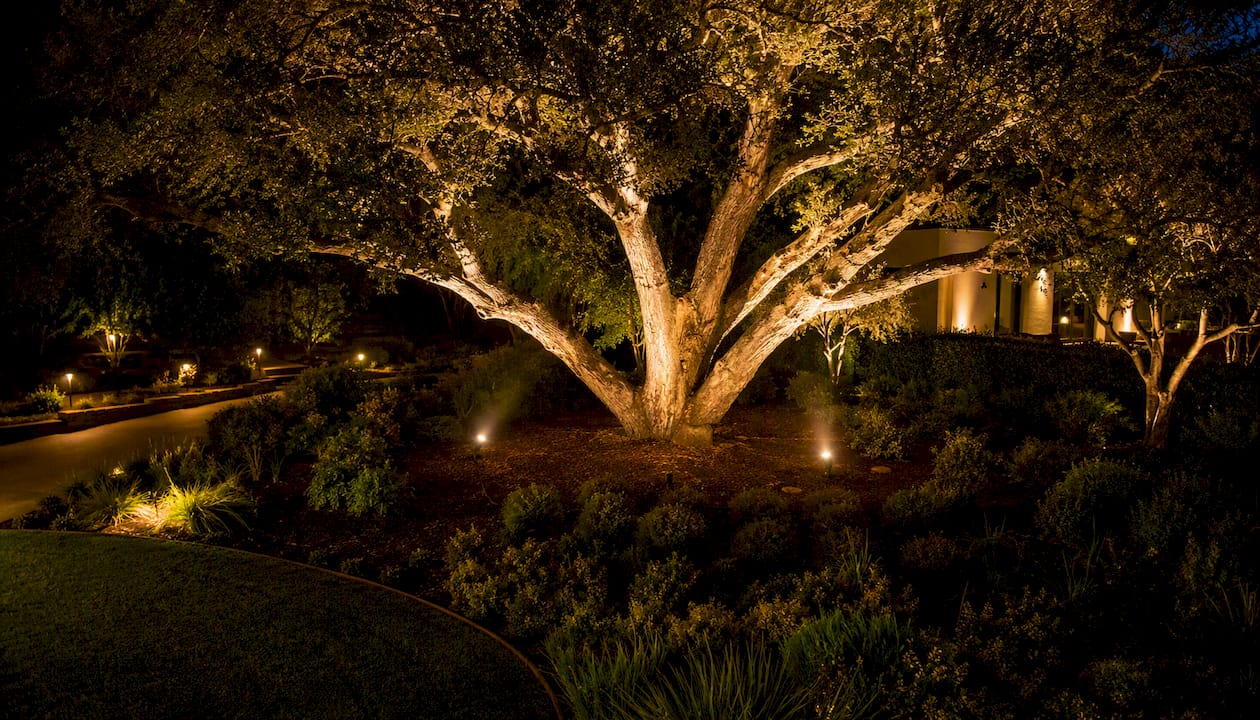
For small trees and shrubs, position the fixture 1–3 feet from the base. Large specimen trees need 3–6 feet of distance so the beam spreads across the full canopy rather than washing out the trunk. Aim at 30–45 degrees from vertical. Using two fixtures on opposite sides of a large tree eliminates the flat, one-dimensional look that a single uplight produces.
Moonlighting and downlighting from trees
Mount fixtures 15–25 feet up in a tree, angled downward at roughly 45 degrees. The effect mimics natural moonlight filtering through branches, casting soft shadows on the ground below. Keep the fixture itself hidden inside the canopy. Glare is almost impossible when the source is above eye level and pointed down.
Grazing and wall-washing
For texture emphasis on stone, brick, or wood, mount the fixture 6–12 inches from the wall surface and aim it nearly parallel to the face. That shallow angle pulls every ridge and shadow into relief. Wall-washing, which produces a more even glow, uses a wider beam and a greater standoff distance of 18–36 inches.
In-ground well lights and recessed fixtures
Site well lights away from mower paths and high-traffic areas. They need a gravel bed or drainage sleeve beneath them to prevent water pooling, which corrodes the socket and lens. In hardscape, coordinate placement with your paver or concrete installer before the surface is poured or set, since retrofitting is expensive.
Step and deck lights
Mount step lights into the riser face, not the tread, so the light falls forward onto the walking surface. Space them every other step on long stairways, or at every step where the grade change is steep. Deck rail lights work best at 6–8 foot intervals along the perimeter.
String lights and overhead ambient fixtures
Hang string lights at 8–10 feet above a seating area, catenary-style between posts or anchor points. Lower than 8 feet and they intrude on sightlines; higher than 12 feet and the warmth of the light is lost.
Pro Tip: Before finalizing any fixture position, sit in your outdoor chairs and look toward each planned fixture location. Then stand at your front door and look out. Any fixture that draws your eye to the hardware rather than the lit surface needs to move or be shielded.
Spacing, aiming angles, and fixture-to-subject distances
Beam angle and distance are inseparable. A narrow beam of 10–25 degrees concentrates light on a small area and needs more distance to spread; a wide beam of 40–60 degrees covers more surface area and can sit closer to the subject. Getting this relationship wrong is why uplights often look like interrogation lamps rather than accent lighting.
Key spacing and aiming rules:
- Path lights: 6–10 feet apart on straight runs, 5–6 feet on curves, staggered alternating sides
- Fixture-to-subject for small trees and shrubs: 1–3 feet from the base
- Fixture-to-subject for large trees: 3–6 feet from the base
- Wall grazing: 6–12 inches from the wall surface, beam nearly parallel
- Wall washing: 18–36 inches from the surface, wider beam angle
- Uplight aiming angle: 30–45 degrees from the base of the subject
- Downlight and moonlight aiming angle: 30–60 degrees downward from the fixture
- Cross-lighting angle: two fixtures at roughly 45 degrees from opposite sides
| Fixture Type | Spacing / Standoff | Aiming Angle | Beam Spread |
|---|---|---|---|
| Path lights | 6–10 ft apart, staggered | Straight down / slight forward tilt | Wide, 40–60° |
| Uplights (small trees) | 1–3 ft from base | 30–45° upward | Narrow to mid, 15–25° |
| Uplights (large trees) | 3–6 ft from base | 30–45° upward | Mid to wide, 30–60° |
| Wall grazing | 6–12 in from surface | Nearly parallel to wall | Narrow, 10–25° |
| Wall washing | 18–36 in from surface | 45° toward wall | Mid to wide, 30–60° |
| Step lights | Riser-mounted, every 1–2 steps | Forward and down | Wide, 40–60° |
| Moonlighting | 15–25 ft up in tree | 30–60° downward | Wide, 40–60° |
When you change beam angle, adjust standoff distance to match. Switching from a 25-degree to a 45-degree bulb in the same fixture means you can move the fixture closer and still cover the same area, or keep the distance and cover more of the subject.
How to layer lights for depth and visual hierarchy
Flat lighting, where every surface gets the same brightness, is the hallmark of a poorly planned system. Pros build three layers, and the contrast between them is what makes a yard look designed rather than just illuminated.
The three-layer model:
- Ambient layer: path lights, area lights, and string lights that establish the overall light level and guide movement
- Task layer: step lights, entry lights, and any fixture whose primary job is safe navigation
- Accent layer: uplights, spotlights, and grazers that draw attention to focal points
Lumens’ landscape lighting guidance recommends aiming for pools of light rather than continuous illumination, with fixtures spaced roughly 15–20 feet apart as a starting point for broader ambient spacing. The gaps between pools are not failures. They are the contrast that makes the lit areas read as intentional.
Visual hierarchy works by grading brightness. Your primary focal point, say a large oak or a stone fireplace, gets the most light. Secondary features like a garden bed or a fence line get less. The path gets just enough to navigate safely. When everything is equally bright, nothing stands out.
For a small yard, two accent lights on a single specimen tree plus four path lights is often enough. A medium yard might add wall grazing on the house facade and a downlight over the patio. A large yard with multiple zones benefits from a two-circuit transformer so front and back can be controlled independently.
Intentional darkness matters. Relying on one fixture type creates flat results; the spaces between lit zones are what give the lit zones their weight. Resist the urge to fill every shadow.
Safety, wiring basics, and code notes
Low-voltage landscape lighting runs on 12V AC, which is why most homeowners can handle the fixture placement themselves. The transformer, however, is where code requirements apply.
What you need to know before installation:
- Mount the transformer at least 12 inches above grade and use a Class 2 compliant unit. Position it at least 5 feet from a pool or water feature, and check local codes, which sometimes set a higher minimum.
- Voltage drop is the most common cause of dim or uneven lighting. Longer wire runs need heavier gauge wire. A 100-foot run at 12-gauge handles more wattage without drop than the same run at 16-gauge. Plan transformer placement to keep runs as short as practical.
- Use waterproof wire connectors at every splice. Exposed copper in moist soil corrodes within one to two seasons and causes flickering or dead fixtures.
- Bury wire at least 6 inches deep in planting beds and 12 inches deep under lawn areas to protect it from aeration equipment and edgers. Route wire in conduit wherever it crosses a hard surface.
- Plan transformer capacity to use no more than 80% of its rated wattage, leaving headroom for future fixtures and preventing overload.
- Dark Sky compliance means pointing fixtures downward, using shielded housings, and keeping color temperature at or below 3000K. Many municipalities are moving toward ordinances that require full-cutoff fixtures in residential zones.
A note on permits: Low-voltage landscape lighting typically does not require a permit. Any 120V line-voltage work, including the transformer’s connection to a GFCI-protected outdoor outlet, must be done by a licensed electrician in most jurisdictions. When in doubt, call your local building department before you dig.
Step-by-step planning and mock-up checklist
A good lighting plan is built in the yard, not on paper. Here is the sequence that produces an installer-ready layout.
- Define your objectives. Write down which areas need safety lighting, which features you want to accent, and what your budget is. Decide whether you want zone control or a single-circuit timer.
- Walk the property after dark. Bring a flashlight and a notepad. Note every hazard, every area that feels unsafe, and every feature that disappears at night. Walk the route from the street to the front door, from the back door to the patio, and from the patio to any outbuilding.
- Flag mock placements. Use bamboo stakes, colored flags, or temporary solar lights to mark every proposed fixture location. For uplights, use a handheld flashlight aimed at the subject from the proposed fixture position to preview the effect.
- Live-test for several nights. Walk the property each evening and adjust flags based on what you see. Check from interior windows and from the street. Photograph each position with your phone so you have a record.
- Sketch the layout. Draw the property to rough scale, mark every fixture location with its type, note distances from the house and from each other, and mark the proposed transformer location. Note the wire run from each fixture back to the transformer.
- Check your wattage budget. Add up the wattage of every planned fixture. Stay at or below 80% of the transformer’s rated capacity. If the total exceeds that, either reduce fixture count or upgrade to a larger transformer.
- Finalize and schedule installation. Starting with 4–6 accent lights and 6 path lights is a proven approach. Live with that for a few weeks before adding more.
Pro Tip: Before burying any wire, run temporary extension cords from the transformer to each fixture position and power the whole system for at least two nights. Adjust fixture angles and positions while everything is still easy to move. This single step eliminates most post-install regrets.
Common placement mistakes and how to fix them
Most lighting problems are placement problems, not fixture problems. Here are the ones that show up most often and what to do about them.
Over-clustering path lights. When fixtures are spaced too close together, the path reads as a lit runway rather than a guided walkway. Pull every other fixture and see if the effect improves before adding anything back.
Uplights too close to the trunk or wall. A fixture 6 inches from a tree trunk creates a hot spot at the base and leaves the canopy dark. Move it out to the recommended 1–3 foot range for small trees, 3–6 feet for large ones, and the beam will spread naturally up through the branches.
Fixtures aimed at eye level. This is the most common source of glare complaints. Lower the fixture, redirect the aim upward, or add a hood. If the fixture cannot be repositioned, a glare shield costs a few dollars and solves the problem immediately.
Ignoring interior sightlines. A spotlight that looks fine from the patio may shine directly into a bedroom window. Always check from inside the house before finalizing placement.
Dim or flickering lights. This is almost always a wiring issue: a run that is too long for the wire gauge, a transformer that is overloaded, or a corroded splice. Check each splice first, then measure voltage at the fixture with a multimeter. Anything below 10.8V at the fixture indicates voltage drop. Fix it by shortening the run, upgrading wire gauge, or redistributing fixtures across multiple transformer taps.
Dark gaps between zones. If a section of the yard disappears into shadow between two lit areas, add a low-output fill light rather than brightening the existing fixtures. A 3-watt path light in the gap is less disruptive than cranking a 10-watt uplight.
When to hire a professional installer
Low-voltage landscape lighting is one of the more DIY-friendly outdoor projects. That said, certain situations genuinely call for a licensed installer.
Hire a pro when:
- You want moonlighting from a tree 15 feet or higher, which requires climbing equipment and knowledge of how to mount fixtures without damaging the tree
- The plan includes two or more transformer zones with independent control or dimming
- Fixtures are embedded in hardscape, concrete steps, or retaining walls, where coordination with the masonry work is required
- Wire runs exceed 100 feet and require load calculations to prevent voltage drop
- Any part of the system connects to 120V line voltage, including the transformer’s power source
What a professional typically delivers:
- A scaled design plan with fixture types, locations, and wire routing
- Transformer sizing and load calculations
- Concealed wiring with proper burial depth and conduit where required
- Waterproof splices and junction boxes
- A warranty on labor and, often, on fixtures
Questions to ask before hiring:
- Are you licensed and insured for electrical work in this state?
- How do you calculate transformer sizing and plan for voltage drop?
- Can you show photos of completed projects similar in scale to mine?
- What is included in your warranty, and who handles fixture replacement?
For homeowners in the Kansas City area, Trew Landscape LLC’s landscape lighting service covers design, transformer and wiring installation, and ongoing maintenance, with a site walk included in the consultation process.
What placement priorities actually matter most
The conventional wisdom in outdoor lighting leans heavily on fixture selection: buy the right brand, choose the right finish, match the style to the house. That framing puts the emphasis in the wrong place. The fixture is almost irrelevant compared to where you put it and how you aim it.
Three priorities consistently produce better results than anything else. First, light the path before you light anything decorative. A yard that is beautiful to look at but unsafe to walk through at night has failed at its most basic job. Second, pick one dominant focal point and commit to it. Homeowners who try to accent everything end up with a yard where nothing stands out. Third, test before you bury. The mock-up phase is not optional. It is where the real design happens, because you cannot predict how light behaves on a surface until you see it.
The trade-off most homeowners do not expect: a well-placed system with fewer fixtures almost always looks better than an over-lit one. Restraint is harder to execute than abundance, but it is what separates a yard that looks designed from one that just has a lot of lights in it. Use the checklist in this guide when you meet with an installer, and push back if the proposal calls for more fixtures than your mock-up showed you actually need.
Professional landscape lighting design and installation in Kansas City
Getting the placement right on paper is one thing. Executing it in the field, with proper wire burial, transformer sizing, and fixture concealment, is where most DIY projects fall short.

Trew Landscape LLC offers a complete landscape lighting design and installation service for homeowners in the Kansas City area. The process starts with a site walk where the team maps your focal points, flags safety zones, and identifies transformer placement before a single fixture is ordered. You get a written layout with fixture types, spacing, and zone assignments, plus a quote tied to that specific plan. Wiring is buried to code, splices are waterproofed, and the transformer is sized with headroom for future expansion. If you are also planning a new landscape or hardscape project, lighting can be integrated from the start rather than retrofitted later. To schedule a consultation, visit the Trew Landscape LLC services page or reach out directly through the website.
Sources
These are the most authoritative references used in this guide, organized by what they cover best.
- Landscape Lighting Guide | Outdoor Lighting Tips at Lumens
- Best Practices in Landscape Lighting Design (GLTE)
- Landscape Lighting Placement Mistakes (Fix Path Lights, Glare & Spacing)
- A DIY Landscape Lighting Guide for All Budgets - Fine Homebuilding
FAQ
Should landscape lights go in front of or behind plants?
Place uplights in front of and slightly to the side of a plant so the beam travels up through the foliage. Hiding the fixture behind dense ground cover keeps the hardware invisible while the light still reaches the subject.
What is the rule of thumb for outdoor lighting spacing?
Path lights work best 6–10 feet apart, staggered on alternating sides. For broader ambient fixtures, a 15–20 foot starting point between pools of light is a reliable baseline to adjust from.
What are the most common outdoor lighting mistakes?
Over-clustering path lights into a runway pattern, placing fixtures where the bulb is visible from a normal sightline, and skipping the nighttime mock-up before burying wires are the three errors that show up most consistently.
How many feet apart should landscape lights be?
Path lights: 6–10 feet on straight runs, 5–6 feet on curves. Uplights for trees: 1–6 feet from the base depending on tree size. Broader ambient fixtures: 15–20 feet apart as a starting point, adjusted based on lumen output and beam spread.
When does landscape lighting require a licensed electrician?
Any 120V connection, including wiring the transformer to an outdoor outlet, requires a licensed electrician in most jurisdictions. Low-voltage fixture placement and wire burial are generally DIY-legal, but check local codes before starting.