
Trew Landscape Blog
Avoid Costly Redos: Plan Your Patio Outdoor Kitchen Around the Grill
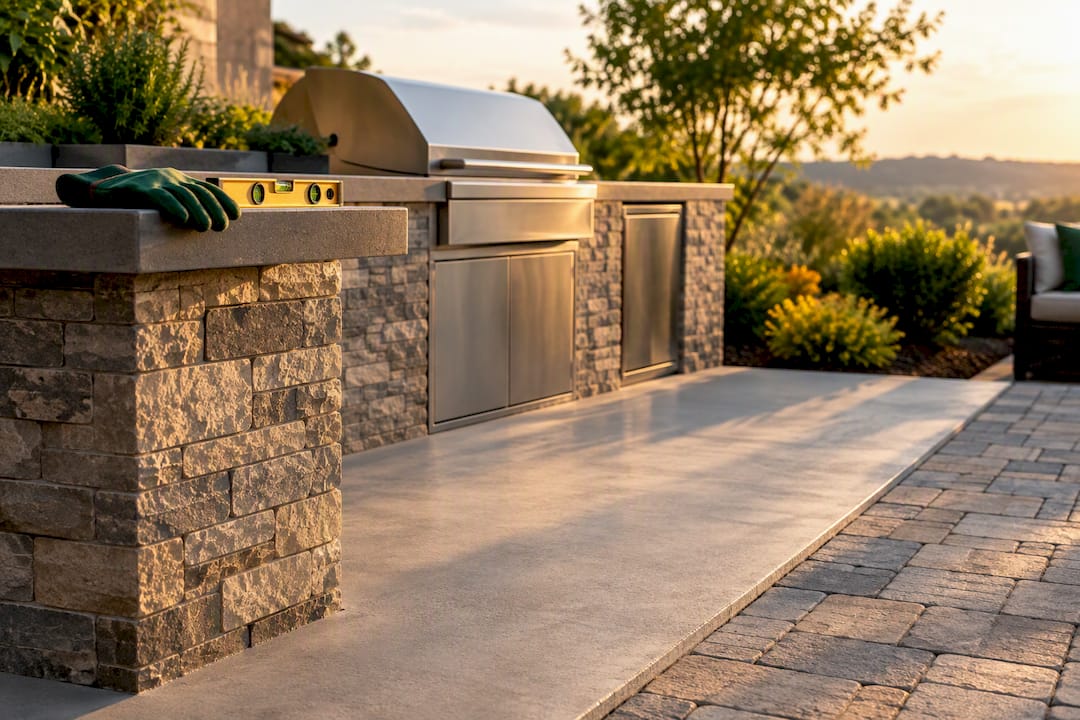
Avoid Costly Redos: Plan Your Patio Outdoor Kitchen Around the Grill ! Planned patio outdoor kitchen with built-in grill Design your patio kitchen around the grill and secure utilities and a proper foundation before you pick countertops or cabinets.
Avoid Costly Redos: Plan Your Patio Outdoor Kitchen Around the Grill
Design your patio kitchen around the grill and secure utilities and a proper foundation before you pick countertops or cabinets. The grill dictates layout, clearance, and ventilation, and every gas, electric, and water line needs to be locked in before the surface goes down. Built-in kitchens usually need a reinforced slab; if the patio can’t take one, a mobile or prefab island is the practical fallback. Start by taping out the footprint and confirming utility needs before anything gets permanent.
TL;DR:
- Built-in kitchens require a reinforced slab or a mobile island if the patio cannot support heavy loads, with concrete supporting up to 4,000 pounds per square foot.
- The layout must include at least 48 inches aisle space for single cooks and 54 to 60 inches for multiple users to prevent crowding.
- Material choices like Dekton, porcelain, and sealed granite best withstand outdoor conditions, while engineered quartz should be avoided due to UV damage.
- Utility rough-in and permits must be completed before surface finishing to avoid costly rework, with gas lines and water supplies planned early.
- Proper placement considers smoke direction, shading, and water runoff, with professional coordination preventing common retrofit failures.
Table of Contents
- Choosing an Outdoor Kitchen Layout That Actually Works
- Does Your Patio Surface Support a Built-In Kitchen?
- What Countertop and Cabinet Materials Survive Outdoors?
- Which Appliances Belong in an Outdoor Kitchen?
- Planning Utilities, Ventilation, and Code Requirements
- Where Should You Place the Kitchen on the Patio?
- Lighting and Finish Details That Improve Daily Use
- Budgeting and Timeline for a Patio Kitchen Project
- What a Professional Build Prioritizes That DIY Often Misses
- The Grill Decides Everything Else
- Get Your Patio Kitchen Built Right the First Time
- Sources
- FAQ
Choosing an Outdoor Kitchen Layout That Actually Works
Every functional outdoor kitchen splits into four zones: prep, cook, serve, and clean. Skip this step and you get a beautiful kitchen where two people can’t stand at the grill without bumping elbows.
Three layouts cover most patios:
- Single-run island — everything along one wall, works on footprints as small as 8 feet by 4 feet, best for solo grilling.
- L-shape — adds a return leg for prep or bar seating, needs roughly 10 by 8 feet, good for small groups.
- Galley — two parallel runs facing each other, ideal for larger patios where multiple people cook at once.
Aisle width makes or breaks these layouts. A single-cook aisle needs at least 48 inches; multi-cook kitchens need 54 to 60 inches so two people can pass without turning sideways. Standard prep counters have a height that suits comfortable standing work, while bar-height seating is higher to allow comfortable seating at the counter. Before you commit, tape the full footprint on the existing patio with painter’s tape, then walk through a mock cooking session, carrying a tray, opening a fake fridge door, moving between stations. Cramped spots show up fast.
Does Your Patio Surface Support a Built-In Kitchen?
Not every patio can carry a built-in kitchen without reinforcement. Poured concrete integrated with the patio slab handles heavy cabinetry well, since there’s no differential settling between the kitchen and the surrounding surface. Paver patios are different: pavers usually need a separate reinforced slab poured underneath the kitchen footprint, while the surrounding pavers stay as they are.
Pro Tip: A reinforced pad built to spec (6 inches of concrete over 4 inches of compacted base with #4 rebar) can support up to 4,000 pounds per square foot, which covers even a stone-veneer island packed with appliances.
Decks raise a different problem. Composite or wood decking rarely carries the load of a stone-veneer island unless the deck was engineered for it, so a freestanding or mobile kitchen is usually the safer route on a deck.
Retrofit basics that prevent drainage failures:
- Slope the pad slightly away from the house, roughly a quarter inch per foot.
- Install a trench drain if the kitchen sits in a low spot.
- Leave a quarter-inch isolation joint between the new slab and the surrounding pavers so seasonal movement doesn’t crack either surface.
- Sequence the retrofit as remove pavers, pour and cure the slab, then reset pavers around the new pad.
What Countertop and Cabinet Materials Survive Outdoors?
Material choice determines whether your kitchen looks good in five years or needs replacing. Sintered stone like Dekton, porcelain slab, and properly sealed granite hold up best outdoors, resisting UV fading, staining, and thermal shock. Engineered quartz, despite its popularity indoors, is a poor outdoor choice: UV exposure breaks down the resin binder over time, leading to discoloration and cracking.
Cabinet material matters just as much:
- 304-grade stainless steel resists rust and holds up in humid or coastal climates.
- Powder-coated aluminum is lighter and budget-friendly, with strong corrosion resistance.
- Marine-grade polymer shrugs off moisture entirely and never rusts.
- Avoid 201-grade or other low-grade stainless near coastal air or high humidity; it stains and pits within a couple of seasons.
Granite needs resealing roughly once a year; Dekton and porcelain need essentially none. Match the material to your local freeze-thaw cycle and sun exposure rather than picking whatever looks best in a showroom.
Which Appliances Belong in an Outdoor Kitchen?
The grill comes first, and everything else gets built around it. Gas grills win on convenience and consistent heat; pellet and charcoal grills trade convenience for flavor and need extra clearance for smoke and ash cleanup.
Beyond the grill:
- Outdoor-rated refrigerators need proper venting and louvered panels; boxing one into a sealed cabinet without airflow shortens its life dramatically.
- Under-counter drawers and ice makers need the same ventilation consideration.
- A sink is worth adding if the kitchen sits far from the house, but the water line needs winterization in freeze climates: a shutoff valve and drain-down point, minimum.
- Side burners need heat-resistant landing space on both sides, at least 12 inches, so hot pans have somewhere to go.
Pro Tip: Leave at least 24 inches of counter space on the “off” side of the grill. It’s the single most useful landing zone in the entire kitchen, and the one most layouts shortchange.
Planning Utilities, Ventilation, and Code Requirements
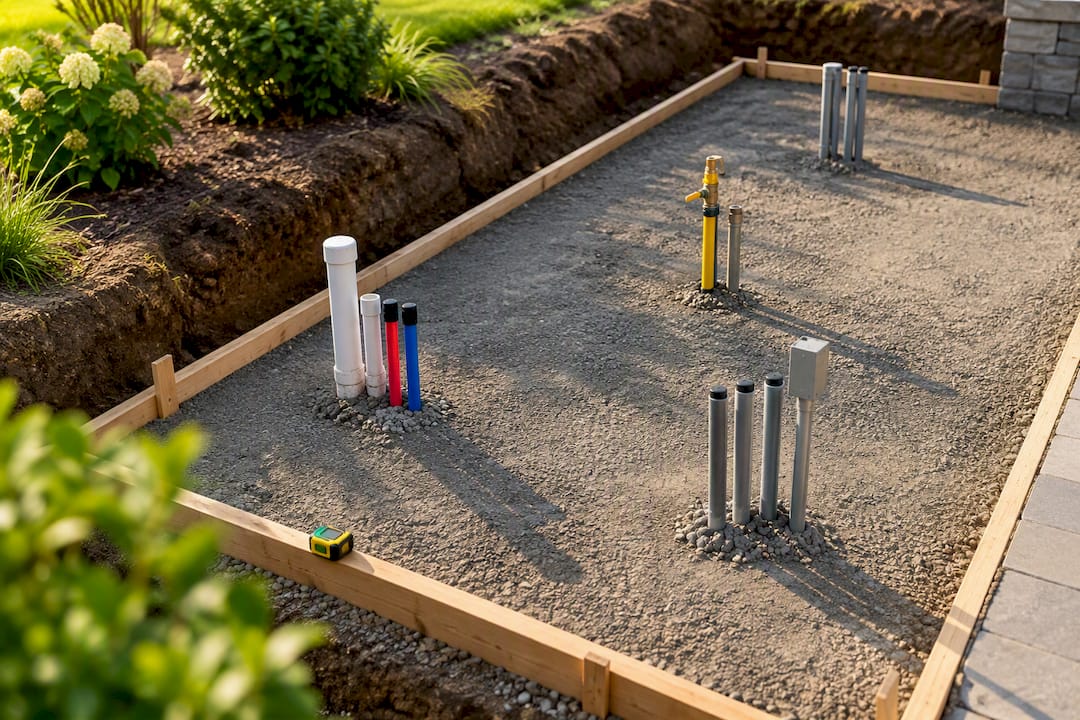
Utilities decide the layout and the budget more than any appliance choice. Locking in gas, electric, and water lines before finishing the patio surface prevents expensive rework later.
- Decide gas line type early: a dedicated natural gas line is cheaper long term than swapping propane tanks constantly.
- Run at least one dedicated 20-amp circuit with GFCI protection for refrigeration and small appliances.
- Plan water supply and drainage before the slab pours, not after.
- Confirm hood and makeup-air needs if the grill sits under a roof.
- Pull permits and pressure-test gas and water lines before covering anything.
Ventilation rules are simple in practice: a fully open-air grill on an uncovered patio typically needs no hood at all. A grill under a covered patio or pergola needs a properly sized vent hood plus makeup air, or smoke and heat pool under the roof. Keep a fire extinguisher rated for grease fires within reach, and maintain non-combustible clearances around the grill, usually a minimum of 24 to 36 inches from any wall or wood structure, depending on your local code.
Where Should You Place the Kitchen on the Patio?
Site placement is where a lot of otherwise well-built kitchens go wrong. Position the kitchen with the grill’s smoke plume pointed away from the seating area and the house, and account for afternoon sun so the cook isn’t squinting into glare during peak grilling hours.
- Keep seating in shade where possible, either from the house, a pergola, or mature trees.
- In coastal or high-humidity regions, favor 304 stainless and sacrificial anode finishes on any exposed hardware.
- Slope the surrounding grade away from the kitchen footprint, and add a trench drain if water tends to pool nearby.
- The farther the kitchen sits from the house, the more support appliances (fridge, sink, extra storage) it needs, since you can’t just run inside for a forgotten ingredient.
Lighting and Finish Details That Improve Daily Use
Good lighting is the cheapest upgrade with the biggest daily payoff. Task lighting at the grill and prep counter, paired with ambient zone lighting, cuts down on burned food and stubbed toes far more than any appliance upgrade does.
- Add dedicated task lighting over the grill and prep surfaces.
- Use low ambient lighting for the dining and lounge zones so the space doesn’t feel like a job site at night.
- Light steps and pathways separately for safety.
- Choose weatherproof hardware and louvered vent panels on cabinet doors to keep moisture from building up inside.
- A fitted protective cover for the grill and any exposed appliances adds years to their service life for very little cost.
Bar-height seating should overhang the counter by about 12 inches to leave knee room, and any dining table nearby should sit a comfortable 36 to 42 inches from the kitchen edge to keep smoke and traffic clear of the food.
Budgeting and Timeline for a Patio Kitchen Project
A realistic checklist keeps a patio kitchen project from ballooning in scope midway through.
- Tape out the layout and measure the patio footprint.
- Confirm utility routes (gas, electric, water) and get a permit review started.
- Prep the site: excavate, compact base, form the reinforced pad if needed.
- Rough in utilities and pressure-test lines before pouring or closing anything.
- Set cabinetry and appliances, then template countertops last, once everything else is confirmed in place.
- Finish with lighting, hardware, and a final inspection.
| Budget tier | What it typically includes | Cost driver |
|---|---|---|
| Movable or prefab island | Freestanding cabinet, portable grill, no slab work | Lowest upfront cost, no permits usually needed |
| Mid-range built-in | Reinforced pad, stainless cabinetry, single grill and side burner | Slab work, utility rough-in |
| Custom high-end | Full utility suite, refrigeration, sink, premium stone, covered structure | Permits, licensed trades, premium materials |
Permit lead time and rough-in inspections usually add the most time to a schedule, often more than the actual construction. Scope and cost usually shift at three decision points: whether the patio needs new structural support, whether you’re adding a sink or full plumbing, and whether the grill sits under a roof requiring a hood system.
What a Professional Build Prioritizes That DIY Often Misses
A professional contractor coordinates hardscape foundation work with appliance and utility rough-in before any finished surface goes down, which is the sequence that prevents the most common retrofit failure: a beautiful patio that has to be cut open six months later for a forgotten gas line. A professional contract typically covers permit pulling, coordination between licensed gas, electric, and plumbing trades, and may offer a workmanship warranty on the hardscape and structural components. That coordination is where DIY projects most often lose time and money.
The Grill Decides Everything Else
Design the kitchen around the grill first, and the rest of the decisions get easier. The retrofit failure I see referenced most often in industry guidance is the same one: a homeowner finishes a gorgeous patio, then realizes there’s no gas line, no dedicated circuit, and no room for the fridge they wanted. Tape the layout before you buy anything, and hire a licensed pro for the utility work. It’s cheap insurance against an expensive mistake.
— Trew Landscape LLC
Get Your Patio Kitchen Built Right the First Time
Coordinating the structural, utility, and finish work of a patio kitchen as one project instead of three separate tasks can simplify the process. Having one team handle the reinforced pad, the utility rough-in, and the final hardscape tie-in prevents the need to call multiple separate crews and hope their schedules align.

Whether you’re weighing a paver patio retrofit or a full built-in island with a covered structure, Custom Outdoor Kitchen Design & Installation from Trew Landscape LLC covers the layout planning, permits, and licensed trade coordination that keep a project from stalling out mid-build. If your patio needs structural work first, the team can also handle that through hardscape design and paver installation before the kitchen ever goes in. Reach out through Trewlandscape to get a site visit scheduled and find out what your patio can actually support.
Sources
- Kitchen ergonomics and layout guidance (Journal of Light Construction / industry guidance)
- 12 Steps to Designing Your Outdoor Kitchen in 2026: What to Buy, What to Skip, and What Actually Matters (Yale Appliance blog)
- Outdoor Patio Kitchen | Outdoor Kitchen Setup
- This Old House — outdoor kitchen planning and considerations
FAQ
Can You Put an Outdoor Kitchen on a Deck?
Yes, but composite and wood decks rarely support the weight of a heavy built-in island without structural upgrades. A freestanding or mobile kitchen island is usually the safer, lower-cost route unless the deck was engineered for that load.
Can You Build an Outdoor Kitchen on Pavers?
Yes. Pavers typically need a separate reinforced concrete slab poured underneath the kitchen footprint, with an isolation joint between the pad and the surrounding pavers to allow for seasonal movement.
What Is the Best Surface for an Outdoor Kitchen?
Poured concrete integrated with the patio slab is the most stable option since it eliminates differential settling under heavy cabinetry. A reinforced pad under pavers is the next best choice for built-ins.
What Countertop Material Lasts Longest Outdoors?
Sintered stone like Dekton, porcelain slab, and sealed granite hold up best against UV, staining, and freeze-thaw cycles. Avoid engineered quartz outdoors, since UV exposure breaks down its resin binder over time.
How Much Does a Patio Outdoor Kitchen Cost to Build?
Costs range widely based on structural work, appliance count, and materials, from a modest prefab island to a full custom build with covered structure and premium stone. Trew Landscape LLC provides project-specific quotes through its outdoor kitchen design and installation service rather than a flat published rate.