
Trew Landscape Blog
6 Paver Walkway Ideas Homeowners Can Build, Plus the Exact Specs
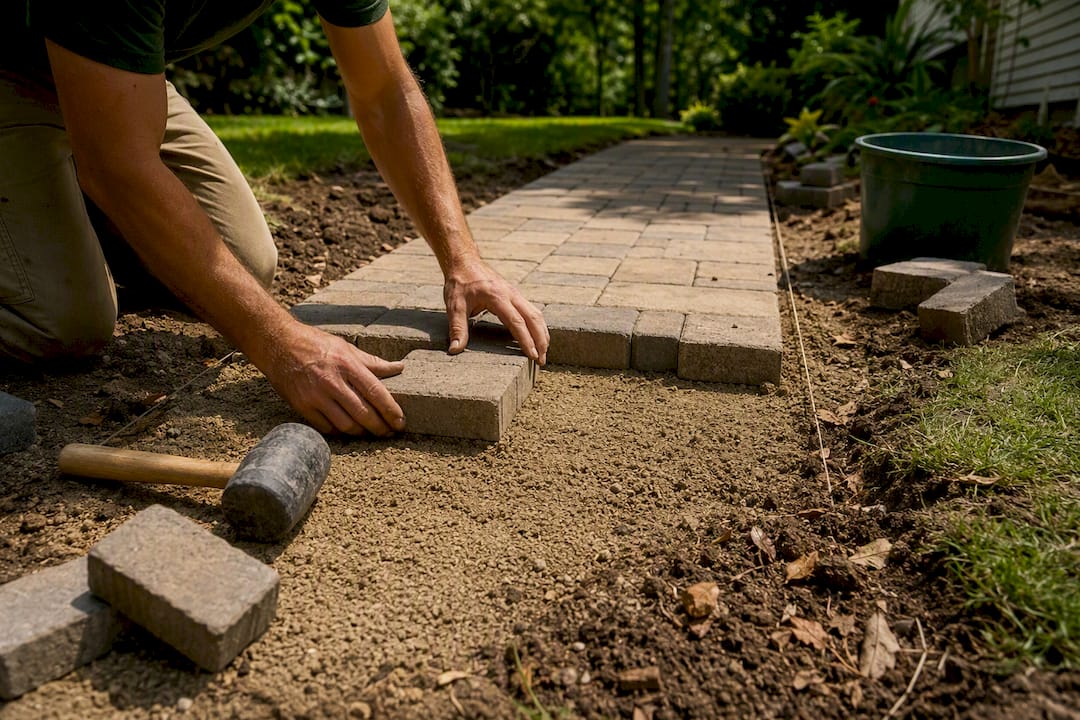
6 Paver Walkway Ideas Homeowners Can Build, Plus the Exact Specs ! Hands layering stone pavers on gravel base The best paver walkway pairs a material and pattern to how the path gets used, what your climate throws at it, and how much upkeep you're willing to do — not just whichever photo caught your eye.
6 Paver Walkway Ideas Homeowners Can Build, Plus the Exact Specs
The best paver walkway pairs a material and pattern to how the path gets used, what your climate throws at it, and how much upkeep you’re willing to do — not just whichever photo caught your eye. Most homeowners land on one of four idea buckets: a formal front entry walk, a curving garden meander, a modern minimalist run, or an informal stepping-stone path. Whatever you pick, keep it at least 36 inches wide if you want it to stay wheelchair and stroller friendly.
TL;DR:
- Proper base preparation, including compaction and edge restraint, is essential to prevent shifting and heaving during freeze-thaw cycles.
- Herringbone patterns provide the strongest interlock for walkways exposed to heavy loads, while running bond is faster to install but less durable.
- Using polymeric sand in joints enhances stability in freeze-thaw regions, but a solid base is more critical to long-term flatness.
- Weather conditions, especially cold and wet climates, dictate material choice, with permeable systems handling rain and freeze-thaw cycles better.
- A minimum width of 36 inches is recommended for accessibility, with wider paths preferred for frequent dual walkers and turning space.
Table of Contents
- Paver Walkway Ideas for Every Yard Style
- Which Paver Material Fits Your Site
- How Paver Patterns Affect Strength and Style
- What to Specify Before You Build a Paver Walkway
- Maintenance, Longevity, and What It Really Costs
- Why a Professional Assessment Pays Off
- Frost Heave, Freeze-Thaw, and Seasonal Movement
- Our Take: Get the Base Right Before You Get the Look Right
- Get a Paver Walkway Built to Last Through Kansas City Winters
- Sources
- FAQ
Paver Walkway Ideas for Every Yard Style
Every yard has a personality, and the walkway should match it rather than fight it. Here are six approaches that cover most residential situations, from the front door to the back fence.
-
Front entry formal walk. A straight or gently angled run with a soldier-course border (pavers laid perpendicular to the field) reads clean and intentional. Pair concrete pavers with a contrasting brick edge for a classic look that photographs well and holds its shape for decades.
-
Curving garden meander. Irregular flagstone or large slabs set with generous planting pockets between them softens a path and slows visitors down, literally. This works best where you want the walkway to feel discovered rather than engineered.
-
Modern minimalist run. Large-format porcelain or smooth concrete pavers set over a gravel field, with wide joints and minimal ornamentation, suits contemporary homes. The trick is restraint: fewer paver sizes, cleaner lines.
-
Stepping-stone path with groundcover. Individual stones set into creeping thyme, moss, or turf create an informal, low-cost path for side yards or garden beds where heavy foot traffic isn’t a concern.
-
Gravel or decomposed granite utility path. Cheap to install and naturally permeable, these work well for side-yard access or anywhere drainage matters more than looks, provided you set solid edging first.
-
Connector path between patio and garage. These get daily wear, so durable interlocking pavers in a locking pattern hold up better than loose stone. Think of this as the workhorse walkway your other, prettier paths don’t have to be.
Which Paver Material Fits Your Site
Material choice drives most of what you’ll love, or regret, about a walkway five years in. Each option below carries real trade-offs tied to your soil, climate, and how often you want to fuss with maintenance.
- Concrete pavers: Durable, low-maintenance, and available in patterns that mimic brick or natural stone at a lower price point than the real thing, according to This Old House. In freeze-thaw climates, polymeric-sand joints keep them locked together instead of shifting.
- Brick (fired clay): Classic and handsome, with solid freeze-thaw resistance when it sits on a proper compacted base. Skip actual house bricks for walkways; they weren’t made to handle foot traffic and will spall.
- Natural stone (flagstone, bluestone, granite): The premium option, with a lifespan that can outlast the house, but it costs more and demands bedding that’s properly supported so slabs don’t rock underfoot.
- Porcelain: Low water absorption and a sleek, modern face make it a strong pick for wet or shaded areas, but it needs a rock-solid base since it doesn’t flex.
- Gravel or decomposed granite: Cheap and permeable, ideal for informal or drainage-sensitive spots, but it needs firm edge restraint and periodic topping to stay put.
- Boardwalk, wood, or composite: The right call for spanning wet ground or protecting tree roots. In humid or rainy climates, treated lumber or composite decking outlasts untreated wood by years.
Climate should drive the decision more than aesthetics alone: polymeric joints and dense paver units suit freeze-thaw regions, permeable assemblies suit heavy-rain areas, and composites make sense for wet, root-sensitive sites, according to Garden Insider.
How Paver Patterns Affect Strength and Style
Pattern isn’t just a look. It changes how much a walkway shifts under weight, how much material you waste in cutting, and how long it stays flat.
- Herringbone (45° or 90°): Offers the strongest interlock and shear resistance of any common pattern, which is why it’s the go-to for paths that see wheelbarrows, carts, or heavy foot traffic, per ASPIRE.
- Running bond or stretcher: Simple to lay and reads as a clean, classic look, but the straight joints give less interlock, so it works best on straight runs without heavy loads.
- Basketweave: Decorative and eye-catching, but it needs a rigid, well-staked edge or the pattern will slowly spread apart.
- Random or irregular flagstone: The most natural-looking option, at the cost of more on-site cutting and careful bedding to keep each irregular piece stable.
- Borders and soldier courses: A perpendicular row of pavers along the edge finishes the look and physically reduces lateral movement over time.
Patterns also change your labor bill. Herringbone takes longer to cut and lay but resists movement better down the road, while running bond goes in faster with less interlocking strength, according to Lowe’s.
What to Specify Before You Build a Paver Walkway
Whether you’re handing plans to a contractor or doing it yourself, these are the specs that separate a walkway that lasts decades from one that heaves and settles within a few winters.
- Set the width and slope first. Thirty-six inches is the minimum for wheelchair access, a wider width is comfortable for two people walking side by side, and a wider turnaround area matters if accessibility is a priority. Build in 1 to 5% fall along the run and 1 to 2% cross slope so water sheds off rather than pooling.
- Prep the subgrade. Strip all organic material and over-dig the edges by about 6 inches to give edge restraint somewhere to anchor. On poor or clay-heavy soils, lay geotextile fabric before adding stone.
- Build the base in lifts. Typical guidance calls for several inches of compacted crushed stone for walkways, added in 2 to 3 inch lifts, according to Build-Construct. Insufficient compaction is the single leading cause of settling and lost joints down the line.
- Screed the bedding sand. A 1-inch layer of leveled sand goes on top of the compacted base before pavers get set to line.
- Install edge restraint. Aluminum, steel, or plastic edging staked flush with grade keeps the whole assembly from creeping outward.
- Lock in the joints. Polymeric sand handles freeze-thaw regions well; clean aggregate works better if you want the joints to stay permeable. Full guidance on excavation, edge restraint, and joint work is laid out in Trew Landscape’s walkway construction resources.
Pro Tip: Rent a plate compactor for the base and a second pass after the pavers are set. Skipping the final compaction is the most common reason a DIY walkway develops dips within the first year.
Contractors will also handle diamond-blade cuts around curves and obstructions, a step that’s tough to get clean with hand tools.
Maintenance, Longevity, and What It Really Costs
A paver walkway earns back its price over the years it’s low maintenance, not just at install. Keep sweeping debris out of the joints seasonally, refresh polymeric sand every few years as it wears, and spot-level any paver that starts to rock. Pull weeds before they root in the joints; a quick pass twice a season keeps them from getting established.
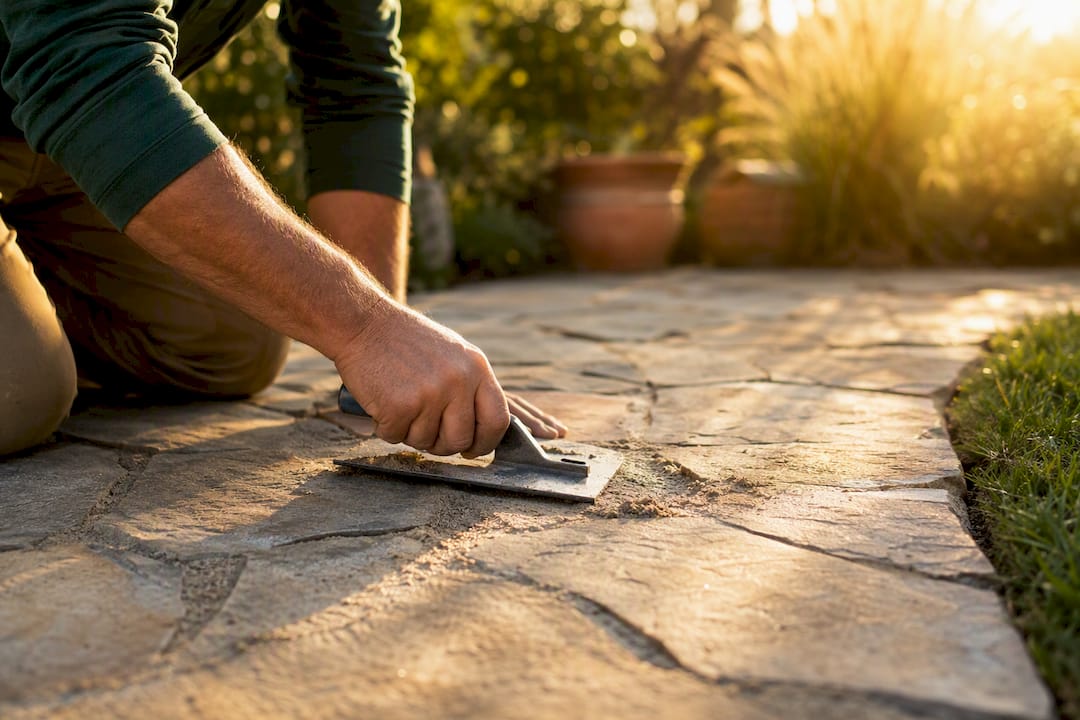
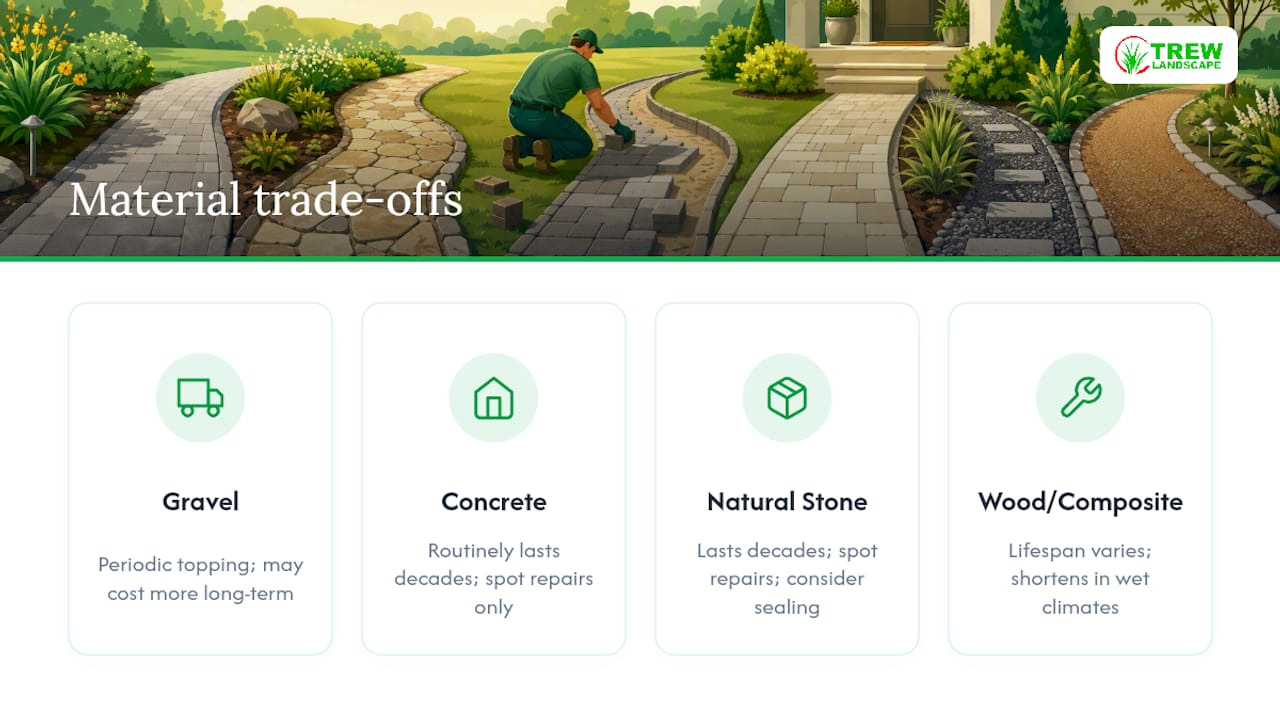
Gravel paths need periodic topping to stay at grade. Concrete pavers and properly set stone routinely last decades with the occasional spot repair rather than full replacement. Wood and composite boardwalks vary more, with lifespan tied directly to how wet the climate is. Skip sealing gravel or open-jointed permeable systems, but consider it for concrete or natural stone if you want to fight staining. The smarter comparison isn’t installation price versus installation price. Think in terms of a 10 to 20 year total cost, since a cheaper path that needs constant topping or leveling can end up costing more than one installed right the first time, an idea backed up by Build-Construct’s cost analysis.
Why a Professional Assessment Pays Off
Drainage, compaction, and edge restraint are where DIY walkways most often go wrong, and they’re exactly what a professional site assessment is built to catch. Trew Landscape LLC’s paver installation team scopes soil type, water flow, and material fit before the first stone goes down, matching the plan to the site instead of a generic template.
Frost Heave, Freeze-Thaw, and Seasonal Movement
Frost heave happens when moisture in the soil beneath a walkway freezes, expands, and pushes pavers up unevenly. It’s the number one reason a walkway that looked flawless in October looks lumpy by March in colder climates. The fix isn’t a thicker paver. It’s proper base depth and drainage that keeps water from sitting under the surface and freezing in the first place.
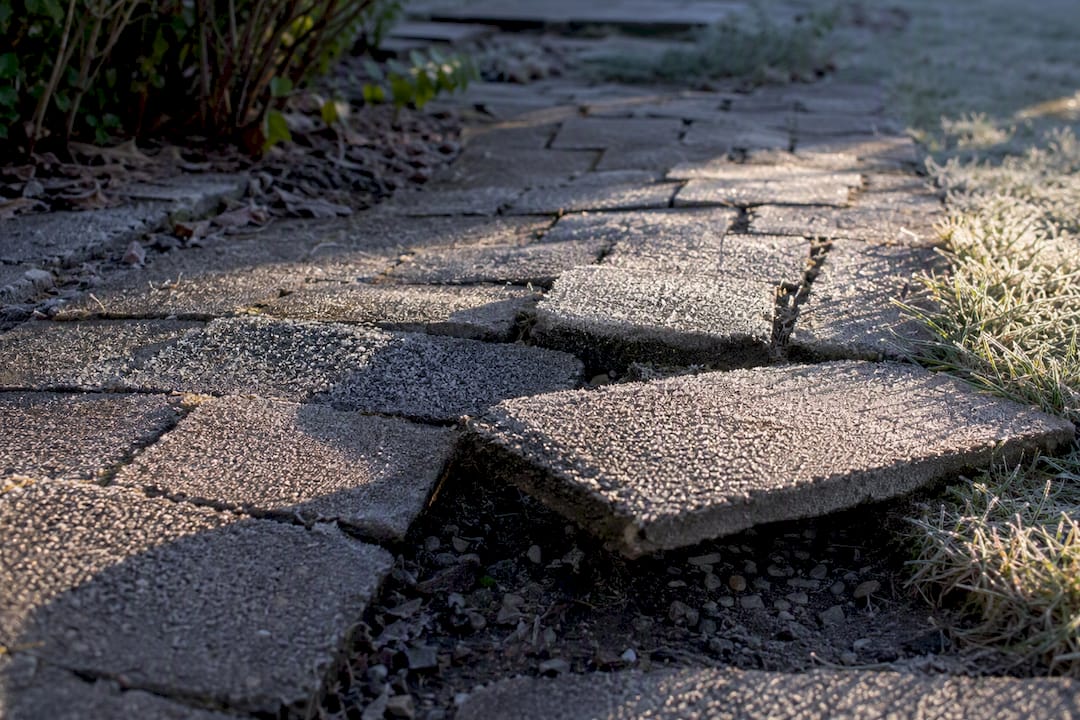
Freeze-thaw cycling is worse than a single hard freeze because it repeats the expansion and contraction dozens of times each winter, gradually working joints loose and shifting units out of line. That’s why polymeric sand, which resists washout and locks joints tighter than plain sand, earns its keep in northern climates. Gravel and permeable systems handle freeze-thaw differently. They let water drain straight through the open-graded base instead of pooling and freezing, which is part of why permeable assemblies hold up well in regions with both heavy rain and hard winters.
Before spring, walk the path and check for any pavers that lifted or settled unevenly over winter. Catching movement in one section early is a lot cheaper than re-setting an entire run after a few more freeze-thaw seasons. If your walkway sits somewhere with real winters, the base prep matters more than the paver you choose sitting on top of it.
Our Take: Get the Base Right Before You Get the Look Right
Most walkway advice online obsesses over pattern and paver color and treats the base as an afterthought. That’s backwards. We’ve seen plenty of gorgeous flagstone paths heave and separate within two winters because nobody compacted the crushed stone in proper lifts or bothered with edge restraint. The pattern is the part everyone photographs; the base is the part that decides whether that photo still looks good in five years.
If you’re planning a DIY project, put your energy into subgrade prep and drainage slope before you spend another hour comparing herringbone versus basketweave. Both patterns fail the same way on a bad base. And if the site has drainage issues, standing water, heavy clay, a steep grade, that’s the moment to call in a professional rather than push through with a weekend project. The walkway itself is forgiving of a lot of design choices. It’s unforgiving of a shortcut in the ground beneath it.
— Trew Landscape LLC
Get a Paver Walkway Built to Last Through Kansas City Winters
A good-looking walkway that heaves every winter isn’t a good walkway. Trew Landscape LLC designs and installs paver paths with proper base depth, drainage slope, and edge restraint built in from day one, so the pattern you love stays flat for years, not just for the first season. Our team handles everything from site grading to final joint locking, matching material and pattern to how the path actually gets used.

- Paver Installer — full design-to-install service for new or replacement walkways
- Hardscape Designs — for larger projects that connect patios, entries, and garden paths
Ready to see what a properly built walkway looks like on your property? Reach out to Trew Landscape LLC for a site visit and a straightforward quote.
Sources
- How to Build a Concrete Paver Walkway - This Old House
- Choosing materials for pathways - Garden Insider
- Comparing paver materials for driveways, patios and walkways - Build-Construct
- How to design and build a paver walkway - Lowe’s
FAQ
Can I lay pavers directly on dirt?
No. Pavers set directly on unprepared soil will settle unevenly within a season or two; a compacted crushed-stone base and a screeded sand bedding layer are what keep them level long term.
Is a paver walkway cheaper than concrete?
Concrete pavers often cost less upfront than natural stone and offer easier spot repairs than poured concrete, since a single damaged unit can be lifted and replaced without redoing the whole slab.
How do I make a simple walkway with pavers?
Excavate and over-dig the edges by about 6 inches, compact 4 to 6 inches of crushed stone in lifts, screed a 1-inch sand bedding layer, set pavers to line, install edge restraint, then lock the joints with polymeric sand.
How far apart should pavers be for a walkway?
Joint spacing varies depending on the desired interlock strength and whether you want a sealed or permeable joint, typically filled with polymeric sand or clean aggregate.
What’s the minimum width for a paver walkway?
Thirty-six inches is the standard minimum for accessibility, 48 inches is comfortable for two people side by side, and a 60-inch turnaround area helps if wheelchair access matters.