

TL;DR:
- Installing a properly designed drainage system with a stone column, perforated pipe, geotextile, and daylighted outlet prevents most retaining wall failures caused by hydrostatic pressure. Regular maintenance, correct installation practices, and engineering consultation for taller or complex structures are essential for long-term stability. Skipping drainage components or improper installation significantly increases the risk of wall failure and costly repairs.
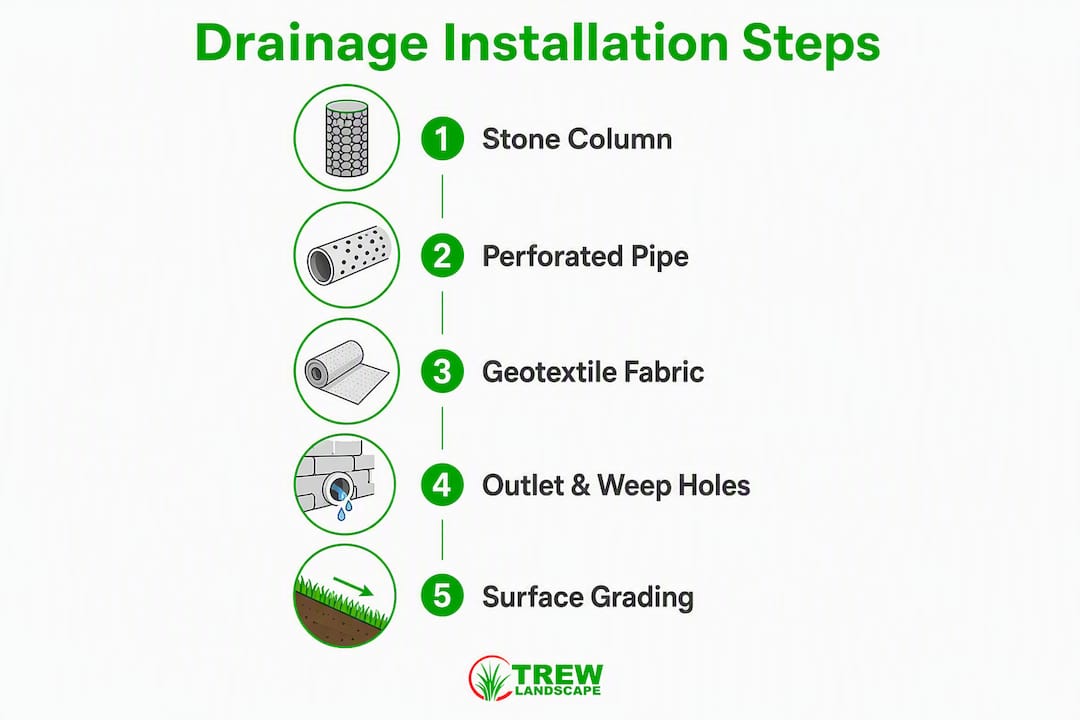
Install a 4-part drainage system behind your retaining wall: a 12-inch column of #57 washed stone, a 4-inch perforated collector pipe at the base sloped at least 1% to a daylighted outlet, non-woven geotextile separating the stone from native soil, and a protected outlet that discharges freely. That combination, paired with surface grading angled 1–3 degrees away from the wall. It handles the vast majority of residential drainage failures before they start.
Quick specs to memorize before any excavation or contractor conversation:
- Stone: #57 (3/4") washed angular stone, 12" minimum column width behind the wall
- Pipe: 4" perforated PVC or corrugated HDPE, perforations facing down, minimum 1% slope to outlet
- Fabric: Non-woven geotextile wrapping the stone zone to keep soil fines out
- Weep holes: Every 4–6 ft along masonry faces, set 6–12 inches above finished grade
- Outlet: Daylighted to a swale, curb, or approved receptor — never dead-ended.
For walls already showing early distress (minor leaning, damp face, or efflorescence), the fastest triage is to core-drill weep holes at the base of the wall, clear any existing outlets of debris, and cut a shallow surface swale to redirect runoff away from the top of the backfill. These steps buy time, but they are not a permanent fix for a wall that was built without proper drainage behind it.
“Poor drainage is by far the most common cause of poor performance for earth retention systems — problems that can progress to outright failure if not addressed.” — Iowa State University / CTRE Design Guide
Table of Contents
- Why does retaining wall drainage prevent failure?
- What drainage methods work best for retaining walls?
- What materials and specs should you require?
- How do you install drainage behind a retaining wall?
- When do you need an engineer for wall drainage?
- What mistakes ruin retaining wall drainage systems?
- The standard 4-component drainage system checklist
- Key Takeaways
- What most homeowners get wrong about drainage timing
- Trew Landscape LLC builds drainage-ready retaining walls in Kansas City
- Useful sources
- FAQ
Why does retaining wall drainage prevent failure?
Water is the primary enemy of any retaining wall. When rain or irrigation soaks into the backfill and has nowhere to go, it saturates the soil and builds hydrostatic pressure against the back face of the wall. Saturated soil also loses shear strength, which means it pushes harder laterally while simultaneously becoming heavier. The combined effect can significantly increase the lateral load on a wall compared to dry conditions, according to geotechnical design references for segmental retaining walls.
The failure modes that follow are predictable: bulging at mid-height, tipping at the base, sliding along the footing, or slow undermining of the foundation as water migrates beneath it. None of these happen overnight, but by the time you see visible movement, the structural damage is already significant.
In Kansas City and other climates with hard freezes, the problem compounds. Trapped water expands roughly 9% when it freezes, exerting additional outward force during every freeze cycle. A wall that survives five mild winters can crack or shift dramatically after one wet fall followed by a hard January.
“Without proper drainage, hydrostatic pressures can result in forces which can deform or even fail the entire wall system.” — IGS / SRW Drainage Design Paper
Short walls under a few feet in well-drained sandy soils sometimes perform without formal drainage, but in clay soils or high-rainfall areas, even low walls can develop pressure problems. Kansas City’s heavy clay subsoils make this the rule, not the exception.
What drainage methods work best for retaining walls?
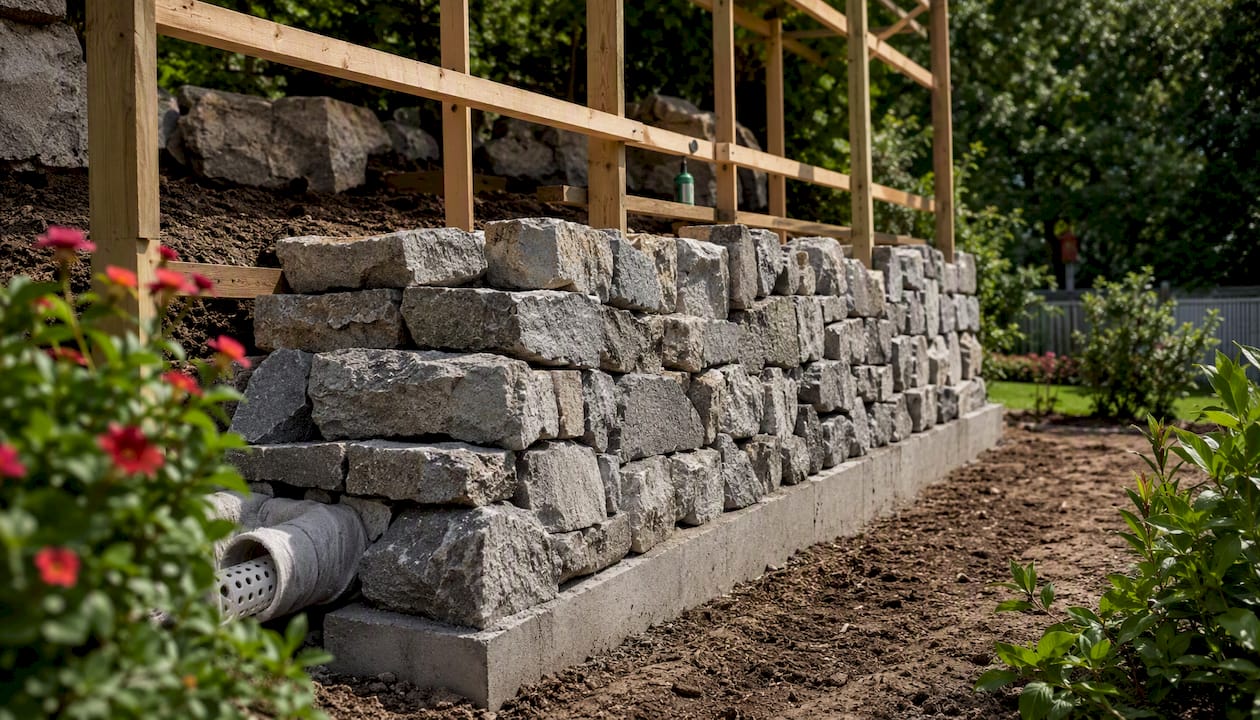
The standard residential approach is a chimney drain: a vertical column of clean stone running the full height of the wall, with a perforated collector pipe at the base. It is reliable, uses widely available materials, and works for the vast majority of residential walls under 4 feet.
Stone column plus perforated pipe
This is the go-to system. Clean #57 stone fills the space directly behind the wall from footing to within 6–12 inches of the top, where it transitions to compacted native soil or topsoil. The perforated pipe at the base collects water that percolates through the stone and carries it to a daylighted outlet. Non-woven geotextile wraps the stone zone to prevent soil migration into the voids.
Geocomposite drainage panels
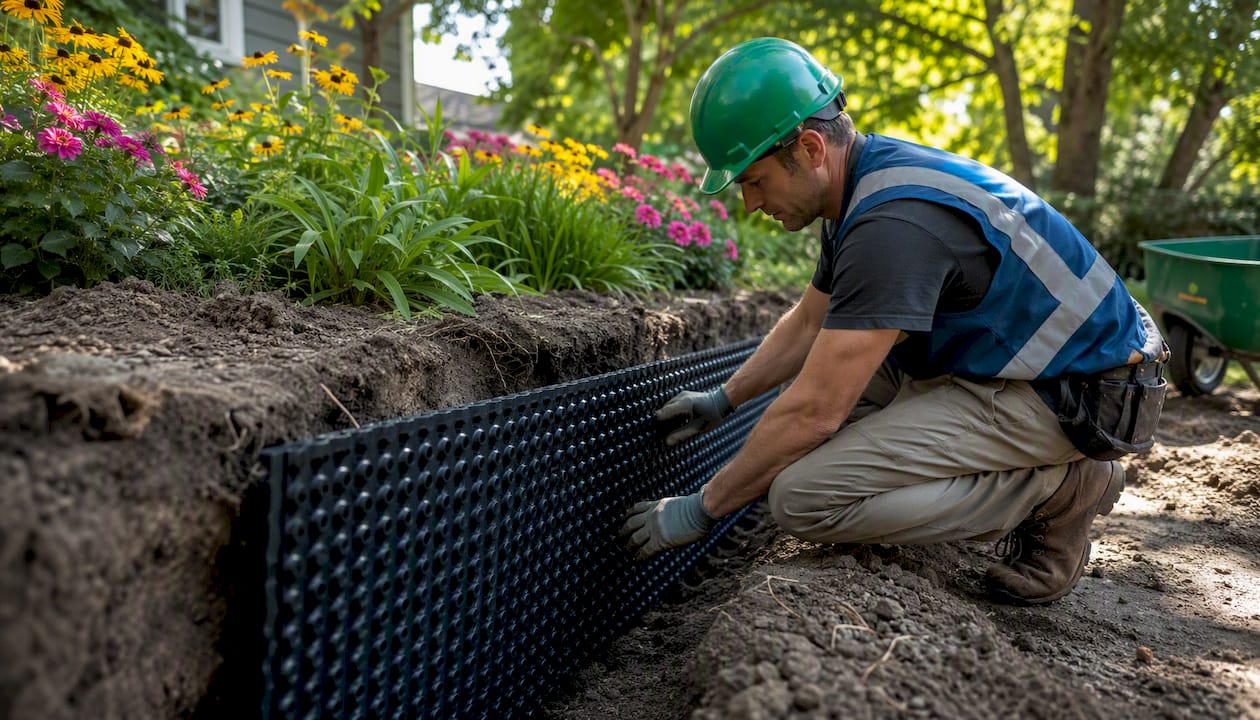
Geocomposite drain boards are a practical alternative when excavation width is constrained or when aggregate delivery to a tight site is difficult. They are thinner than a stone column, which saves space, but they cost more per linear foot and must be installed without buckling, with proper overlaps at seams. They still require a collector pipe at the base and a daylighted outlet.
Toe drains and engineered systems
Walls taller than 4 feet, walls retaining sloped ground above them, or walls near structures typically require a toe drain at the base of the footing in addition to the chimney drain. A toe drain intercepts groundwater before it reaches the footing and routes it away independently. This detail usually appears in engineered drawings and is not optional when specified.
Weep holes
Weep holes placed at regular intervals along a masonry face provide a secondary pressure relief path. They are useful as a backup but should never be the primary drainage strategy, particularly in clay soils where the soil behind the wall can migrate through the opening and clog it within a few seasons.
Pro Tip: If you are retrofitting drainage on an existing wall and full excavation is not feasible, geocomposite panels installed in a narrow trench behind the wall combined with core-drilled weep holes give you the most drainage improvement for the least disruption.
What materials and specs should you require?
Get these numbers in writing before any contractor starts backfilling. Once the stone is covered, you cannot verify what is underneath without excavating again.
| Component | Specification | Why It Matters |
|---|---|---|
| Drainage stone | #57 washed angular stone (3/4") | Angular voids stay open; fines-free stone resists clogging |
| Collector pipe | 4" perforated PVC (preferred) or corrugated HDPE | PVC resists crushing and lasts longer; HDPE is flexible for curved runs |
| Pipe slope | ≥1% continuous fall (1" drop per 8 ft) | Self-cleaning flow; flat pipe silts up within a few seasons |
| Drainage zone width | 12" minimum behind wall face | Adequate storage and flow capacity for typical residential loads |
| Geotextile | Non-woven, 4–6 oz/sq yd minimum | Filters soil fines without restricting water flow |
| Weep holes | 4–6 ft spacing, 6–12" above grade | Backup relief; screened to prevent animal entry |
| Outlet | Daylighted to grade or approved receptor | Dead-ended outlets are the single most common installation failure |
Perforated collector pipes must maintain a continuous fall — professionals specify a minimum 1% slope to keep water moving and prevent sediment from settling in the pipe. A pipe laid even slightly uphill at any point creates a trap that fills with silt and eventually blocks entirely.
On pipe material: PVC is generally preferred for straight runs because it resists crushing under compacted backfill and does not corrugate, which reduces sediment accumulation risk. Corrugated HDPE works well for curved layouts but may have a higher clogging risk. Crushed run and pea gravel are poor substitutes for clean angular stone as they introduce fines that migrate into the drainage zone and can cause clogging over time.
Pro Tip: Verify pipe slope with a digital level or laser at multiple points along the run before backfilling. Photograph the level reading next to the pipe at each check point. Those photos are your only evidence of compliance once the stone goes in.
How do you install drainage behind a retaining wall?
Drainage must go in before backfilling. Correcting omitted or improperly installed drainage later requires full excavation — an expensive and disruptive process that costs far more than getting it right the first time.
Step-by-step installation sequence
- Locate utilities before any excavation. Call 811 (Dig Safe) at least three business days ahead.
- Excavate the drainage trench to the footing level, providing at least 12 inches of clearance behind the wall face for the stone column.
- Lay the collector pipe at the base of the trench, perforations facing down, with a continuous slope of at least 1% toward the outlet. Confirm slope with a level before proceeding.
- Wrap the pipe and trench base with non-woven geotextile, lapping the fabric up both sides of the trench so it can fold over the top of the stone later. Minimum 12-inch overlaps at seams.
- Backfill with #57 washed stone from the pipe up to within 6–12 inches of the top of the wall. Do not compact the stone aggressively — light tamping is fine; heavy compaction crushes void space.
- Fold the geotextile over the top of the stone column before placing the final topsoil or native backfill layer.
- Core-drill weep holes through masonry faces at 4–6 ft intervals, 6–12 inches above finished grade. Screen openings with hardware cloth to prevent animal entry.
- Build the outlet to daylight at a stable discharge point — a riprap apron, a swale, or a curb outlet. The pipe end must be protected from erosion and kept clear of mulch or soil.
- Grade the surface away from the wall at 1–3 degrees to reduce surface water infiltration into the backfill zone.
- Run a commissioning hose test: flow water steadily into the drainage zone from the uphill end and confirm prompt discharge at the outlet. Document with time-stamped photos.
For walls taller than 4 feet or in unstable soils, trench shoring may be required for worker safety. Deep excavations next to an existing wall also risk undermining the footing — a licensed contractor or geotechnical engineer should assess the risk before work begins.
Installation acceptance checklist:
- Stone width confirmed at 12" minimum
- Pipe diameter 4", perforations down, slope verified at ≥1%
- Geotextile laps minimum 12", no gaps at seams
- Outlet discharges freely, protected from erosion
- Weep holes open, screened, set above grade
- Surface grade slopes away from wall
- Hose test passed and documented with photos
When do you need an engineer for wall drainage?
Most residential walls under 4 feet on flat ground with no surcharge loads can follow the standard 4-part system without a geotechnical engineer. Past that threshold, the variables multiply fast.
Call an engineer when any of these conditions apply:
- Wall height exceeds approximately 4 feet
- A slope, driveway, or structure sits within the retained zone above the wall
- Groundwater appears in the excavation during construction
- The native soil is heavy clay with poor drainage characteristics
- The wall is near a building foundation, utility corridor, or public right-of-way
- Outlets are constrained and a dry well or pumped system is being considered
“Walls over 4 ft, surcharged slopes, or high groundwater require toe drains or engineered drainage plans — the standard chimney drain alone is not sufficient for these conditions.” — Geoengineer.org, Pore Pressure and Retaining Wall Drainage
For a useful engineer site visit, prepare as-built photos of the wall face, any level readings you have taken, a rough plan view showing the wall length and adjacent slopes, and notes on where water currently appears after rain. That information cuts the site assessment time significantly and gives the engineer what they need to specify a toe drain detail or a full drainage plan.
Pro Tip: If you are building a new wall on a sloped lot in Kansas City, budget for slope-specific drainage design from the start. Retrofitting a toe drain after the wall is built typically costs two to three times more than including it during initial construction.
Surface grading is part of the engineered solution too. The 1–3 degree rule for grading the top of the backfill away from the wall reduces how much surface water enters the drainage zone in the first place, which reduces the load on the collector pipe and extends the system’s service life. Pair that with proper yard grading across the broader site and you address both subsurface and surface water in one coordinated plan.
What mistakes ruin retaining wall drainage systems?
Most drainage failures trace to a short list of avoidable errors. The most common:
- Using crusher run or pea gravel instead of #57 stone. Both introduce fines that clog the drainage zone within a few years.
- Skipping the geotextile. Without fabric separation, native soil migrates into the stone column and fills the voids over time.
- Running the pipe flat or with a reverse slope. A level pipe silts up; a pipe with even a slight uphill section traps water permanently.
- Dead-ending the outlet. Water with nowhere to go backs up into the drainage zone and defeats the entire system.
- Covering the outlet with mulch or soil. Outlets get buried during landscaping and stop functioning within one season.
- Relying on weep holes alone. In clay soils, weep holes clog and offer no meaningful pressure relief without a stone-and-pipe collector behind them.
Maintenance schedule
Annual checks take about 20 minutes and prevent the most common failure modes:
- Every spring: Clear outlet guards of debris, confirm the pipe end is visible and discharging freely.
- Every fall: Remove leaves and mulch from outlet headwalls; check weep holes for blockage.
- Every 2–3 years: Run a hose test from the uphill end of the drainage zone and time the discharge. Slow or absent flow means partial clogging.
- After any major storm: Walk the wall face and look for new bulging, cracking at the top course, or sudden wet patches in the soil behind the wall.
Signs that drainage has already failed and needs professional assessment: visible bulging or bowing of the wall face, new horizontal cracks in block or mortar joints, sagging or separation of the top course, or water pooling directly against the wall base after rain stops. Stop all irrigation near the wall immediately and keep surface grading directed away from it until a contractor can assess the situation.
The standard 4-component drainage system checklist
The canonical system used by residential installers and verified against industry installation guidance covers four components. Use this as both a shopping list and an acceptance checklist.
| Component | Spec | Acceptance Criteria |
|---|---|---|
| Drainage stone column | #57 washed stone, 12" min width | No crusher run, pea gravel, or mixed fines; full height behind wall |
| Perforated collector pipe | 4" diameter, perforations down | Continuous ≥1% slope confirmed by level; no flat or reverse sections |
| Non-woven geotextile | 4–6 oz/sq yd, full wrap | 12" minimum laps at seams; no gaps; folded over top of stone |
| Outlet | Daylighted or approved receptor | Discharges freely; protected from erosion; not buried by mulch |
Quantity estimate for a 40-foot wall: A 12-inch stone column at 4 feet of wall height requires roughly 6 cubic yards of #57 stone (40 ft × 4 ft × 1 ft ÷ 27 = approximately 5.9 cu yd). Pipe runs 40 feet plus whatever length is needed to reach the outlet. Material costs for a 40-foot residential wall drainage system vary by region and site access, but budgeting $800–$1,800 for materials alone (stone, pipe, fabric, outlet hardware) is a reasonable starting point for planning purposes. Labor and excavation add significantly to that figure depending on depth and access.
Commissioning checklist:
- Run a steady hose flow into the uphill end of the drainage zone
- Confirm discharge appears at the outlet within a reasonable time
- Document with time-stamped photos of the outlet flowing
- Label and file photos with the project address and date for future reference
Field crews use measurable acceptance criteria — slopes, laps, outlet freeboard, and photographic evidence — because once the stone is backfilled, access disappears. Those records become the only basis for future troubleshooting or warranty claims.
Key Takeaways
Proper retaining wall drainage requires a 4-part system: 12" of #57 washed stone, a 4" perforated pipe at ≥1% slope, non-woven geotextile, and a daylighted outlet — installed before backfilling, never after.
| Point | Details |
|---|---|
| Install the 4-part system | #57 stone column, 4" perforated pipe, non-woven geotextile, and a daylighted outlet form the complete system. |
| Pipe slope is non-negotiable | A minimum 1% slope (1" drop per 8 ft) keeps the collector pipe self-cleaning and prevents silt buildup. |
| Weep holes are backup only | Weep holes every 4–6 ft relieve secondary pressure but cannot replace a stone-and-pipe collector, especially in clay soils. |
| Call an engineer above 4 feet | Walls exceeding ~4 ft, sloped surcharges, or groundwater in the excavation require engineered drainage details and possibly a toe drain. |
| Trew Landscape LLC for Kansas City installs | Trew Landscape LLC designs and installs complete drainage systems for residential retaining walls across Kansas City. |
What most homeowners get wrong about drainage timing
The single most costly mistake in retaining wall drainage is treating it as optional until something goes wrong. By the time a wall shows visible bulging or cracking, the drainage zone has usually been saturated through multiple wet seasons, and the soil behind the wall has already shifted. At that point, the repair is not a drainage fix — it is a wall rebuild.
What surprises most homeowners is how little the drainage system costs relative to the wall itself. The stone, pipe, fabric, and outlet on a standard 40-foot residential wall represent a fraction of the total project budget, yet skipping them is the single most reliable way to cut the wall’s service life in half. The math is not complicated: spend a modest amount now or spend several times that on excavation and reconstruction in five to ten years.
There is also a local dimension to this. Kansas City’s clay-heavy soils hold water longer than sandy or loamy profiles, which means the drainage zone behind a wall here works harder than it would in a drier or sandier region. A system that might be marginal in Arizona is genuinely inadequate in Missouri. That is why Trew Landscape LLC treats drainage as a built-in component of every retaining wall project, not an upgrade.
Trew Landscape LLC builds drainage-ready retaining walls in Kansas City
Drainage problems are easier to prevent than fix, and the gap between a wall that lasts 30 years and one that fails in 7 usually comes down to what was installed in that 12-inch zone behind the face.

Trew Landscape LLC installs complete retaining wall drainage systems for Kansas City homeowners, from outlet-clearing repairs on existing walls to full drainage retrofits and new engineered wall builds with toe drains and daylighted outlets. Every project includes photographic documentation of pipe slope, stone depth, and fabric placement before backfilling, so you have a permanent record of what was installed and how. For walls that need engineered coordination, Trew Landscape LLC manages that process as part of the project scope.
If your wall is showing early warning signs or you are planning a new build, the right next step is a site visit. Bring the checklist from this article, and ask for level readings and as-built photos as part of the deliverables. You can review Trew Landscape LLC’s hardscape and retaining wall services or contact the team directly to schedule an inspection and get a project quote.
Useful sources
These resources provide the installation criteria, design standards, and commissioning guidance referenced throughout this article. Save or print the installer checklists and request similar documentation from any contractor you hire.
- Design of Maintainable Drains for Earth Retaining Structures (Iowa State / CTRE) — Full design guide covering weep hole design, maintainable drain systems, and acceptance criteria for earth retention structures.
- Design of External Drainage Systems for Segmental Retaining Walls (IGS) — Technical paper on hydrostatic pressure quantification and drainage design for SRW systems; includes the surface grading 1–3 degree guidance.
- Pore Pressure and Retaining Wall Drainage (Geoengineer.org) — Educational reference on pore pressure mechanics and drainage design principles for retaining walls.
- Retaining Wall Drainage Installation Guide (Family Handyman) — Practical homeowner-level guide covering core-drilling weep holes, footing drains, and aggregate selection for DIY-accessible repairs.
- Trew Landscape LLC Retaining Wall Services — Local service contact for Kansas City retaining wall drainage installation, inspection, and retrofit projects.
- Trew Landscape LLC Stormwater Drainage Solutions — Covers how yard-level and stormwater drainage systems connect to retaining wall outlets and surface swales in Kansas City.
FAQ
What is the best drainage system behind a retaining wall?
The most reliable residential system combines a 12-inch column of #57 washed stone, a 4-inch perforated collector pipe at the base sloped at least 1% to a daylighted outlet, and non-woven geotextile separating the stone from native soil. Weep holes every 4–6 feet along the wall face add a secondary relief path.
Does a 2-foot retaining wall need drainage?
In well-drained sandy soils, a 2-foot wall sometimes performs without formal drainage, but in clay soils or high-rainfall areas, even low walls can develop hydrostatic pressure problems. Kansas City’s clay-heavy subsoils make a simple drainage layer advisable even for short walls.
What is the 1–3 rule for retaining walls?
The 1–3 rule refers to surface grading: slope the top of the backfill at least 1–3 degrees away from the wall face to reduce how much surface water infiltrates the drainage zone. It is a surface water management measure that works alongside, not instead of, the subsurface stone-and-pipe system.
What are the most common retaining wall drainage mistakes?
The most frequent errors are using crusher run or pea gravel instead of #57 stone, skipping the geotextile fabric, running the collector pipe flat or with a reverse slope, dead-ending the outlet, and relying on weep holes as the only drainage measure. Any one of these can cause the system to fail within a few seasons.
When should weep holes be spaced along a retaining wall?
Space weep holes every 4–6 feet along the wall face, set 6–12 inches above finished grade. They function as a secondary pressure relief and should always be paired with a proper stone-and-pipe collector behind the wall, not used as a standalone drainage solution.