Trew Landscape Blog
DIY Artificial Turf Installation: A Homeowner's Guide
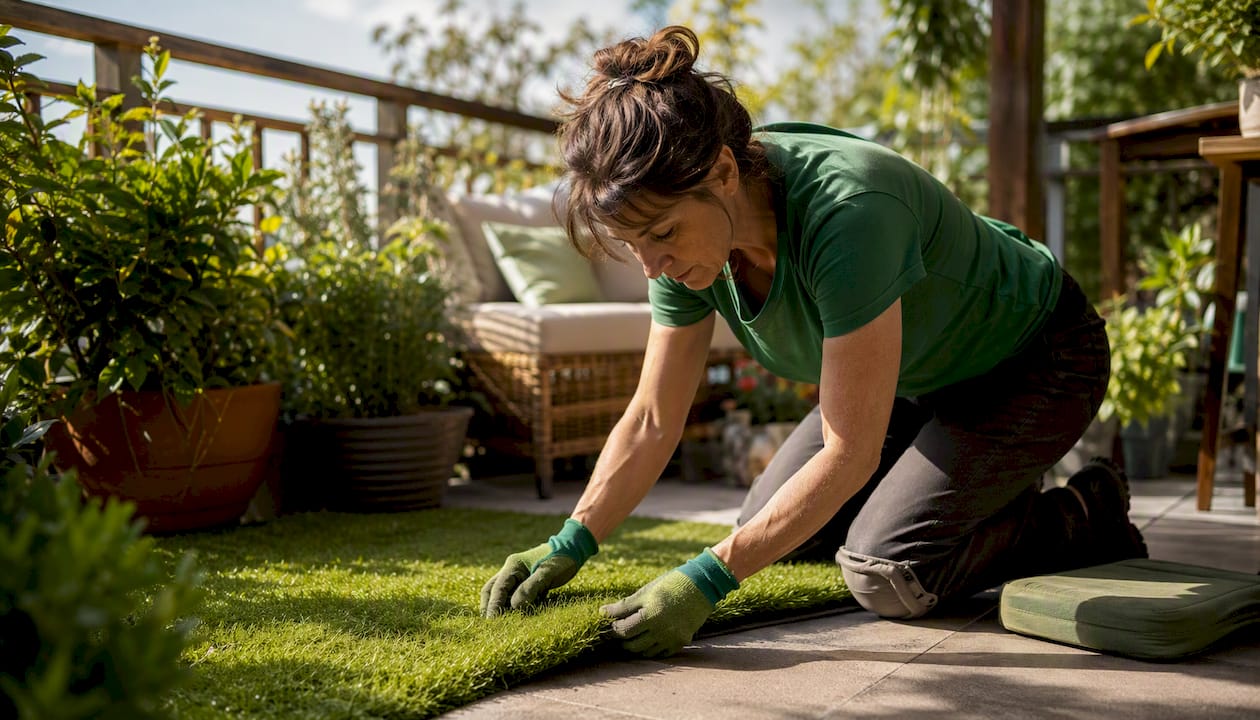
DIY Artificial Turf Installation: A Homeowner's Guide ! Homeowner installing artificial turf in backyard > TL;DR: > > - Homeowners can save money by installing artificial turf themselves on small to medium flat areas but must ensure proper base and drainage for longevity.
DIY Artificial Turf Installation: A Homeowner’s Guide
TL;DR:
- Homeowners can save money by installing artificial turf themselves on small to medium flat areas but must ensure proper base and drainage for longevity. Proper planning, measuring, and skilled seaming are crucial, especially for complex yards or slopes. Professionals are recommended for sites with drainage issues, large areas, or complicated transitions to prevent costly mistakes.
Most homeowners can install artificial turf themselves on flat, small to medium areas, and the savings are real. DIY material and rental costs are generally lower per square foot than professional installation, with the cost difference increasing with yard size, meaning that labor savings can be significant for small to medium backyards. The critical factor is proper base and drainage work, which heavily influences turf longevity and performance; this is commonly the challenge for DIY installations.
On time: be realistic. A 500 sq ft project takes most homeowners about a weekend or two, while a 1,000 to 1,500 sq ft install typically requires multiple days spread over a few weekends, considering base curing and equipment rental times. If your yard has slopes, clay soil, or complex transitions to patios or downspouts, add another weekend and seriously consider calling a professional for at least the drainage and grading phase.
Table of Contents
- What tools and materials do you need for artificial turf installation?
- How do you plan the layout, drainage, and permits before starting?
- How do you build a base that actually lasts?
- How do you roll out, cut, and seam artificial turf correctly?
- What infill should you use, and how do you finish the job?
- What are the most common DIY mistakes, and how do you fix them?
- What does artificial turf installation actually cost, and how long does it take?
- How do you maintain artificial turf, and what are the environmental tradeoffs?
- When does hiring a professional make more sense than DIY?
- Key Takeaways
- The part most guides won’t tell you about DIY turf
- Trew Landscape LLC handles the hard parts of turf installation
- Useful sources
- FAQ
What tools and materials do you need for artificial turf installation?
The complete materials list
Before you price anything, write down your square footage and add a 5–10% waste factor for cuts, seams, and irregular edges. A 1,000 sq ft yard needs 1,050–1,100 sq ft of turf on order.
Turf and base materials:
- Artificial turf (polyethylene or polypropylene, 30–80 oz face weight depending on use)
- Weed barrier / geotextile fabric (non-woven, permeable)
- Crushed granite or decomposed granite (DG) base, 3–4 inches deep
- Class II road base as an alternative in areas with poor native soil
- Drainage aggregate or river rock if tying into a French drain
- Bender board or galvanized steel edging
- Seam tape (12-inch wide, minimum) and polyurethane seam adhesive
- Galvanized nails or landscape staples (6-inch, 9-gauge)
- Infill material (see the infill section below for type guidance)
Infill options at a glance:
- Silica sand: most affordable, works for low-traffic and decorative areas
- Coated or acrylic-coated sand: better odor resistance, good for pet runs
- Crumb rubber: adds cushion, common for play areas, but retains heat
- Cork infill: natural, cooler surface, good for kids and pets
- Cooling infill (e.g., HydroChill): reduces surface temperature, premium price
Tools and rentals
You can buy some of these; rent the heavy ones.
- Plate compactor (rent for 1–2 days)
- Utility knife with hook blade (buy several extra blades)
- Turf cutter or hand seamer
- Stiff-bristle turf broom or power broom
- Wheelbarrow and flat-head rake
- Hand tamper for tight corners
- Chalk line and measuring tape
- Safety glasses, knee pads, and work gloves
Measurement and quantity formula
Measure the length and width of your area at the widest points, multiply for total square footage, then add your waste factor. Turf rolls typically come in 12-foot or 15-foot widths, so plan your layout to minimize seams. If your yard is 22 feet wide, two 12-foot rolls with a seam down the middle beats one 15-foot roll that leaves a 7-foot gap you’d have to patch awkwardly.
| Material | Typical Coverage | Budget Range | Mid-Range | Premium |
|---|---|---|---|---|
| Artificial turf | Per sq ft installed | $4.50–$7 (DIY) | $10–$15/sq ft (pro) | — |
| Crushed granite base | 1 ton covers ~80 sq ft at 3 in. | $30/ton | $50/ton delivered | Varies by region |
| Weed barrier | 1 roll covers 300–500 sq ft | — | — | — |
| Seam tape + adhesive | — | $40–$60/kit | $60–$90/kit | $90+/kit |
| Infill (silica sand) | 1–2 lbs per sq ft | — | — | — |
Pro Tip: Order base material delivered directly to your driveway, not the backyard. Moving 3 tons of DG through a gate in a wheelbarrow adds hours to your project. Stage turf rolls flat in a garage or shaded area; never store them standing on end, which permanently creases the pile.
How do you plan the layout, drainage, and permits before starting?
Good planning prevents the problems that cost the most to fix after the fact. Spend a few hours here and you’ll save days of rework.
Measure and sketch your yard
Walk the perimeter and sketch it on graph paper, marking every fixed feature: fence posts, downspouts, garden beds, patio edges, and any low spots where water pools after rain. Note where the grade rises and falls. This sketch becomes your cut plan and your drainage map.
Slope and drainage requirements
Standard practice calls for a 1–2% slope away from structures to prevent ponding. That’s roughly 1/4 inch of drop per foot. If your yard is flat or slopes toward your house, you have a drainage problem that needs solving before any turf goes down. In Kansas City, clay-heavy soils are common, and they don’t drain well. A French drain or perforated pipe system under the base is often the right call for yards that hold water after storms.
Artificial turf reduces soil infiltration and increases surface runoff compared with natural grass, which means drainage planning isn’t optional. It’s the difference between a yard that drains in 30 minutes and one that ponds for hours.
Call 811 before you dig
This is non-negotiable. Call 811 (or submit online at call811.com) at least three business days before excavation. Utility lines are marked for free, and hitting one is both dangerous and expensive. Most municipalities don’t require a permit for residential turf installation, but check with your local planning office if you’re altering drainage patterns or installing edging near a public right-of-way.
Planning checklist
- Sketch the yard with all fixed features and high/low points marked
- Confirm your slope and identify any drainage problem areas
- Call 811 and wait for utility marking before digging
- Identify transitions to pavers, concrete, or garden beds and plan edging type for each
- Schedule equipment rental to align with your weekend work blocks
- Plan for base material delivery 1–2 days before you start excavation
Pro Tip: Phase the job across two weekends: Weekend 1 for demolition, excavation, and base installation; Weekend 2 for turf laying, seaming, and infill. This gives the base time to settle and lets you catch any drainage issues before the turf goes down.
How do you build a base that actually lasts?
The base is where DIY installs succeed or fail. Professional installers consistently identify inadequate sub-base preparation as the primary reason DIY turf projects fail, with compaction and grading mistakes causing irreversible defects within a few years. Spend the time here.
Step-by-step base construction
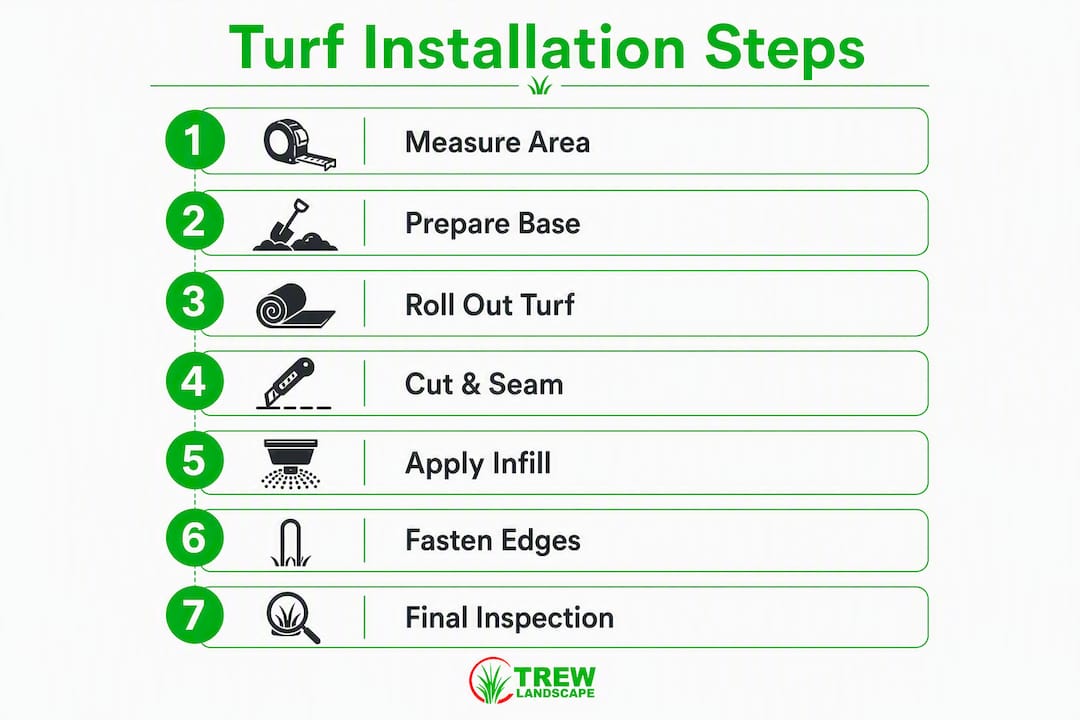
- Remove existing grass and sod. Use a sod cutter (rentable) to strip the top layer. Remove all organic material, roots, and debris. Organic matter decomposes and creates soft spots.
- Excavate to depth. Target 3–4 inches of excavation for a standard residential install. Add depth for heavy-use areas or if native soil is soft or clay-heavy. Deeper is better than shallower.
- Address native soil. If you hit clay, loosen it with a tiller and add a layer of drainage aggregate before your base material. Clay that sits directly under compacted DG will still hold water.
- Install edging first. Set bender board or steel edging at your perimeter before adding base material. This gives you a fixed reference for your finished grade and keeps base material from migrating.
- Add base material in thin lifts. Spread crushed granite or DG in 1.5–2 inch layers. Do not dump the full 3–4 inches at once. Thin lifts compact uniformly; thick ones leave soft pockets.
- Water lightly between passes. A light misting helps the material bind. Don’t saturate it.
- Compact each lift. Run the plate compactor in overlapping passes, covering each area at least twice from perpendicular directions. Target 90–95% compaction density.
- Test for firmness. Walk the surface in work boots. Any area that feels soft or spongy needs another compaction pass. Press a screwdriver handle into the surface; it should not indent more than 1/4 inch.
- Lay the weed barrier. Roll geotextile fabric over the compacted base, overlapping seams by 6 inches. This layer stops weeds without blocking drainage.
Pro Tip: The single most common DIY failure is skipping the second compaction pass on the perimeter and corners, where the plate compactor can’t reach. Use a hand tamper in those spots and spend extra time on them. Soft edges cause turf to lift and curl within the first year.
How do you roll out, cut, and seam artificial turf correctly?
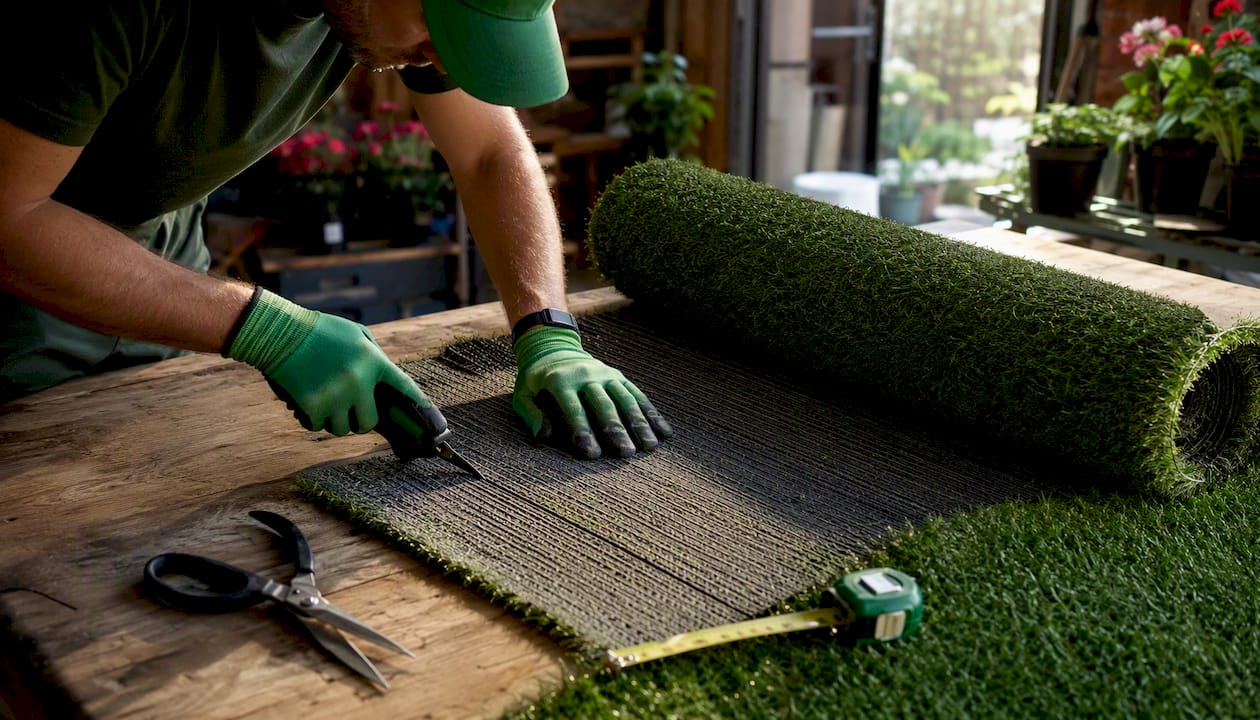
Laying turf looks straightforward until you’re standing in a yard with two rolls that don’t quite line up and a seam you can see from the back door. Precision here pays off for the next 15 years.
Aligning pile direction
Unroll your turf and let it rest for 30–60 minutes in the sun before cutting. This relaxes the backing and makes the pile direction easier to read. All sections of turf in the same yard must run in the same pile direction, meaning the blades all lean the same way. Looking down the length of the roll, the blades should lean toward you. If two sections lean in opposite directions, the seam will look like a part in hair, visible from any angle.
Cutting cleanly
Use a hook blade utility knife and cut from the back of the turf, not the face. Score the backing in a single controlled pass along a chalk line. Cutting from the face crushes fibers and leaves a ragged edge. For curved cuts around garden beds or tree rings, use a flexible garden hose as a template, trace the curve onto the backing, and cut in short, controlled strokes.
Seaming technique
Seams are the most common failure point for DIY installs. Follow this sequence:
- Lay both turf sections face-up and butt the edges together. Check that pile direction matches on both pieces.
- Fold back both edges 6–8 inches and lay 12-inch seam tape centered under the seam line, adhesive side up.
- Apply polyurethane seam adhesive to the tape in a thin, even bead.
- Fold one edge back onto the tape, press firmly, then fold the second edge back and press. The seam gap should be minimal, just enough for the adhesive layer to grip both backings.
- Walk the seam and press down firmly every few inches. Place weights (sandbags, pavers) along the seam for 30–60 minutes while the adhesive cures.
Pro Tip: Never seam turf in direct sun on a hot day if you can avoid it. Heat softens the adhesive before it cures and causes the seam to shift. Early morning or overcast conditions give you a longer working window.
Fastening edges
Drive 6-inch galvanized nails or landscape staples every 3–4 inches along straight edges and every 2 inches around curves. Nails should sit flush with the backing, not punching through the pile. Along the perimeter, tuck the turf edge under the bender board lip or nail directly into the edging. Pull the turf taut before nailing; wrinkles at the edge usually mean the turf wasn’t tensioned before fastening.
What infill should you use, and how do you finish the job?
Infill is what makes synthetic turf feel and perform like real grass. Without it, the pile lies flat, the surface feels hard, and the turf shifts underfoot. Getting this step right is the difference between a lawn that looks great for years and one that looks tired in 18 months.
Choosing the right infill
- Silica sand: the standard choice for decorative and low-traffic areas. Affordable, widely available, and easy to apply. Not ideal for pet runs because it doesn’t address odor.
- Coated or acrylic-coated sand: adds an antimicrobial coating that reduces odor. Better for households with dogs.
- Crumb rubber: provides cushioning for play areas and sports surfaces. Retains more heat than sand, so it’s a tradeoff in sunny yards.
- Cork: natural material, cooler surface, good biodegradability. A solid choice for kids’ play areas and pet zones.
- Cooling infill (e.g., HydroChill or similar): absorbs moisture and releases it as evaporative cooling. Reduces surface temperatures noticeably in direct sun. Premium cost, but worth it in hot climates or south-facing yards.
Application rates and method
Most residential turf needs 1–2 pounds of infill per square foot. Spread it in two passes: the first pass covers the surface evenly, the second fills in after the first round of brooming. Use a drop spreader for large areas; a shovel and stiff broom work fine for small spaces.
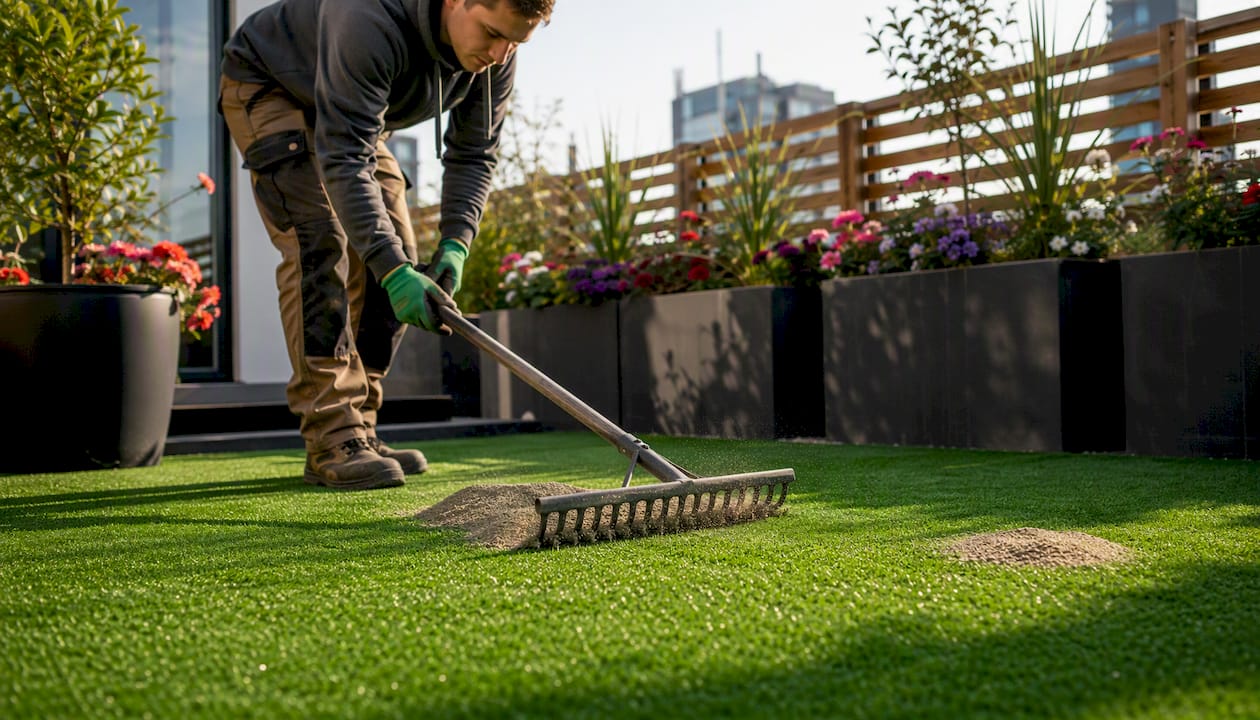
After each pass, use a stiff-bristle turf broom or a power broom to work the infill down into the pile and stand the blades upright. Broom against the grain of the pile, not with it. The blades should stand at roughly 45–60 degrees when properly infilled.
Finishing checklist
- Trim any overhanging turf edges flush with the edging using a sharp utility knife
- Check every nail and staple along the perimeter; any that are proud of the backing need to be driven flush
- Walk the entire surface and press down any bulges; small bulges usually mean infill hasn’t settled evenly
- Lightly water the surface to help infill settle and cool the turf after installation
- Run a final broom pass to groom the pile and check for low-infill patches (they look flat and matted)
- Schedule a second infill top-up after the first heavy rain, which redistributes infill toward low spots
What are the most common DIY mistakes, and how do you fix them?
Even careful installs run into problems. Most are fixable if you catch them early.
Ripples and waves
Cause: Turf wasn’t tensioned before fastening, or the base settled unevenly after installation. Fix: Pull back the affected section, re-tamp the base underneath, re-tension the turf, and re-fasten. For small ripples, sometimes adding infill and brooming vigorously is enough to flatten them.
Visible seams
Cause: Misaligned pile direction, insufficient adhesive, or the seam was walked on before the adhesive cured. Fix: If the seam is still fresh, carefully lift one edge, reapply adhesive, and re-press. If it’s cured and separated, use a seam repair kit with fresh tape and adhesive. Pile direction mismatches can’t be fixed without re-cutting and re-laying.
Ponding or poor drainage
Cause: Inadequate slope, compacted base blocking flow-through, or clay soil trapping water under the base. Fix: For minor pooling, check whether the weed barrier is blocking drainage at a low point and cut a small slit to allow flow. Persistent ponding usually means the base slope is wrong or subsurface drainage is needed. This is the scenario where calling a professional pays for itself. A drain tile installation under the base is often the right long-term fix.
Sunken spots
Cause: Organic material left in the base decomposed, or a lift wasn’t compacted before the next one was added. Fix: Pull back the turf, excavate the sunken area, add fresh base material, compact thoroughly, and re-lay. Don’t try to fill a sunken spot with extra infill; it won’t hold.
Infill displacement
Cause: Heavy rain, pets digging, or high foot traffic pushing infill to the edges. Fix: Redistribute infill with a rake and broom, then add a top-up layer. Pet areas need more frequent infill checks than decorative lawns.
When to call a professional
Persistent drainage problems that return after your fix, seam failures across more than a few feet, base settling across a large area, or any project adjacent to a foundation or retaining wall are all situations where professional intervention prevents much larger repair costs down the line.
What does artificial turf installation actually cost, and how long does it take?
Cost breakdown: DIY vs. professional
DIY material and rental costs typically run $4.50–$7.00 per square foot. Professional installation costs vary based on turf grade and site conditions. For a 1,000 sq ft backyard, DIY costs are generally substantially lower than professional installation, which can be significantly more expensive depending on turf quality and site complexity.
The math on DIY savings is real, but so is the risk: correcting DIY mistakes on drainage, seams, or base settling can push your total cost above what a professional would have charged from the start.
| Cost Category | Budget | Mid-Range | Premium |
|---|---|---|---|
| Tool/equipment rental | $150–$300 total | $300–$500 total | $500+ total |
| Professional install (all-in) | $10–$20/sq ft | — | — |
Line-item notes
- Plate compactor rental runs $100–$200 per day depending on your area; budget two days.
- Disposal of old sod and base material adds $100–$300 for a typical residential project.
- Turf grade matters: a 40 oz face weight polyethylene pet turf costs more than a 30 oz landscape turf, but it lasts longer under heavy use.
Sample timelines
- Under 500 sq ft: one solid weekend (Saturday demolition and base, Sunday turf and infill).
- 500–1,500 sq ft: two to three weekends. Base work on Weekend 1, turf laying and seaming on Weekend 2, infill and finishing on Weekend 3 if needed.
- 1,500+ sq ft: plan for three to four weekends minimum, or hire out the base work and do the turf laying yourself to split the difference on cost and quality.
How do you maintain artificial turf, and what are the environmental tradeoffs?
Routine maintenance schedule
Synthetic grass is low-maintenance, not no-maintenance. Here’s what a realistic schedule looks like:
- Weekly: remove leaves, debris, and pet waste. A leaf blower works well for dry debris.
- Monthly: brush the pile with a stiff broom to keep blades upright and redistribute infill.
- Quarterly: check infill levels and top up low spots; inspect edges and seams for lifting.
- Annually: rinse the surface thoroughly with a garden hose to flush accumulated dust and organic material. Check for any areas where the backing has begun to degrade.
Pet care
Dog urine passes through the turf and into the base, but odor builds up over time, especially in hot weather. Rinse pet areas weekly with water and treat monthly with an enzyme-based cleaner (products like Simple Green Outdoor Odor Eliminator work well). For active dog runs, consider a coated sand or cork infill rather than plain silica sand, and look into a drainage upgrade that routes runoff away from the area efficiently. More detail on pet-specific turf care is available in Trew Landscape LLC’s guide to artificial grass for dogs.
Lifespan expectations
A quality polyethylene turf with proper base and infill typically lasts 15–20 years in residential use. Signs it’s time to replace: pile that won’t stand up even after brooming, backing that’s cracking or separating, or infill that’s compacted so hard it no longer drains. Infill top-ups every 3–5 years extend the life of the surface significantly.
Environmental tradeoffs
Artificial turf reduces soil permeability and increases surface runoff compared with natural grass, contributing to localized urban heat effects. That’s a real consideration, not a reason to avoid turf, but a reason to plan drainage carefully and think about what happens to runoff leaving your yard. On the other side of the ledger, turf eliminates mowing (no fuel or electricity), eliminates irrigation (meaningful water savings in drought-prone areas), and removes the need for fertilizers and pesticides.
Mitigation tips: choose lighter blade colors, which absorb less heat than dark green; add shade structures or trees near the turf area; and use a cooling infill if the surface gets heavy afternoon sun.
Safety and heat
Artificial turf surfaces in direct sun can reach 150–170°F in hot climates. Cooling infill and lighter blade colors can reduce surface temperature by 10–15 degrees, but on a 95°F Kansas City summer afternoon, even cooled turf gets hot. Schedule play time for morning or evening, add shade where possible, and keep a hose nearby for a quick cool-down rinse before kids or pets use the surface.
When does hiring a professional make more sense than DIY?
DIY works well for flat, straightforward yards with good native drainage and no complex transitions. The calculus shifts when any of these factors are present.
What professionals bring to the job
- Site-specific drainage solutions: pros integrate French drains, perforated piping, and engineered grading where clay soils or low-lying areas would trap water under a DIY base
- Engineered base construction: professional compaction equipment and technique reliably hits the 90–95% density spec that hand tamping and a single compactor pass often miss
- Professional seaming tools and technique: power seam rollers, commercial-grade adhesive, and experience reading pile direction produce seams that are genuinely invisible
- Material and workmanship warranties: most professional installs include both material and limited labor warranties, something no DIY project provides
- Permit and HOA navigation: a local contractor knows what your municipality requires and handles it
Scenarios where professional investment pays off
While pros charge more up front, their site analysis and material selection protect properties from drainage issues and future costly repairs. Specifically, hire a professional when:
- Your yard has a slope greater than 3% or drains toward the house
- Native soil is clay-heavy or has a history of standing water
- The project involves complex transitions to pavers, concrete, or retaining walls
- The area is larger than 1,500 sq ft (scale amplifies every base mistake)
- The turf will be adjacent to a foundation, fence post, or drainage structure
- You want a warranty that covers both materials and labor
What to ask before hiring
- Do you carry general liability insurance and workers’ compensation?
- Can you provide references or a project gallery for similar residential installs?
- Is the quote itemized by material, labor, base prep, and infill separately?
- What does your workmanship warranty cover, and for how long?
- Will you pull any required permits?
Pro Tip: Ask specifically whether the quote includes compaction testing or a final grade check before turf is laid. Contractors who include this step are telling you something about how seriously they take base quality. Those who skip it are telling you something too.
Key Takeaways
A successful artificial turf installation comes down to one thing above everything else: building the base right, because no amount of quality turf material recovers from a poorly compacted or improperly graded sub-base.
| Point | Details |
|---|---|
| DIY cost range | DIY material and rental costs run $4.50–$7.00 per sq ft; professional installation runs $10–$20 per sq ft. |
| Base depth and compaction | Excavate 3–4 inches and compact base material to 90–95% density in thin lifts using a plate compactor. |
| Drainage is non-negotiable | Maintain a 1–2% slope away from structures; add subsurface drainage for clay soils or low-lying areas. |
| Seams are the top failure point | Align pile direction on all sections, use seam tape and polyurethane adhesive, and weight seams during cure. |
| Trew Landscape LLC | Offers professional artificial turf installation in Kansas City, including engineered base, drainage, and workmanship warranties. |
The part most guides won’t tell you about DIY turf
The DIY turf industry has done a good job selling homeowners on the idea that laying artificial grass is basically like rolling out carpet. It’s not. Carpet goes on a flat, engineered subfloor. Turf goes on soil that moves, drains (or doesn’t), and behaves differently in every yard.
The honest contractor perspective is this: the turf itself is rarely the problem. The base is almost always the problem. Homeowners who spend $800 renting a plate compactor and two days building the base correctly end up with turf that looks great a decade later. Homeowners who skip that step and spend the same money on a fancier turf grade end up with ripples and ponding in year two.
There’s also a misconception about seaming. Most DIYers assume a seam is just two edges pushed together. A proper seam requires aligned pile direction, the right adhesive, the right tape width, the right cure time, and tension in the turf before the adhesive sets. Miss any one of those and the seam shows. It’s not a skill that’s impossible to learn, but it takes practice, and your backyard is not the place to practice for the first time on a 40-foot seam.
For straightforward, flat, well-draining yards under 1,000 sq ft, DIY is a legitimate option if you’re willing to rent the right equipment and follow the base specs exactly. For anything more complex, the math on professional installation changes fast when you factor in the cost of fixing a failed base or re-doing a seam that separated.
Trew Landscape LLC handles the hard parts of turf installation
Skipping the base work to save a weekend is the most expensive shortcut in residential turf. Trew Landscape LLC’s artificial turf installation service in Kansas City covers every step that determines long-term performance: engineered base construction, professional compaction, site-specific drainage planning, and precision seaming with professional-grade tools and adhesive.

Beyond turf, Trew Landscape LLC integrates complementary work that most homeowners discover they need mid-project: landscape drainage solutions, yard grading, hardscape transitions to patios and pavers, and landscape lighting for finished outdoor spaces. Every project comes with an itemized quote, local permitting guidance, and a workmanship warranty. If you’ve read this guide and decided your yard is more complex than a straightforward DIY, or you simply want it done right the first time, request a site visit and quote at trewlandscape.com/services/artificial-turf-installation/.
Useful sources
- Artificial Turf: What to Consider — University of California Agriculture and Natural Resources overview of residential and commercial turf use, water savings, and regulatory context
- Why Are Artificial Lawns Bad for the Environment? — University of Plymouth research on soil permeability, surface runoff, and urban heat effects
- Artificial Turf Cost 2026: Prices by City — national cost data including per-sq-ft installed ranges, surface temperature data, and cooling infill performance
- 14 Synthetic Grass Installation Cost Facts for 2026 — DIY material and rental cost ranges and risk of cost escalation from mistakes
- Complete Guide to Artificial Turf Installation: Professional Standards, DIY Methods, and Cost Breakdown — base construction specs, compaction targets, drainage standards, and professional deliverables
- DIY vs Pro Turf Installation: Which One Makes More Sense for Your Yard? — scenario-based comparison of DIY and professional installation value
- DIY vs Pro Artificial Turf Installation — seaming technique, pile direction alignment, and common amateur mistakes
Always check your turf manufacturer’s technical data sheet for flow-through backing specifications, approved infill types, and warranty terms before purchasing. Using an unapproved infill can void a material warranty.
FAQ
How much does professional artificial turf installation cost?
Professional installation typically runs $10–$20 per square foot installed. Total project costs commonly fall between $9,000 and $20,000 depending on yard size and turf grade.
How much does DIY artificial turf installation cost?
DIY material and rental costs generally run $4.50–$7.00 per square foot. Keep in mind that correcting mistakes on drainage, seams, or base settling can push your final cost above what a professional would have charged.
What are the main downsides of artificial turf?
Artificial turf surfaces can reach 150–170°F in direct sun, it reduces soil permeability and increases surface runoff, and it requires periodic infill top-ups and cleaning rather than zero maintenance. Pet odor buildup is a common complaint in dog runs without proper drainage and enzyme-based cleaning.
Can a homeowner install artificial turf without professional help?
Yes, for flat, well-draining yards under 1,000–1,500 sq ft, DIY installation is realistic if you rent a plate compactor, follow the 3–4 inch excavation and 90–95% compaction specs, and take seaming seriously. Complex slopes, clay soils, or large areas are better handled by a professional.
How long does artificial turf last?
Quality polyethylene turf with a properly built base typically lasts 15–20 years in residential use. Regular infill top-ups every 3–5 years and annual rinsing extend the surface life considerably.