
Trew Landscape Blog
Downspout Drainage Solutions: Simple Fixes and When to Call a Pro
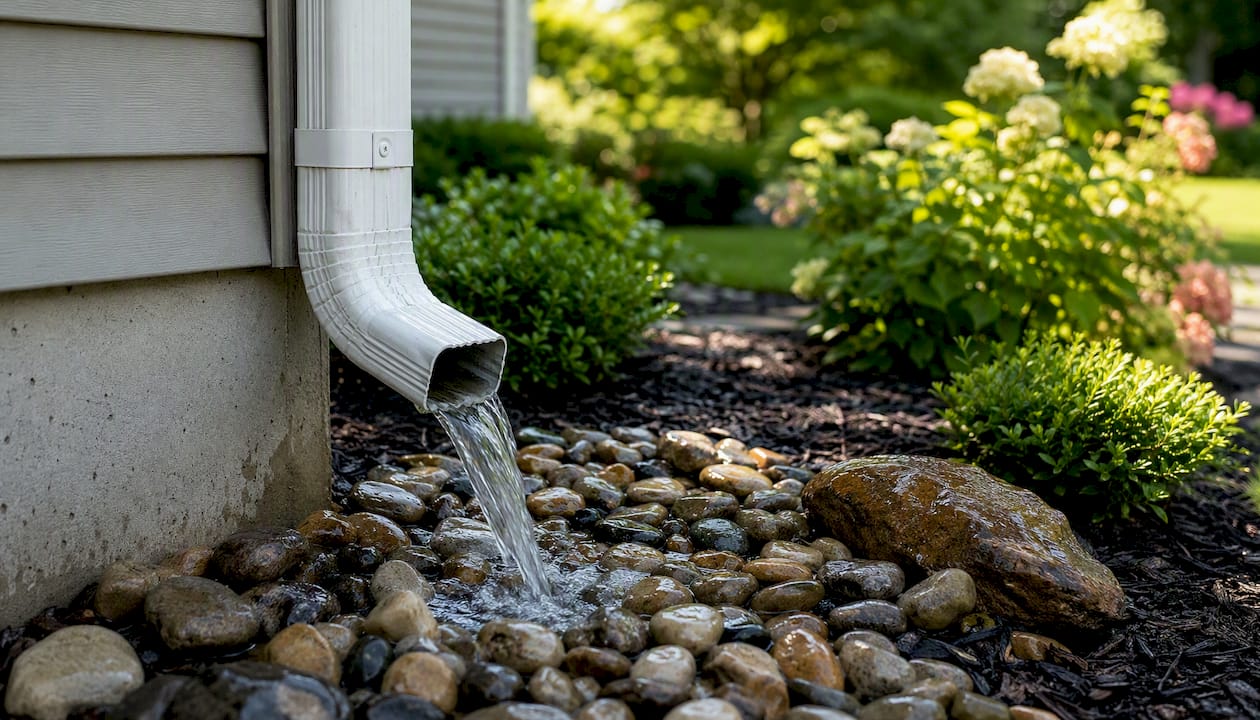
Downspout Drainage Solutions: Simple Fixes and When to Call a Pro ! Downspout draining water onto rock splash pad For most homeowners, the fastest reliable approach is to fix the grade first, then discharge roof runoff at least 5 feet from the foundation.
Downspout Drainage Solutions: Simple Fixes and When to Call a Pro
For most homeowners, the fastest reliable approach is to fix the grade first, then discharge roof runoff at least 5 feet from the foundation. According to Building America Solution Center guidance, surface discharge should terminate no closer than 5 feet from the foundation, and any buried underground catchment should sit at least 10 feet away. Get those distances right and you’ve solved the majority of foundation moisture problems before spending a dollar on pipe.
The three best quick fixes, roughly in order of effort:
- Splash block or surface extension: Redirect water away from the foundation immediately. A 2x3 splash block costs under $15 and takes ten minutes to set.
- Rigid or flexible surface extension: Snap-on plastic extensions reach 4–6 feet and cost $5–$20. Rigid aluminum extensions hold their shape better in high-flow situations.
- Buried solid pipe to daylight: The most durable surface-independent fix. Run smooth-walled PVC from the downspout outlet to a lower point in the yard where water can exit freely.
For sites where a daylight outlet isn’t practical, a dry well or rain-harvesting system (rain barrel or cistern) handles overflow, though both require more planning and maintenance.
Pro Tip: Never route a downspout into a foundation drain or a sanitary sewer line. Foundation drains aren’t designed for roof runoff volumes, and connecting to a sanitary sewer is illegal in most municipalities. Both mistakes can cause backups and costly repairs.
Key Takeaways
Fixing grade first is the single most important step in any downspout drainage project, because even a long buried pipe fails if the yard slopes back toward the foundation.
| Point | Details |
|---|---|
| Fix grade before anything else | A 5% slope (6 in over 10 ft) around the foundation determines whether any drainage fix actually works. |
| Minimum discharge distances | Surface discharge must exit at least 5 ft from the foundation; underground catchment must be at least 10 ft away. |
| Choose smooth-walled pipe for buried runs | PVC or HDPE resists clogs and clears easily; corrugated pipe traps debris and is difficult to service. |
| Bury at 5/8 in per ft slope | Consistent pitch prevents sediment buildup and keeps buried runs self-draining between storms. |
| Trew Landscape LLC for complex jobs | Kansas City clay soils and flat lots often need professional grading and drain tile work to solve drainage reliably. |
Table of Contents
- What are the best downspout drainage solutions you can install today?
- How do rain gardens and surface infiltration options work?
- What are your options for burying a downspout underground?
- What distance and slope rules keep water away from your foundation?
- Two DIY projects you can build this weekend
- How do you keep a downspout drainage system working long-term?
- When should you hire a drainage contractor instead of doing it yourself?
- What Trew Landscape LLC sees in Kansas City yards
- Trew Landscape LLC handles the drainage work Kansas City yards actually need
- Sources
- FAQ
What are the best downspout drainage solutions you can install today?
Speed matters when water is pooling against your foundation after every rain. These fixes require basic tools, no permits in most cases, and can be completed in an afternoon.
Step-by-step: fast surface fixes
- Set a splash block. Place a concrete or plastic splash block (standard size: 24 inches long, 2x3 cross-section) directly under the downspout outlet, angled away from the house. Press it firmly into the soil so it won’t shift.
- Add a surface extension. Snap a flexible or rigid extension onto the downspout elbow. Aim for at least 4 feet of extension, angled to follow the natural slope of the yard.
- Re-angle the elbow if needed. If the existing elbow points toward the house or along the foundation, swap it for a 45° or 75° elbow that directs flow outward. Standard 2x3 downspout elbows are widely available at hardware stores.
- Reattach loose hangers. A downspout that has pulled away from the wall can dump water directly against the siding and footing. Reattach with sheet-metal screws and gutter hangers rated for your downspout size.
Tools and materials you’ll need:
- Tin snips or a hacksaw (for trimming extensions)
- Drill with sheet-metal bits
- Gutter screws or pop rivets
- 2x3 splash block (concrete or plastic)
- Snap-on flexible extension (4–6 ft) or rigid aluminum extension
- 45° or 75° downspout elbow (2x3 or 3x4, matched to your existing downspout)
Total cost for a basic splash block and extension: $20–$50. Time: 30–60 minutes per downspout.
Pro Tip: Work from a stable, properly footed ladder. Never lean a ladder against the gutter itself. Have a second person steady the base when working above 8 feet.
University of Maryland Extension guidance recommends adding loose rock or a splash pad at the discharge point to prevent erosion where the water exits, especially on bare soil or mulched beds.
How do rain gardens and surface infiltration options work?
Surface and landscape features handle downspout discharge without any buried pipe. Done right, they also improve water quality and recharge groundwater.
Rain gardens are shallow, planted depressions that collect runoff and let it soak in over 24–48 hours. They work best in soils with at least moderate permeability. NebGuide research from the University of Nebraska-Lincoln shows that routing downspouts to rain gardens, bioretention areas, or swales measurably reduces both stormwater volume and pollutant loading reaching municipal drains. Native plants with deep root systems, such as switchgrass, coneflower, or native sedges, handle temporary wet conditions and improve infiltration over time.
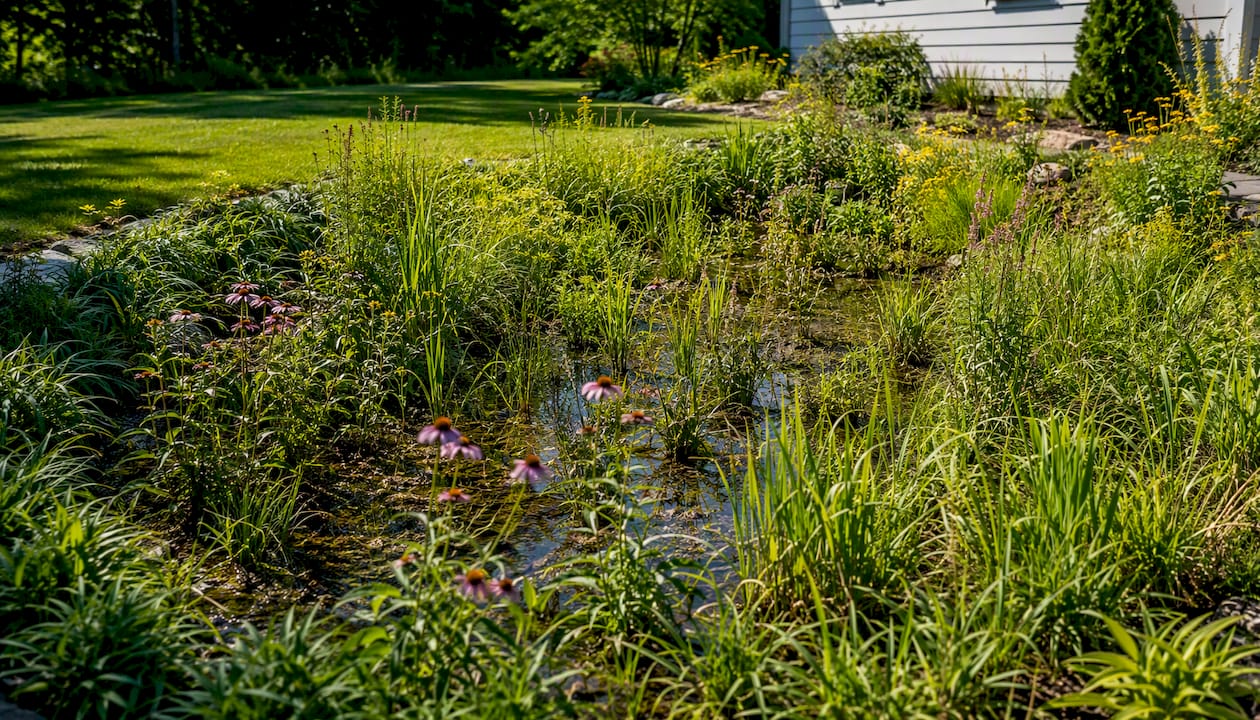
Bioswales are vegetated channels that slow and filter runoff as it moves across the yard. They’re a good fit for long, narrow lots or properties with a clear slope from the house to the street or rear boundary.
Rock-lined channels serve the same routing purpose without plants. A 12–18 inch wide channel filled with 2–4 inch river rock carries water away from the foundation and dissipates its energy before it reaches a lawn or planting bed. They’re lower-maintenance than planted swales but don’t infiltrate as effectively.
Shallow infiltration trenches are narrow excavations (12–18 inches deep, filled with gravel) that receive downspout discharge and let it percolate into the subsoil. They work well on flat lots where a surface channel would look out of place.
Key placement rules for all infiltration features:
- Keep any infiltration feature at least 10 feet from the foundation for basement homes, and at least 5 feet for crawlspace homes.
- Locate infiltration features away from septic system components to prevent contamination.
- Avoid placing infiltration features where soils remain saturated for extended periods after rain. Prolonged ponding signals poor permeability and a different solution is needed.
Statistic: Disconnecting downspouts and directing runoff to pervious landscape features reduces the volume of stormwater reaching municipal storm drains and can meaningfully improve local groundwater recharge, particularly when native plants and amended soils are used in the receiving area.
Pro Tip: Before digging a rain garden, do a simple percolation test: dig a 12-inch-deep hole, fill it with water, and time how long it takes to drain. If it takes more than 24 hours to empty, that spot won’t support a rain garden without significant soil amendment.
For Kansas City homeowners, yard drainage solutions that incorporate native plantings and bioswales are especially effective given the region’s clay-heavy soils and periodic heavy rainfall events.
What are your options for burying a downspout underground?
Buried systems move water away from the foundation invisibly and permanently, but they require more planning and have more failure modes than surface options.
Pipe material: smooth-walled vs. corrugated
The single most important material decision is pipe type. Smooth-walled PVC or HDPE is strongly preferred over corrugated plastic pipe for buried downspout runs. Corrugated pipe’s ridged interior traps sediment, leaves, and debris, leading to clogs that are difficult to clear without excavation. Smooth-walled pipe drains cleanly, clears easily with a flush or snake, and handles root intrusion better.
| Feature | Smooth-walled PVC/HDPE | Corrugated plastic pipe |
|---|---|---|
| Clog resistance | High | Low |
| Root intrusion resistance | Moderate to high | Low |
| Ease of clearing | Easy (snake or flush) | Difficult |
| Cost | Moderate | Low |
| Best use | Buried downspout runs | Short surface applications only |
Termination options
Pop-up emitters sit at the end of a buried run and open automatically when water pressure builds, then close when flow stops. They keep pests out and work well in lawn areas. The main risk is freezing in cold climates if water sits in the pipe near the emitter.
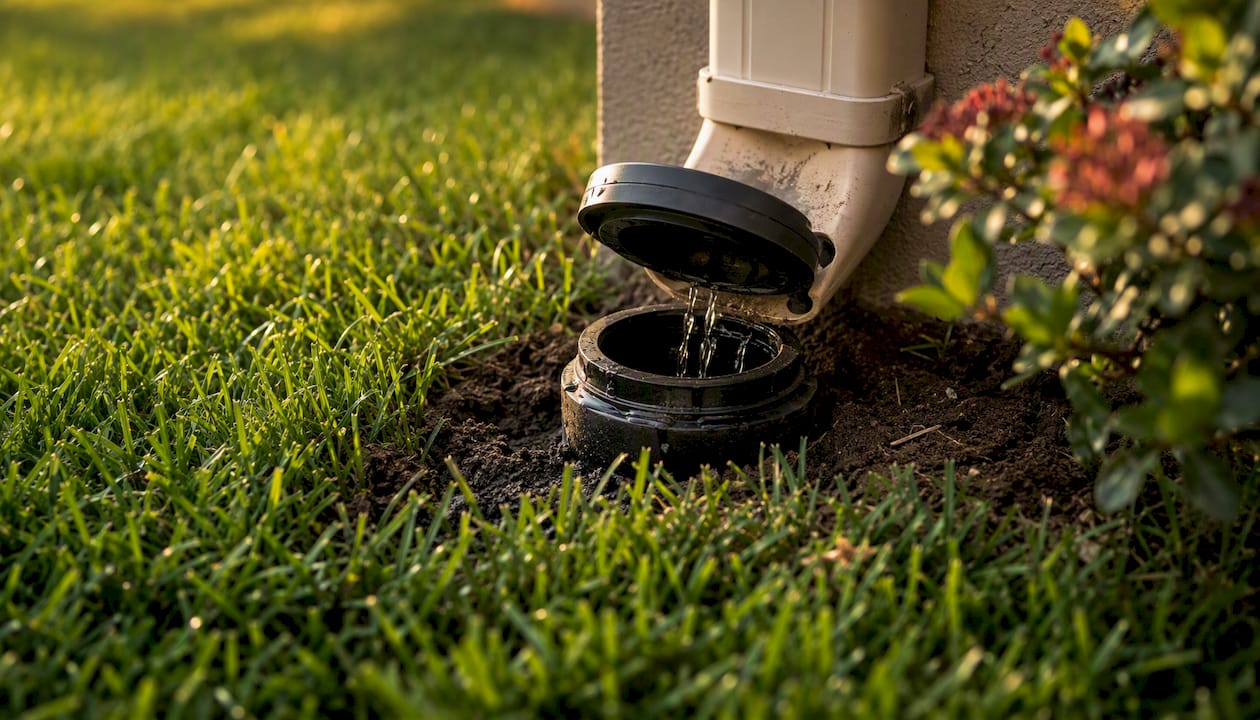
Catch basins collect runoff at a low point in the yard and connect to a buried outlet pipe. They handle large volumes and are easy to clean through the grate. A good choice when multiple downspouts or yard drains need to converge.
Dry wells are perforated chambers buried in the ground that receive water and let it percolate into surrounding soil. They work only where soil permeability is adequate. A full dry well that can’t drain fast enough will back up into the downspout during heavy rain.
French drains (perforated pipe in a gravel trench) distribute water along their length rather than concentrating it at one point. Connecting a downspout to a French drain works well for flat yards, but the pipe must be solid from the downspout to the French drain inlet, not perforated, or water will exit too close to the foundation.
Installation checklist for buried runs
- Confirm the outlet point is lower than the inlet and that the yard grade carries water away from the house.
- Dig the trench at a minimum slope of 5/8 inch per foot toward the outlet.
- Bed the pipe on compacted, level gravel or native soil (no large rocks that could crack the pipe).
- Install a cleanout access point within 10 feet of the downspout connection.
- Terminate with a pop-up emitter, open daylight outlet, or catch basin at least 10 feet from the foundation.
- Backfill in lifts and tamp lightly to avoid settling.
What distance and slope rules keep water away from your foundation?
Grade is the controlling variable in any gutter drainage system. If the finished grade slopes back toward the house, even a long buried pipe will eventually return water to the footing. The Roofing Brief makes this point plainly: fix grade first, then choose your discharge method.
For buried lateral pipe, the recommended minimum pitch is 5/8 inch per foot. That’s not a steep slope, but it must be consistent the entire length of the run.
Key sizing and placement rules:
- Downspout sizing: 1 square inch of downspout cross-section for every 100 square feet of roof area draining to that outlet.
- Downspout spacing: Place downspouts no more than 50 feet apart and no less than 20 feet apart along a gutter run.
- Surface discharge distance: At least 5 feet from the foundation (crawlspace homes); at least 10 feet for basement homes.
- Underground catchment distance: At least 10 feet from the foundation, per Building America guidance.
- Infiltration feature setback: At least 50 feet from any septic system component.
| Rule | Minimum requirement |
|---|---|
| Surface discharge from foundation | 5 ft (crawlspace), 10 ft (basement) |
| Underground catchment from foundation | 10 ft |
| Buried pipe slope | 5/8 in per ft |
| Downspout spacing | 20–50 ft |
| Downspout sizing | 1 sq in per 100 sq ft of roof |
| Infiltration feature from septic | 50 ft |
How to test your grade: After a rain, watch where water flows in the first 10 feet from your foundation. If it moves toward the house or pools against the wall, the grade is wrong. You can also run a garden hose at the downspout outlet and observe the flow path. Correcting grade with compactable fill is often the single highest-return fix before any pipe is installed. For Kansas City yards specifically, yard grading for drainage is frequently the first step Trew Landscape LLC recommends before any underground work begins.
Two DIY projects you can build this weekend
Project A: Surface extension with splash block
Summary: Redirect a downspout that currently discharges against the foundation to a point at least 5 feet away.
Tools and materials:
- Stable extension ladder
- Drill and sheet-metal screws
- 45° or 75° downspout elbow (2x3)
- Rigid aluminum or snap-on flexible extension (4–6 ft)
- Concrete splash block (24 in)
- Loose river rock or splash pad (optional)
Steps:
- Set the ladder on firm, level ground beside the downspout. Never rest it against the gutter.
- Remove the existing elbow if it points toward the house. Install the new elbow angled outward.
- Attach the extension to the elbow. For rigid aluminum, cut to length with tin snips and secure with sheet-metal screws.
- Place the splash block at the outlet, angled away from the house to protect soil from erosion.
- Add a layer of river rock (2–4 inches) beyond the splash block to prevent erosion on bare soil.
- Run a hose from the roof or pour a bucket of water into the gutter and confirm flow exits at least 5 feet from the foundation.
Time: 1–2 hours. Estimated cost: $25–$60.
Project B: Buried downspout to pop-up emitter
Summary: Run a smooth-walled PVC line from the downspout outlet to a pop-up emitter at least 10 feet from the house.
Tools and materials:
- Spade or trenching shovel (or rented trencher for long runs)
- 4-inch smooth-walled PVC pipe and fittings
- 4-inch pop-up emitter
- PVC primer and cement
- Downspout adapter (2x3 to 4-inch round)
- Gravel for bedding (optional but recommended)
- Cleanout tee with cap
Steps:
- Mark the trench line from the downspout to the emitter location. Confirm the outlet point is visibly lower than the inlet.
- Dig the trench at a consistent slope: 5/8 inch of drop per foot of run. For a 16-foot run, that’s 10 inches of total drop.
- Lay 2 inches of gravel in the trench bottom for bedding.
- Install the cleanout tee within 10 feet of the downspout connection, with the cap accessible at grade.
- Glue all PVC joints with primer and cement. Let cure per manufacturer instructions before backfilling.
- Install the pop-up emitter at the outlet end, level with the surrounding ground.
- Backfill gradually, tamping each layer to avoid settling.
- Connect the downspout adapter at the top and test with a hose. Water should exit the pop-up emitter within a few seconds of flow starting.
Time: 3–6 hours depending on run length. Estimated cost: $80–$200 for a 15–20 foot run.
Pro Tip: Call 811 (the national “Call Before You Dig” line) at least three business days before any digging. It’s free, and it prevents you from hitting buried utility lines.
Stop and call a professional if you find basement seepage during excavation, if the trench reveals roots from large trees, or if the yard has no natural low point where water can exit.
How do you keep a downspout drainage system working long-term?
A well-installed system fails faster than it should when maintenance gets skipped. The schedule is simple: clean gutters and downspouts twice a year (spring and fall), and inspect buried runs annually or after any storm that drops more than 2 inches of rain in a short period.
Common causes of overflow and failure:
- Gutters clogged with leaves, blocking flow before it even reaches the downspout
- Downspout clogged at the elbow (the most common single point of failure)
- Buried pipe pitched incorrectly, allowing sediment to settle and build up
- Pop-up emitter stuck closed or packed with debris
- Dry well saturated and unable to accept more water
- Frozen pipe in winter, particularly near the outlet end
Troubleshooting steps:
- Standing water at the foundation: Check the grade first. Then flush the downspout with a hose from the top. If water backs up, the buried run is clogged.
- Clogged buried pipe: Feed a plumber’s snake or drain auger through the cleanout. Flush with a hose after clearing. If no cleanout exists, this is the moment to add one.
- Pop-up emitter not opening: Remove the emitter cap and clear debris manually. Check that the emitter is not buried under settled soil.
- Frozen outlet: In climates with hard freezes, insulate the last 2–3 feet of buried pipe or use a heated cable on the outlet section. Slope the pipe steeply enough that water drains completely after each rain rather than sitting in the pipe.
Pro Tip: Leaf guards or gutter filters reduce cleaning frequency but don’t eliminate it. Fine-mesh guards work best; foam inserts tend to trap debris inside the gutter rather than keeping it out.
For drain tile installation and subsurface drainage systems, annual camera inspection is worth the cost every few years, especially in yards with mature trees.
When should you hire a drainage contractor instead of doing it yourself?
Some drainage problems are genuinely DIY-friendly. Others look simple on the surface and turn out to involve foundation waterproofing, municipal permits, or grading work that requires equipment. Knowing the difference saves money and prevents expensive mistakes.
Red flags that point to a professional:
- Active basement seepage or water intrusion through the foundation wall
- Yard has no natural low point where water can daylight
- Large trees with root systems near the planned pipe route
- The project requires a permit (many municipalities require permits for any buried drainage that connects to a storm sewer or crosses a property line)
- Grading changes involve more than 6 inches of fill or cut
- Multiple downspouts need to converge into a single system
Questions to ask any drainage contractor:
- What is your grading strategy before installing pipe?
- What pipe material do you use for buried runs, and what slope do you maintain?
- Where will cleanouts be located, and how are they accessed?
- How do you size a dry well for my roof area and soil type?
- Does this project require a permit, and will you pull it?
- What warranty do you offer on materials and labor?
What a professional estimate typically includes:
- Site assessment and grade survey
- Material specification (pipe type, diameter, fittings)
- Termination strategy (daylight, catch basin, dry well, or rain garden)
- Permit coordination if required
- Cleanup and restoration of disturbed lawn or planting areas
Rough cost ranges vary significantly by region and project complexity, but surface fixes (regrading, splash blocks, extensions) typically run $200–$800 for a contractor visit. A buried downspout run with a pop-up emitter generally falls in the $500–$1,500 range per downspout depending on run length and site conditions. Dry wells and catch basin systems with multiple inlets can reach $2,000–$5,000 or more for larger properties.
For Kansas City homeowners dealing with the region’s clay soils and periodic heavy storms, professional landscape drainage installation often pays for itself by preventing foundation repair costs that run far higher.
What Trew Landscape LLC sees in Kansas City yards
Kansas City’s combination of clay-heavy soils, flat subdivisions, and intense summer storm events creates a specific drainage challenge that generic guides don’t fully address. Clay doesn’t percolate quickly, which means dry wells and rain gardens that work fine in sandy Midwest soils can saturate and back up here if they’re undersized or poorly sited.
The most common pattern Trew Landscape LLC encounters: a homeowner installs a flexible surface extension, it gets kicked out of position or crushed by foot traffic, and water starts pooling against the foundation again within a season. The fix isn’t a longer extension. It’s correcting the grade so that even without any extension, water naturally moves away from the house. Once grade is right, a buried solid pipe to daylight or a properly sized catch basin handles the rest reliably for years.
Every drainage project Trew Landscape LLC takes on starts with a site walk and a grade assessment, not a materials list. That sequence matters.
Trew Landscape LLC handles the drainage work Kansas City yards actually need
Splash blocks and snap-on extensions solve simple problems. When the issue is a flat lot with clay soil, a basement that takes on water after every heavy rain, or a yard where multiple downspouts need to converge into a single buried system, the project needs more than a hardware store run.

Trew Landscape LLC designs and installs complete stormwater drainage systems for Kansas City residential and commercial properties, including drain tile installation, catch basins, grading corrections, and landscape-integrated solutions like rain gardens and rock channels. Every project starts with a site assessment, not a standard package, because Kansas City’s clay soils and varied lot grades mean the right fix is rarely the same twice. If you’re ready to stop managing a recurring water problem and fix it properly, request a project estimate from Trew Landscape LLC.
Sources
- Gutters and Downspouts | Building America Solution Center
- Stormwater Management: Disconnecting Downspouts and Impervious Surfaces
- Downspout extension brief — University of Maryland Extension
- Downspout Drainage: Where Roof Water Should Go | TRB
FAQ
What is the best solution for downspouts draining too close to the foundation?
The most reliable fix is a surface extension or buried solid pipe that terminates at least 5 feet from the foundation for crawlspace homes and at least 10 feet for basement homes, combined with correcting any grade that slopes back toward the house.
What is the best way to disperse water from a downspout?
Daylighting a buried smooth-walled PVC pipe to a lower point in the yard is the most durable method. For simpler situations, a rigid surface extension with a splash block and loose rock at the outlet handles most residential volumes effectively.
What is the best downspout drainage option for a flat yard?
On flat lots without a natural low point, a catch basin connected to a buried pipe that exits at the property edge, or a properly sized dry well in permeable soil, are the most practical options. In Kansas City’s clay-heavy soils, professional grading and drain tile installation often outperform DIY dry wells.
Why do my downspouts overflow in heavy rain?
Overflow usually means the gutters or downspouts are undersized for the roof area, partially clogged, or pitched incorrectly. Check that each downspout handles no more than 100 square feet of roof per square inch of downspout cross-section, and clear any debris at the elbow or buried inlet before the next storm.