
Trew Landscape Blog
Install It Right: Driveway Lighting Ideas with 8–10 ft Spacing
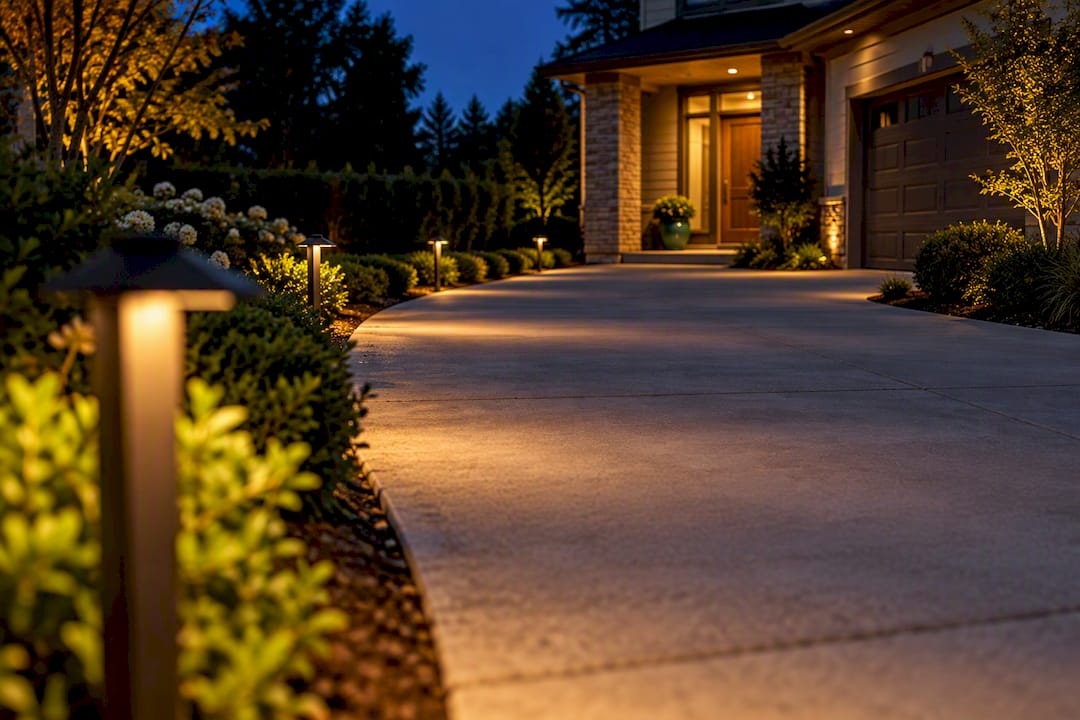
Install It Right: Driveway Lighting Ideas with 8–10 ft Spacing ! Spaced driveway lights guiding a residential approach The most practical driveway lighting approach layers three things: low profile edge lights for everyday guidance, a few well-placed bollards or moonlighting fixtures for drama, and warm, shielded LEDs that cut glare instead of adding it.
Install It Right: Driveway Lighting Ideas with 8–10 ft Spacing
The most practical driveway lighting approach layers three things: low profile edge lights for everyday guidance, a few well-placed bollards or moonlighting fixtures for drama, and warm, shielded LEDs that cut glare instead of adding it. This combination keeps drivers and pedestrians safe without turning your driveway into a runway. The sections below cover spacing rules, fixture trade-offs, and the installation details that separate a driveway that looks designed from one that just looks lit.
TL;DR:
- Using a layered approach with low profile edge lights, bollards, and shielded LEDs ensures safety and aesthetic appeal without excessive glare.
- Fixtures should be spaced 8 to 10 feet apart on straight drives, staggered, and focused on decision points to avoid creating a runway effect.
- LED fixtures in the 2700K to 3000K range produce the most flattering, soft light, while solar fixtures are less reliable for primary driveway illumination.
- Proper installation habits, including transformer sizing with a 20% buffer, aiming after rain, and seasonal adjustments, extend fixture lifespan.
- Professional installation is recommended for complex wiring, long runs, or fixtures involving in-ground or hardscape integration to prevent costly rework.
Table of Contents
- Driveway Lighting Ideas for Every Type of Property
- Fixture Types: What Holds Up and What to Watch For
- Layout and Spacing Rules by Driveway Shape
- Installation, Aiming, and Maintenance That Actually Hold Up
- Why Layered Lighting Beats More Lumens
- Get Your Driveway Lighting Designed and Installed Right
- Sources
- FAQ
Driveway Lighting Ideas for Every Type of Property
Not every driveway needs the same fixtures. A short suburban drive and a quarter-mile country lane solve completely different problems, and matching the idea to the layout is what keeps a lighting plan from looking generic.
- Path or edge lights work best on shorter, straight drives where drivers need constant, low-level guidance along the pavement edge.
- Bollards hold up on long drives, sweeping curves, and anywhere you want to mark the entrance without a wall of small fixtures.
- In-ground or well lights and flush strips suit modern, minimalist homes since the fixture disappears into the hardscape by day.
- Moonlighting from mature trees casts a soft, dappled glow across long runs, cutting the number of ground fixtures you need on a big lot.
- Wall or soffit lights handle garage aprons and pedestrian zones where you want light close to the structure, not scattered across the pavement.
- Motion-sensor boosts add a security layer that only kicks on when needed, keeping baseline lighting soft while still lighting up for a car or visitor.
- Solar and hybrid fixtures offer a low-maintenance option for accent spots, though they trade off some reliability and brightness against wired systems.
- Decorative touches like lanterns, glass orbs, or seasonal string lights add personality around a porch or entrance without competing with the functional lighting doing the real work.
Design pros generally recommend layering ambient, task, and accent light rather than relying on one fixture type to do everything, which is why uplighting a specimen tree near the entrance often reads better than another row of path lights.
Fixture Types: What Holds Up and What to Watch For
Every fixture category has a sweet spot and a failure mode. Knowing both before you buy saves you from replacing half your driveway lighting two seasons in.
- Low-voltage LED path lights run on modest wattage, last years longer than incandescent equivalents, and depend on a properly sized transformer to stay bright at the far end of a run.
- Bollards and post lights define a style instantly, but they sit close to tire paths, so plan mounting locations around plow routes and turning radius.
- In-ground well lights need solid load ratings if they sit anywhere a car might roll over them, plus real drainage so winter freeze-thaw cycles do not crack the housing.
- Spot and uplights demand careful aiming; point one wrong and you get glare in a driver’s eyes instead of a lit tree canopy.
- Motion sensors and smart controls need thoughtful placement, or they will trigger on every passing car on the street instead of your own driveway traffic.
- Solar fixtures run fine for accent lighting but generally can’t match the brightness and reliability of low-voltage LED systems for a driveway you depend on every night.
Pro Tip: Stick with warm white LEDs in the 2700K to 3000K range for every fixture type on this list. Mixing warm and cool color temperatures along one driveway is one of the fastest ways to make a lighting plan look unfinished.
Layout and Spacing Rules by Driveway Shape
Spacing is where most driveway lighting plans go wrong. Too many fixtures spaced too evenly creates what installers call the runway effect: a landing strip look that feels institutional instead of inviting.
- Straight residential drives: Space path lights roughly 8 to 10 feet apart, staggered on alternating sides rather than lined up in matching rows. This creates depth instead of a runway effect.
- Long or rural drives: Skip evenly spaced fixtures altogether. Use a zone-based approach that focuses light on decision points — the entrance, sharp curves, and the approach to the garage — and fill the gaps between with moonlighting from trees.
- Circular drives: Keep a steady rhythm of low fixtures along the outer edge, then add one accent light on a center island or planting bed to give the loop a focal point.
- Gated entrances: Paired bollards or pillar uplights flanking the gate read as intentional design, marking the threshold without extra fixtures down the drive itself.
- Garage aprons: Shielded wall or soffit lights handle the parking area, while a separate, dimmer path light guides foot traffic to the front door so the two zones don’t blur together.
- Placement details that apply everywhere: Set fixtures 6 to 12 inches back from the pavement edge, and account for mower or snowplow lines before you commit to a final position.
Installation, Aiming, and Maintenance That Actually Hold Up
A good layout still fails if the power budget or aim is off. A handful of practical habits separate driveway lighting that looks sharp for a decade from lighting that flickers out in year two.
- Size your transformer with a 20% buffer above your calculated wattage load, since undersized transformers are one of the most common reasons LED fixtures dim at the far end of a long run.
- Walk the driveway after dark once fixtures are installed, then test and adjust aim again after rain, since wet pavement reflects glare that dry pavement doesn’t show.
- Recheck aim seasonally, since tree growth, snow accumulation, and mulch refreshes all shift how light hits the ground.
- Clean fixture lenses and check connectors for corrosion at least once a year, especially at any point where wiring runs near sprinkler heads or planting beds.
- Choose fixtures with accessible, weatherproof connectors, and plan wire runs before pavers or concrete go down rather than after.
- Pair a photocell for automatic dusk-to-dawn operation with a timer or astronomical clock, and aim any motion sensors inward so passing street traffic doesn’t set them off all night.
Pro Tip: Map your wire runs on paper before any paver installation work starts. Retrofitting conduit under a finished driveway costs far more than running it during the original build.
Why Layered Lighting Beats More Lumens
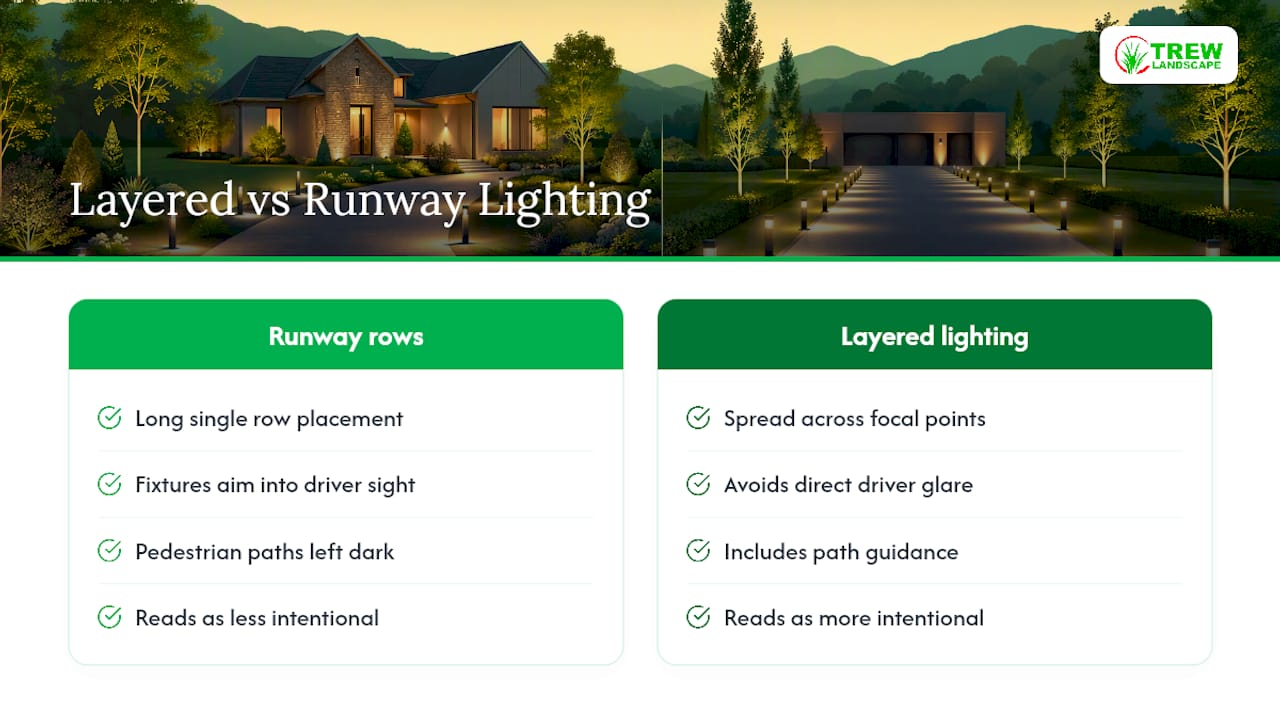
More fixtures rarely means better lighting. Layered lighting, spread across a few focal points instead of packed into one long row, almost always reads as more intentional and does a better job guiding the eye.
The biggest mistakes we see are runway rows down straight drives, fixtures aimed straight into a driver’s line of sight, and pedestrian paths left dark while the driveway itself gets all the attention. A simple test catches most of these: walk the full length of the drive after dark, including the path to the front door, and note anywhere you squint or lose your footing. Fix those two spots first.
— Trew Landscape LLC
Get Your Driveway Lighting Designed and Installed Right
Professional driveway lighting installers handle the parts of driveway lighting that are easy to get wrong on your own: transformer sizing, wire runs planned before hardscaping goes in, and fixture aim tested after dark instead of guessed at during daylight.

Our landscape lighting service covers full design, low-voltage installation, and ongoing maintenance plans, so you’re not stuck troubleshooting a failed connector or a dim run six months later. DIY works fine for a few solar stake lights along a short walkway. Once you’re talking about in-ground well lights, long wire runs, or coordinating fixtures with new pavers, professional installation avoids the rework that comes with undersized transformers or buried connections nobody planned for. If you’re also refreshing plantings around your fixtures, pairing that with drought-resilient landscaping cuts long-term upkeep too. Reach out through our services page to schedule a design consultation and get a plan built around your specific driveway.
Sources
Technical claims on spacing, color temperature, and transformer sizing draw on professional lighting design guides and glare-control research, all linked throughout this article. Full source links appear inline above.
- Best Way to Light Up a Driveway: Professional Techniques for Safety, Style, and Curb Appeal
- How to Design a Professional Landscape Lighting Layout
- How to light a driveway without creating too much glare – Dazuma®
FAQ
How far apart should driveway path lights be spaced?
Most residential drives work well with fixtures spaced 8 to 10 feet apart, staggered on alternating sides rather than lined up evenly. This avoids the runway look while still giving drivers consistent visual guidance.
Is solar or low-voltage LED better for driveway lighting?
Low-voltage LED systems generally outperform solar fixtures in brightness and reliability for permanent installations. Solar works fine for accent lighting in sunny spots, but it isn’t the best choice as your primary safety lighting on a driveway you use every night.
What color temperature works best for driveway lights?
Warm white LEDs in the 2700K to 3000K range flatter stone, brick, and landscaping while keeping light output soft instead of harsh. Cooler color temperatures are better reserved for dedicated security zones, not everyday driveway lighting.
Where should motion sensors be placed to avoid false triggers?
Aim motion sensors inward toward your own driveway and walkways rather than out toward the street, so passing cars and pedestrians don’t set off lights all night. Placement height and angle matter too, since a sensor mounted too low or too wide often triggers on wind-blown branches or small animals.
When should I hire a professional instead of installing driveway lights myself?
DIY suits a handful of solar stake lights or a simple plug-in path light kit. Once your plan involves in-ground fixtures, long low-voltage wire runs, or coordinating lighting with new pavers or concrete, hiring a pro like Trew Landscape LLC avoids the rework that comes from undersized transformers or wiring buried in the wrong place.