

A leaning retaining wall is either an emergency or a manageable repair — and the difference comes down to how fast it’s moving, how far it’s tilted, and what’s behind it. Here’s what to do right now.
If the wall is actively moving, cracking loudly, or supporting a structure above it, evacuate the area immediately and call a structural engineer or your local building department before doing anything else.
For walls that appear stable but visibly lean, take these steps in the next hour:
- Secure the area. Keep people, pets, and vehicles away from both sides of the wall until you’ve assessed it.
- Document everything. Take time-stamped photos from multiple angles. Note any cracks, bulging soil, or displaced blocks.
- Stop water sources. Redirect downspouts, turn off irrigation near the wall, and check whether surface water is pooling behind it.
- Measure the lean. Hold a level against the face of the wall and measure the gap at the top or bottom. Record it in writing.
- Call a professional. For any wall taller than 4 feet, or one showing horizontal cracking or soil movement, contact a licensed contractor or structural engineer within 24–48 hours.
A wall that has shifted even slightly has compromised structural integrity — don’t assume it’s cosmetic.
Table of Contents
- Why retaining walls lean: the common failure mechanisms
- How to assess a leaning retaining wall safely
- Repair vs. replace: how to decide and when to call an engineer
- DIY-safe steps you can take right now
- Professional repair methods explained
- What repairs typically cost and how long they take
- How to prevent future lean and maintain your wall
- Why cosmetic fixes fail: the engineering reality
- Key Takeaways
- What the crew at Trew Landscape LLC sees in the field
- Trew Landscape LLC can assess and fix your leaning wall
- Useful sources and how to find licensed help
- FAQ
Why retaining walls lean: the common failure mechanisms
Most retaining walls don’t fail overnight. The lean you’re seeing today usually started months or years ago, driven by one or more of these root causes.
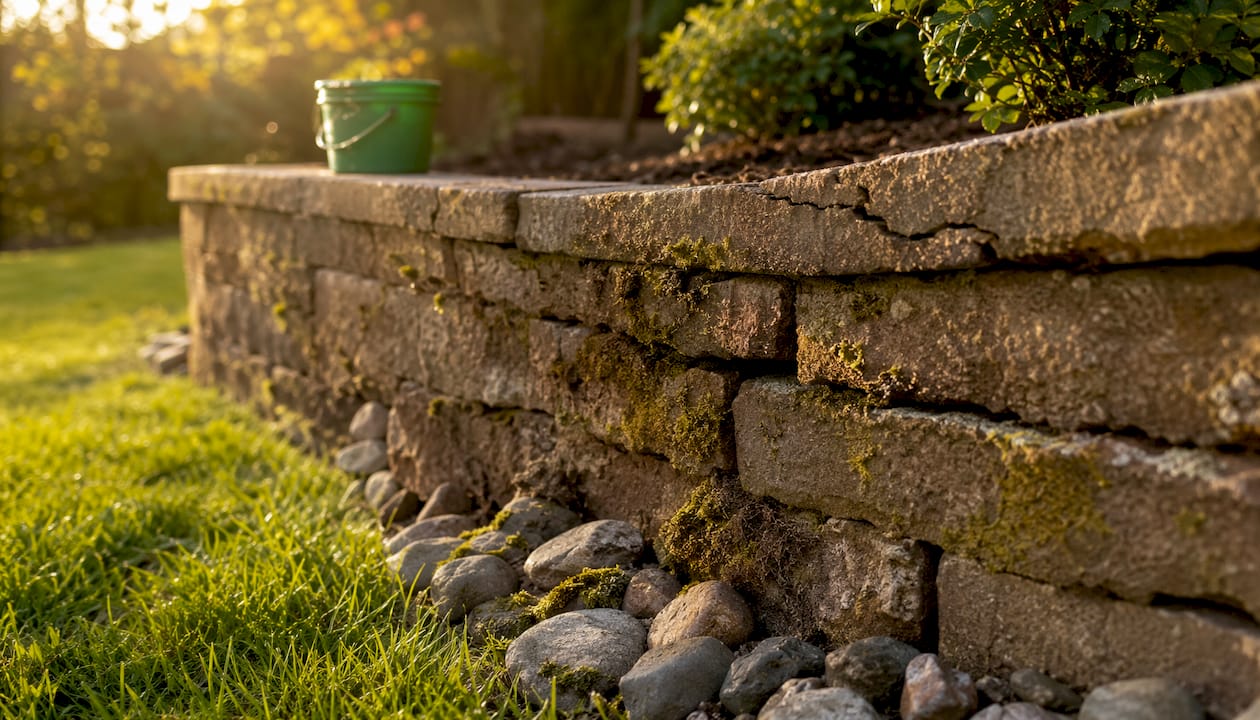
How pressure builds behind a wall
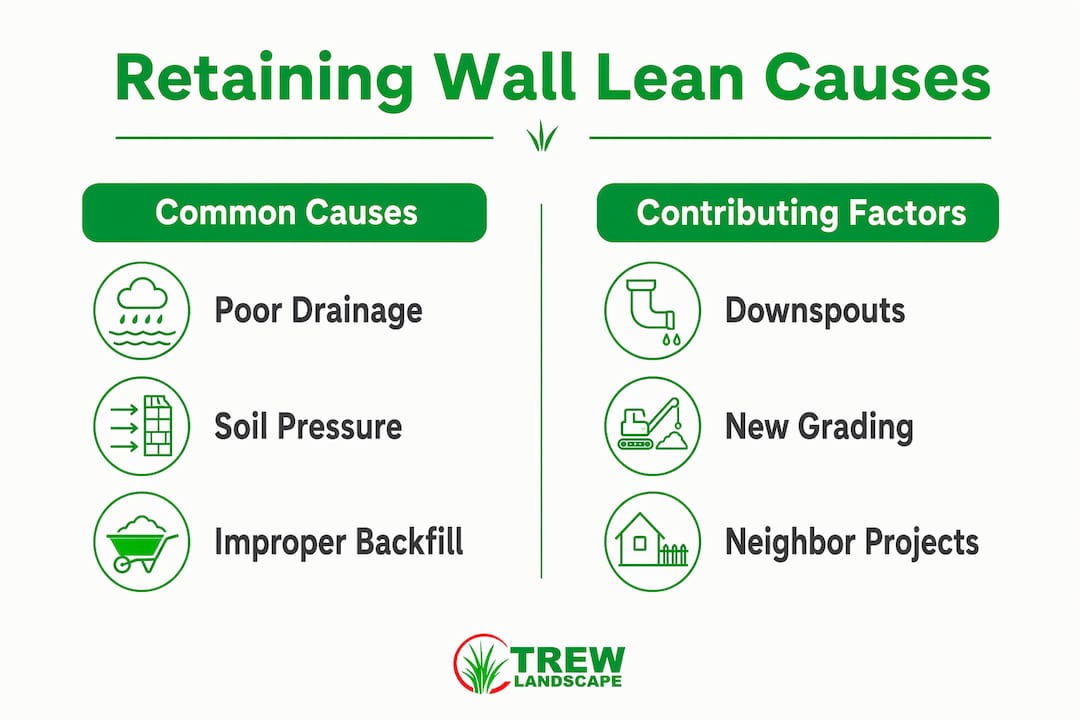
Retaining walls resist two forces: lateral earth pressure (the weight of soil pushing outward) and hydrostatic pressure (water pressure when drainage fails). When drainage is blocked, saturated soil exerts significantly more lateral pressure than drained soil. That extra load is what tips a wall from “stable” to “failing.”
Common causes of wall lean:
- Blocked or absent weep holes. Water has nowhere to escape, so pressure builds behind the wall face.
- Clay or cohesive backfill. Clay absorbs water, swells, and continuously increases pressure against the wall — often for years after construction.
- Inadequate footing or embedment depth. A wall without sufficient embedment below grade can rotate or slide forward under load.
- Surcharge loads. Vehicles parked near the top of the wall, heavy planters, or new structures added after construction all increase the load the wall was never designed to carry.
- Frost heave. In climates with freeze-thaw cycles, soil expansion pushes walls outward each winter. Repeated cycles accumulate permanent displacement.
- Rebar corrosion or section loss. In concrete walls, corroding steel loses tensile strength over time. A wall can perform fine for years, then fail suddenly when corrosion reaches a critical threshold.
- Poor original construction. Walls built without engineered drawings, using undersized footings, or with inadequate drainage blankets are the most common candidates for early failure.
Pro Tip: Check your gutters and downspouts before anything else. A single downspout discharging near the top of a retaining wall can saturate the backfill and double the lateral pressure within a few rain events.
Look for recent site changes too: new grading uphill, a neighbor’s construction project, or a new driveway near the wall’s top edge. Any of these can add surcharge load the original design never accounted for.
How to assess a leaning retaining wall safely
Before you call anyone, gather data. A clear inspection report with photos and measurements helps contractors and engineers give you accurate quotes and faster diagnoses.
Step-by-step inspection checklist:
- Check for visible lean. Stand back 20–30 feet and sight along the wall face. A straight wall should look plumb. Any forward tilt is a red flag.
- Look for horizontal cracks. Horizontal cracks near the base or mid-height indicate bending stress — the wall is being pushed beyond its design capacity. These are more serious than vertical cracks, which often result from thermal movement or settlement.
- Inspect for soil bulging. Soil pushing out at the base (toe) or through the wall face suggests active movement.
- Check weep holes. Are they flowing after rain? Blocked weep holes mean water is trapped behind the wall.
- Look for spalling or exposed rebar. Concrete that’s flaking off or showing rust-stained steel means the structural core is compromised.
- Check the footing area. Settlement or erosion at the base can cause the entire wall to rotate forward.
- Note any soil sheening or seepage. Water weeping through the wall face or at the base indicates high hydrostatic pressure.
How to measure lean at home
You need a 4-foot level, a tape measure, and a helper. Hold the level vertically against the wall face. The gap between the level and the wall at the top or bottom tells you the offset. For a 4-foot level, a 1-inch gap equals roughly a 1:48 lean ratio. Record this number and the date. Recheck in 48–72 hours. If the gap has grown, the wall is actively moving — stop monitoring and call a professional immediately.

Documentation guidance: Photograph from fixed reference points (a fence post, a corner of the house) so you can compare images over time. Include a ruler or tape measure in the frame for scale. Time-stamp every photo. A simple spreadsheet with date, lean measurement, and crack width is enough to give a contractor or engineer a clear picture of how fast things are changing.
Visible forward tilt or horizontal cracking are high-priority red flags — even one clear sign should trigger a professional assessment, not a wait-and-see approach.
Repair vs. replace: how to decide and when to call an engineer
Not every leaning wall needs to come down. But some do, and confusing the two is expensive. Here’s how to think through it.
Signs that require an engineer call today:
- The wall is moving visibly or measurably over hours or days
- Horizontal cracks run continuously across the wall face
- The wall supports a structure (deck, driveway, building foundation) above or below it
- Utilities run through or near the retained soil
- The wall is taller than 4 feet and shows any structural distress
Repair vs. replace criteria
| Condition | Likely Repair | Likely Replacement |
|---|---|---|
| Lean degree | Less than 1–2 inches per 4 feet | More than 2 inches per 4 feet, or accelerating |
| Crack pattern | Vertical, hairline, isolated | Horizontal, continuous, or stepped |
| Foundation condition | Footing intact, no settlement | Footing eroded, rotated, or undermined |
| Failure type | Local (individual units or section) | Global (entire soil mass moving) |
| Wall age and material | Under 20 years, no corrosion | Older concrete with rebar loss, or timber rotting |
| Surcharge present | None, or easily removed | Permanent structure or heavy load above |
Global vs. local failure — why it matters
Global failure involves the entire soil mass moving as a unit, not just the wall face. You’ll recognize it by soil movement uphill of the wall, cracking in the ground surface behind the wall, or the wall rotating at its base rather than bending. Local failure affects individual blocks, a single panel, or a short section. Local failures are often repairable. Global failures almost always require engineered stabilization or full reconstruction.
When the 1:3 rule applies — and when it doesn’t
The 1:3 rule is a design guideline, not a building code. It is often interpreted as requiring either an embedment depth or a base width equal to one-third of the exposed wall height. This rule is only a starting point for small garden walls; for walls over about 1 meter (roughly 3 feet) in height or any wall under surcharge, a geotechnical assessment and engineered design are necessary. Do not rely on the 1:3 rule alone to determine safety.
DIY-safe steps you can take right now
There’s a clear line between what’s safe for a homeowner to do and what requires a licensed contractor. Stay on the right side of it.
Safe DIY tasks (non-structural, temporary):
- Clear blocked weep holes. Use a wire or a garden hose to flush debris from existing weep holes. This alone can relieve significant hydrostatic pressure.
- Extend downspouts. Route downspouts at least 6 feet away from the wall using corrugated drain pipe. This is one of the highest-impact, lowest-cost fixes available.
- Regrade surface drainage. Use a shovel and topsoil to create a gentle slope away from the wall’s top edge so rainwater sheds away rather than soaking into the backfill.
- Remove light surcharge. Move heavy planters, stored firewood, or equipment away from the top of the wall. Reducing the load reduces pressure immediately.
- Add gravel behind accessible sections. If the top of the backfill is exposed and accessible, adding a few inches of clean crushed stone near the wall face can improve drainage while you wait for professional repair.
Tools and materials you’ll need:
- Round-point shovel and hand tamper
- Corrugated flexible drain pipe (4-inch diameter)
- Clean crushed stone or pea gravel
- Safety glasses and work gloves
- A level and tape measure for monitoring
For stormwater drainage solutions that go beyond surface fixes, professional drain tile installation addresses the root cause rather than the symptom.
What not to attempt: Do not try to push or re-plumb the wall. Do not core-drill anchors into the wall face. Do not excavate behind a leaning wall without engineering oversight. These are structural tasks, and attempting them without proper shoring can trigger sudden collapse.
Pro Tip: Temporary fixes buy time — they don’t fix the problem. Clearing weep holes and regrading surface drainage can slow deterioration, but a wall that’s already leaning needs a professional assessment to determine whether the underlying cause has been addressed.
Professional repair methods explained
When a wall needs more than surface drainage work, contractors and engineers have several proven options. Understanding them helps you evaluate proposals and ask the right questions.
Drainage retrofit
A French drain or perforated collector pipe installed at the base of the wall, surrounded by a gravel drainage blanket, addresses the most common failure cause directly. This is often the first repair recommended for walls with hydrostatic-driven lean and an otherwise intact structure. Proper granular backfill and a gravel drainage blanket are industry standards — if the original wall lacked them, a retrofit is the minimum intervention.
Soil reinforcement with geogrid
Geogrid layers are woven into the retained soil mass to create a mechanically stabilized earth (MSE) system. This is most appropriate when the wall needs to retain a high fill but the foundation is still sound. It typically requires excavating behind the wall and rebuilding in lifts.
Tiebacks and soil anchors
Helical anchors or grouted tiebacks drilled through the wall and into stable soil behind it can arrest movement and add tensile resistance. This method works well for concrete or masonry walls that are structurally intact but being pushed by excessive lateral load. It’s less invasive than a full rebuild.
Counterforts and buttresses
Concrete or masonry buttresses added to the front face of the wall increase its resistance to overturning. These are visible and affect aesthetics, but they’re effective for walls where the footing is sound and the failure is rotational rather than sliding.
Partial dismantle and rebuild
When a section has failed locally, contractors can remove and reconstruct that section with correct backfill, drainage, and embedment. This is more cost-effective than a full rebuild when the failure is truly isolated.
Full reconstruction
When global failure is confirmed, or when the wall is too deteriorated to repair economically, full reconstruction is the right answer. A retaining wall rebuild done correctly — with engineered drawings, proper embedment, granular backfill, and a collector drain — should last decades.
Questions to ask any contractor:
- Does this project require a permit, and will you pull it?
- Will you provide engineered drawings or coordinate with a geotechnical engineer?
- What factor of safety does the design use?
- What’s your warranty, and what does it cover?
- Who handles excavation, disposal, and landscape restoration?
Pro Tip: Any contractor who proposes pushing the wall back upright and patching cracks without addressing drainage or backfill is describing a repair that will fail again. Ask specifically what they’re doing about the root cause.
What repairs typically cost and how long they take
Costs vary significantly based on wall height, length, access, soil conditions, and whether permits and engineering are required. These ranges reflect typical U.S. residential projects.
Typical cost ranges:
- Drainage retrofit only (French drain, gravel blanket, outlet): $1,500–$6,000 for a standard residential wall section, depending on length and access.
- Tieback or anchor installation: $3,000–$12,000+ depending on wall height, number of anchors, and soil conditions.
- Partial dismantle and rebuild (one section, 20–30 linear feet): $5,000–$20,000 depending on material, height, and site access.
- Full reconstruction: $10,000–$50,000+ for a typical residential wall. Taller walls, difficult access, or engineered concrete construction push costs toward the higher end.
For a detailed local estimate, the retaining wall cost guide for Kansas City breaks down pricing by material and project type.
Timeline expectations:
- Inspection and assessment: 1–3 days for a contractor visit; 1–2 weeks if a geotechnical engineer is engaged for soil testing.
- Permitting: 2–8 weeks depending on your municipality. Walls over 4 feet typically require a permit in most U.S. jurisdictions.
- Construction: 1–3 days for drainage retrofits; 1–2 weeks for partial rebuilds; 2–4 weeks for full reconstruction with excavation and restoration.
Budget for contingencies. Difficult soil, unexpected utilities, or poor original construction often add 15–25% to initial estimates. If the wall is in a tight space with no equipment access, hand excavation alone can double labor costs.
How to prevent future lean and maintain your wall
A well-maintained retaining wall can last 20–50 years. Most premature failures trace back to deferred maintenance and drainage neglect.
Seasonal maintenance checklist:
- After every significant storm, check that weep holes are flowing and that no soil is washing out at the base.
- Each spring, inspect the wall face for new cracks, displaced blocks, or changes in alignment. Compare to your photo record.
- Keep vegetation trimmed away from the wall face. Root systems from large shrubs or trees can destabilize footings and crack wall panels over time.
- Maintain positive drainage grade at the top of the wall — soil should slope away from the wall, not toward it.
- Clear debris from drainage outlets before winter to prevent freeze-thaw blockage.
Do and don’t list for homeowners:
- Do divert roof runoff and surface water away from the retained slope.
- Do use free-draining granular backfill (crushed stone, clean gravel) if you ever disturb the area behind the wall.
- Do schedule a professional inspection after major storms, after any grading changes nearby, or every 3–5 years for walls older than 15 years.
- Don’t plant large trees within 10 feet of the wall base.
- Don’t park vehicles or place heavy equipment near the top of the wall.
- Don’t add fill or raise the grade behind the wall without engineering review.
Preventive design basics
For anyone planning a new wall or a full rebuild, the fundamentals that prevent lean are straightforward: adequate embedment depth (at minimum, follow the 1:3 guideline as a starting point, then get engineering for anything over 3–4 feet), a gravel drainage blanket at least 12 inches wide behind the wall face, a perforated collector pipe at the base, and clean granular backfill compacted in controlled lifts. The retaining wall construction guide covers these principles in detail for Kansas City conditions.
Why cosmetic fixes fail: the engineering reality
The pattern is consistent across forensic case studies: a wall leans, someone patches the face or pushes it back, and within a few years it fails again. The reason is almost always the same.
Quick cosmetic patches that don’t address drainage, backfill, or foundation conditions re-fail because the forces driving the failure are still present. Patching the surface doesn’t reduce lateral pressure. Pushing a wall back upright without excavating and correcting the backfill doesn’t fix the soil conditions that caused the lean. The wall moves again, usually faster the second time.
Retaining wall design crosses geotechnical and structural disciplines; many failures are revealed only after site testing and forensic evaluation — and the root cause is almost never visible from the wall face alone. Drainage and backfill are the primary failure drivers in the majority of documented cases, and correcting them is the single most effective remedial action available.
Forensic failure analysis consistently shows that geotechnical collapses result from combinations of factors: poor drainage, inadequate compaction, surcharge loads, and sometimes corrosion that developed slowly over years before becoming visible. A wall that looked fine for a decade can fail in a single wet season when one of those factors reaches a tipping point.
Global failures, where the entire soil mass behind the wall is moving, require geotechnical solutions — not patch repairs. The distinction between global and local failure is what drives whether a contractor can repair a section or whether a geotechnical engineer needs to redesign the entire system.
Stop DIY efforts and retain an engineer when: the wall is actively moving, you suspect bearing failure at the footing, the wall is taller than 4 feet, or there’s a surcharge load above. Those conditions put the project outside the range where field experience alone is sufficient.
Key Takeaways
A leaning retaining wall almost always traces back to drainage failure or poor backfill — fix the root cause first, or any structural repair will eventually fail again.
| Point | Details |
|---|---|
| Drainage is the primary cause | Saturated soil exerts significantly more lateral pressure than drained soil; clearing weep holes and rerouting water is the first step. |
| Global vs. local failure | Local failures (individual sections) may be repairable; global failures (entire soil mass moving) require engineered stabilization or full reconstruction. |
| Safe DIY limits | Homeowners can clear drainage, remove surcharge, and regrade surface water — but should never attempt to re-plumb or anchor a leaning wall. |
| Cost and timeline | Drainage retrofits run $1,500–$6,000; full rebuilds typically cost $10,000–$50,000+ depending on height, access, and materials. |
| Trew Landscape LLC | Offers retaining wall inspection, drain tile installation, and full reconstruction in Kansas City — contact them for a site assessment and written estimate. |
What the crew at Trew Landscape LLC sees in the field
The most common pattern in the Kansas City area isn’t dramatic — it’s a wall built without a drainage blanket, backfilled with native clay, and left alone for 10–15 years. By the time a homeowner notices the lean, the hydrostatic pressure has been building for years. The wall didn’t fail suddenly; it was failing slowly the whole time.
A few field observations that come up repeatedly:
- Blocked weep holes are almost universal in walls that are 10+ years old. Silt and root debris seal them off, and nobody notices until the wall starts to move.
- Surcharge is often accidental. A homeowner adds a raised garden bed, parks a trailer near the wall for a season, or a neighbor’s contractor stockpiles soil nearby. None of these feel significant, but they add up.
- Drainage retrofits fix a surprising number of walls that looked like they needed full replacement. When the footing is still sound and the lean is under 2 inches per 4 feet, installing a collector drain and replacing clay backfill with clean gravel has stabilized walls that homeowners were ready to tear out.
- Walls that support slopes need slope-specific assessment — the retained soil mass is larger and the consequences of failure are more serious. Local slope conditions in Kansas City, particularly in areas with expansive clay soils, make drainage design especially critical.
When Trew Landscape LLC inspects a leaning wall, the process starts with a site visit to document lean, crack patterns, drainage conditions, and any surcharge sources. When the situation calls for it, the team coordinates with a structural or geotechnical engineer before recommending a repair path. Homeowners get a clear written assessment and an honest recommendation — repair when repair makes sense, rebuild when it doesn’t.
Trew Landscape LLC can assess and fix your leaning wall
When you’re looking at a wall that’s shifted and you’re not sure whether it’s a drainage fix or a full rebuild, the fastest way to get clarity is a professional site visit.

Trew Landscape LLC handles the full range of retaining wall work in Kansas City: drain tile installation to address hydrostatic pressure, hardscape design and reconstruction for walls that need rebuilding, and concrete contractor services for poured concrete walls and footings. The inspection process covers lean measurement, crack documentation, drainage assessment, and a clear recommendation on whether repair or replacement makes sense for your specific wall.
,.
Pricing is transparent — no vague estimates. Request a site inspection and written quote at trewlandscape.com to get a clear picture of what your wall needs and what it will cost.
Useful sources and how to find licensed help
Authoritative references:
- Inspection of Old Retaining Walls (NYC DOB guidance) — Municipal inspection checklist covering failure modes, classification, and red flags. A practical template for homeowners and inspectors alike.
- Beyond the Building Code: Forensic Failure Analysis of Retaining Walls — Peer-reviewed paper on how forensic investigations differ from standard design practice and why site-specific testing matters.
- Evaluation of Causes of Retaining Wall Failure — Academic analysis of common failure mechanisms including hydrostatic pressure, clay backfill, and inadequate drainage.
- Concrete Retaining Wall Failure Causes Guide — Practical overview of warning signs, drainage requirements, and why cosmetic repairs fail.
- NYSDOT Retaining Wall Inspection and Inventory Procedures — State-level inspection framework covering failure modes, appraisal procedures, and data collection standards.
How to find a licensed structural or geotechnical engineer:
- Search the National Society of Professional Engineers (NSPE) directory for licensed PEs in your state.
- For geotechnical specialists, the Geo-Institute of ASCE maintains a member directory.
- Ask any engineer you contact whether they carry professional liability (E&O) insurance, whether they’ve worked on residential retaining walls specifically, and whether they’ll provide a written report with a factor-of-safety calculation.
- Check your local building department’s website for permit requirements and approved engineer lists — many municipalities publish these for free.
Local resource: Trew Landscape LLC’s retaining wall service page covers inspection, repair, and reconstruction options for Kansas City homeowners and property managers.
FAQ
How do you fix a retaining wall that is leaning?
The fix depends on the cause and severity. Start by clearing blocked weep holes and rerouting surface water away from the wall. For structural lean, professional options include drainage retrofits, tiebacks, soil anchors, or full reconstruction — the right method depends on whether the failure is local or global and whether the footing is still sound.
Is a leaning retaining wall dangerous?
Yes, potentially. A wall showing horizontal cracks, active movement, or soil bulging at the base can collapse without warning. Secure the area, stop water sources near the wall, and get a professional assessment within 24–48 hours if you see any of those signs.
How far can a wall lean before it’s a serious problem?
Any measurable lean warrants monitoring, but more than 1–2 inches of offset per 4 feet of wall height — or any lean that’s actively increasing — should be assessed by a licensed contractor or structural engineer promptly. Rapid movement at any lean angle is an emergency.
What is the 1:3 rule for retaining walls?
The 1:3 rule is a design guideline suggesting that a wall’s embedment depth or base width should equal roughly one-third of its exposed height. It’s a useful starting point for small garden walls, but it doesn’t replace engineered design for walls over 3–4 feet tall or walls carrying surcharge loads.
When should I call a structural engineer instead of a contractor?
Call an engineer when the wall is taller than 4 feet, when it’s actively moving, when it supports a structure above or below it, or when a contractor recommends a repair but can’t explain what’s causing the lean. Trew Landscape LLC coordinates with engineers when site conditions call for it and can help you determine the right path forward.