
Trew Landscape Blog
Low Voltage Landscape Lighting: A Homeowner's Guide
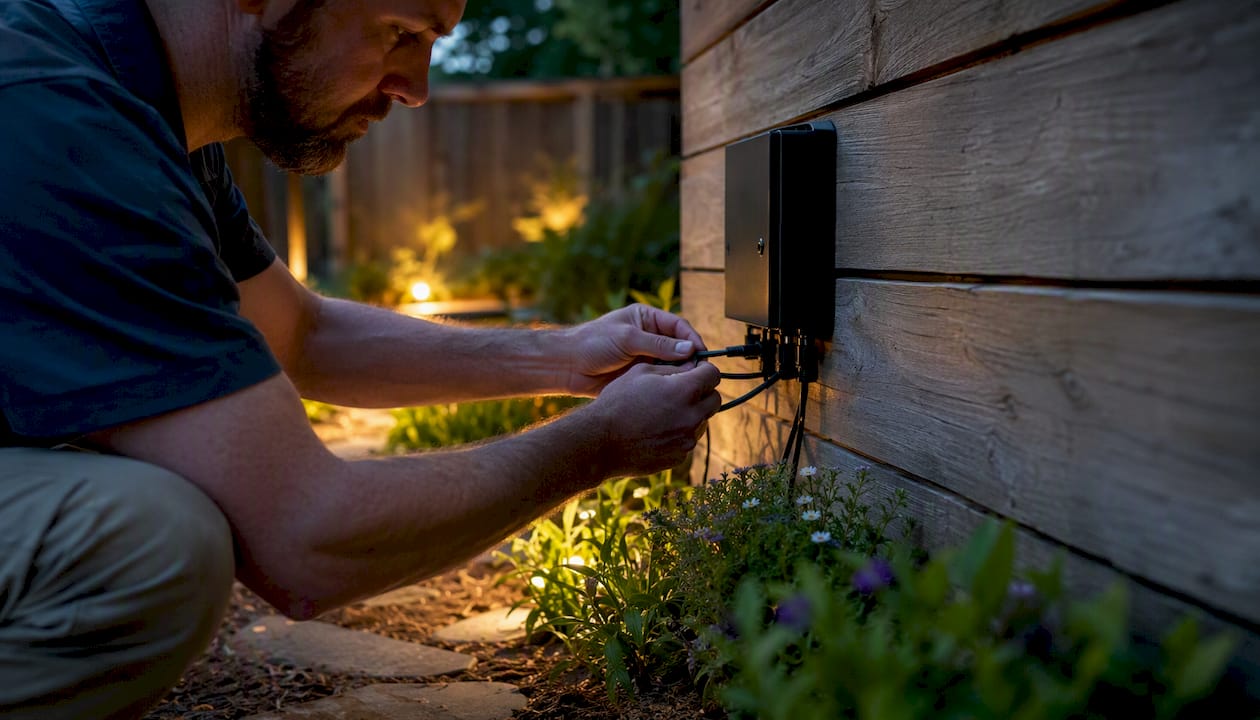
Low Voltage Landscape Lighting: A Homeowner's Guide ! Hands wiring low voltage landscape lighting outdoors Low voltage landscape lighting runs on transformer-powered 12V (or 24V) systems that step your home's standard 120V supply down to a safe, workable level.
Low Voltage Landscape Lighting: A Homeowner’s Guide
Low voltage landscape lighting runs on transformer-powered 12V (or 24V) systems that step your home’s standard 120V supply down to a safe, workable level. For most residential yards, it’s the right call: safer to touch, cheaper to run with LEDs, and flexible enough to reposition fixtures without calling an electrician. Under NEC Article 411 and NFPA 70, these systems must use listed transformers and listed luminaires, and secondary wiring must follow the manufacturer’s listing.
Here’s the short version for homeowners deciding what to do next:
- Small yard, simple layout: Buy a listed LED kit sized to your planned fixture wattage, add 20% headroom to the transformer VA rating, and follow the step-by-step install below.
- Runs longer than 150 feet, near a pool, or requiring a permit: Hire a licensed professional. Voltage drop and code compliance get complicated fast.
- Not sure which category you’re in: Read the transformer-sizing section and the “when to hire a pro” section before ordering anything.
Trew Landscape LLC offers professional design and installation services for Kansas City homeowners with larger or more complex landscape lighting projects.
Key Takeaways
A properly sized transformer, listed components, and a voltage check at every fixture are the three things that separate a low-voltage landscape lighting install that lasts from one that fails within a season.
| Point | Details |
|---|---|
| Size the transformer correctly | Total fixture wattage × 1.2 gives your minimum transformer VA; choose the next standard size up. |
| Test voltage at every fixture | Target 10.8V–12V at each fixture; below 10.8V causes dimming and shortened LED life. |
| Use heavier wire for long runs | Upgrade from 14/2 to 12/2 or 10/2 for runs over 100 feet to control voltage drop. |
| Follow NEC Article 411 near water | Wet-contact installations must not exceed 15VAC; pool proximity triggers Article 680 rules. |
| Hire Trew Landscape LLC for complex projects | Runs over 150 feet, multiple circuits, or near-water installs warrant professional design and commissioning. |
Table of Contents
- What is low voltage landscape lighting and why do homeowners choose it?
- What does a starter kit include, and what will you buy separately?
- How do you size the transformer and calculate voltage drop?
- How to install low voltage landscape lights: a DIY checklist
- How do you choose fixtures and place them for the best effect?
- What safety rules and U.S. codes apply to low-voltage landscape lighting?
- What do low voltage landscape lighting kits and installs cost?
- How do you maintain and troubleshoot a low voltage system?
- When does it make sense to hire a professional?
- The honest trade-off between DIY and professional installation
- Professional landscape lighting installation in Kansas City
- Sources
- FAQ
What is low voltage landscape lighting and why do homeowners choose it?
A low-voltage outdoor lighting system uses a listed transformer to convert 120V household current to 12V (sometimes 24V) on the secondary side. That secondary circuit is classified as a Class 2 system under the NEC, which means the wiring rules are far less restrictive than for full line-voltage circuits. You can bury the cable shallowly, use snap-on connectors, and move fixtures without a permit in most jurisdictions.
The practical benefits stack up quickly. VOLT Lighting’s comparison of 12V vs. line-voltage systems confirms what most installers already know: lower shock risk, easier fixture relocation, and lower installation cost than 120V systems for typical residential use. Pair that with LED fixtures, which use a fraction of the energy that halogen bulbs do and last far longer, and the running costs drop substantially. Malory Lighting’s breakdown of low-voltage benefits lists six advantages: safety, energy savings, design flexibility, simplified installation, durability, and environmental impact, all of which hold up in practice.
The main trade-offs: run distance is limited by voltage drop (more on that below), the transformer must be sized correctly, and any installation near water has tighter rules.
Pro Tip: Avoid mixing halogen and LED fixtures on the same transformer circuit. Halogens draw far more wattage, which throws off your load calculations and can cause LEDs to flicker.
What does a starter kit include, and what will you buy separately?
A typical low-voltage landscape lighting kit contains a transformer (often 150W or 300W), a length of 12/2 or 14/2 low-voltage cable, six to twelve fixtures (usually a mix of path lights and spotlights), snap-on or piercing connectors, mounting stakes, and a basic instruction sheet. Philips Hue’s consumer guide uses 40W and 95W PSU examples to illustrate how kit size scales with yard size, which gives you a useful mental model before you start counting fixtures.
What kits typically leave out:
- Additional wire: Most kits include one run. Larger yards need extra 12/2 or 10/2 cable sold by the foot or spool.
- GFCI-protected outlet: Your transformer plugs into an outdoor, weather-resistant receptacle. If you don’t have one already, an electrician needs to add it.
- In-use outlet covers: Required for cord-and-plug transformers outdoors.
- Photocell or smart timer: Basic kits include a manual or simple dial timer. Photocells, astronomical timers, and Wi-Fi-enabled transformers are sold separately.
- Extra fixtures: Kits are sized for a starter layout. Most homeowners add fixtures over time.
Magnetic vs. electronic transformers
Magnetic (toroidal) transformers are heavier and more tolerant of inductive loads and minor overloads. Electronic transformers are lighter and often include better built-in timers and dimming. Magnetic units tend to be more forgiving with mixed fixture types in permanent outdoor installs, while electronic units offer more features for integrated smart controls.
Pro Tip: Buy a transformer with multiple tap settings (12V, 13V, 14V, 15V). That flexibility lets you compensate for voltage drop on longer runs without rewiring.
How do you size the transformer and calculate voltage drop?
This is where most DIY installs go wrong. Undersizing the transformer trips the overload protection; ignoring voltage drop leaves fixtures at the end of a long run dim or flickering.
Step-by-step transformer sizing
- List every fixture and its wattage. Check the spec sheet, not the box art. LED fixtures typically run 3W–7W each.
- Total the wattage. Add all fixture watts together.
- Add 20% headroom. Multiply total watts by 1.2. That’s your minimum transformer VA rating.
- Choose the next transformer size up. Transformer ratings run in standard increments (150W, 300W, 600W). Pick the one above your calculated minimum.
Manufacturer transformer install instructions confirm this approach: size to total system VA, verify secondary voltage at each fixture, and use the cable-constant data provided to calculate voltage drop for your wire gauge and run length.
Worked example
Say you’re planning 12 path lights at 5W each and 4 spotlights at 7W each.
- Total wattage: (12 × 5) + (4 × 7) = 60 + 28 = 88W
- Add 20% headroom: 88 × 1.2 = 105.6W
- Choose transformer: a 150W unit covers this load with room to expand.
Wire gauge and voltage drop
Voltage drop increases with run length and total wattage, and decreases with heavier wire gauge. The practical rule: keep the voltage at the last fixture above 10.8V for a 12V system. Below that, LEDs dim noticeably and some fixtures shut off.
| Wire Gauge | Max Recommended Run (at ~100W load) | Notes |
|---|---|---|
| 12/2 or 14/2 | ~50 ft | Light loads only; small kits |
| 14/2 | ~100 ft | Standard kit wire; most starter installs |
| 12/2 | ~150 ft | Better for mid-size yards |
| 10/2 | ~200 ft | Long runs; heavier fixtures |
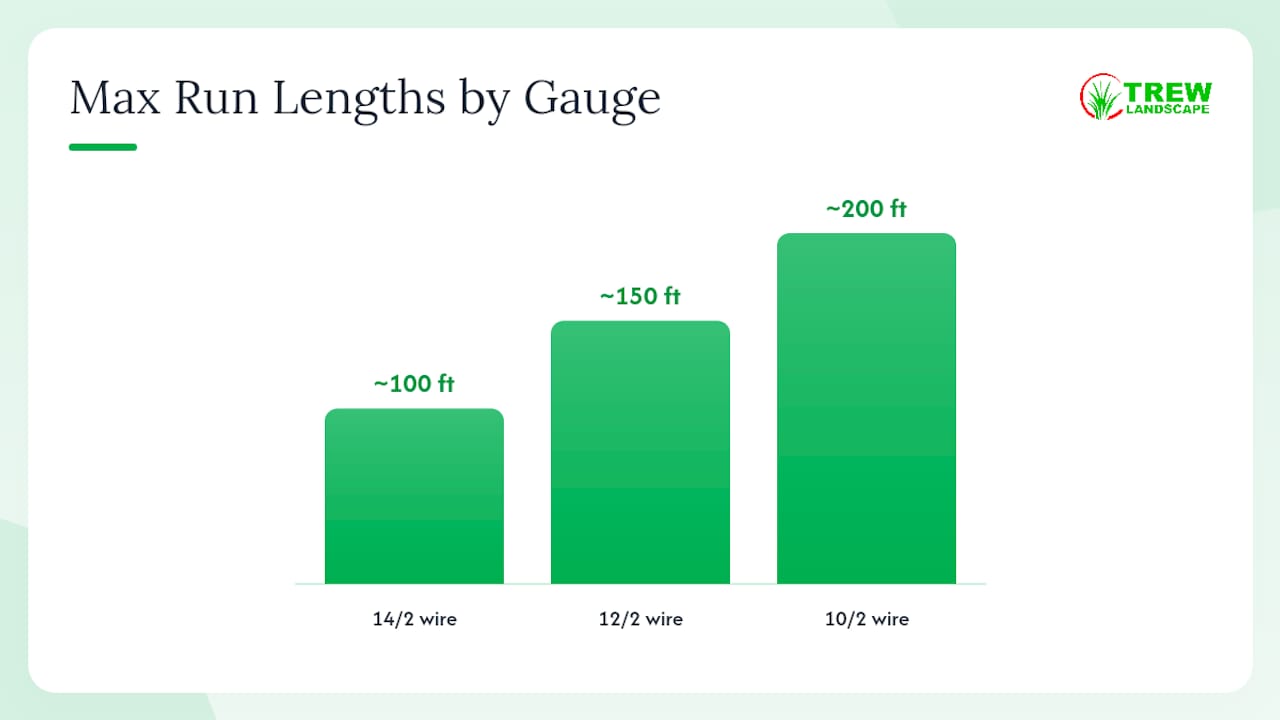
When a run exceeds your gauge’s practical limit, you have three options: use heavier wire, split the run into two shorter home-runs back to the transformer, or use a higher transformer tap (13V or 14V) to compensate for the expected drop.
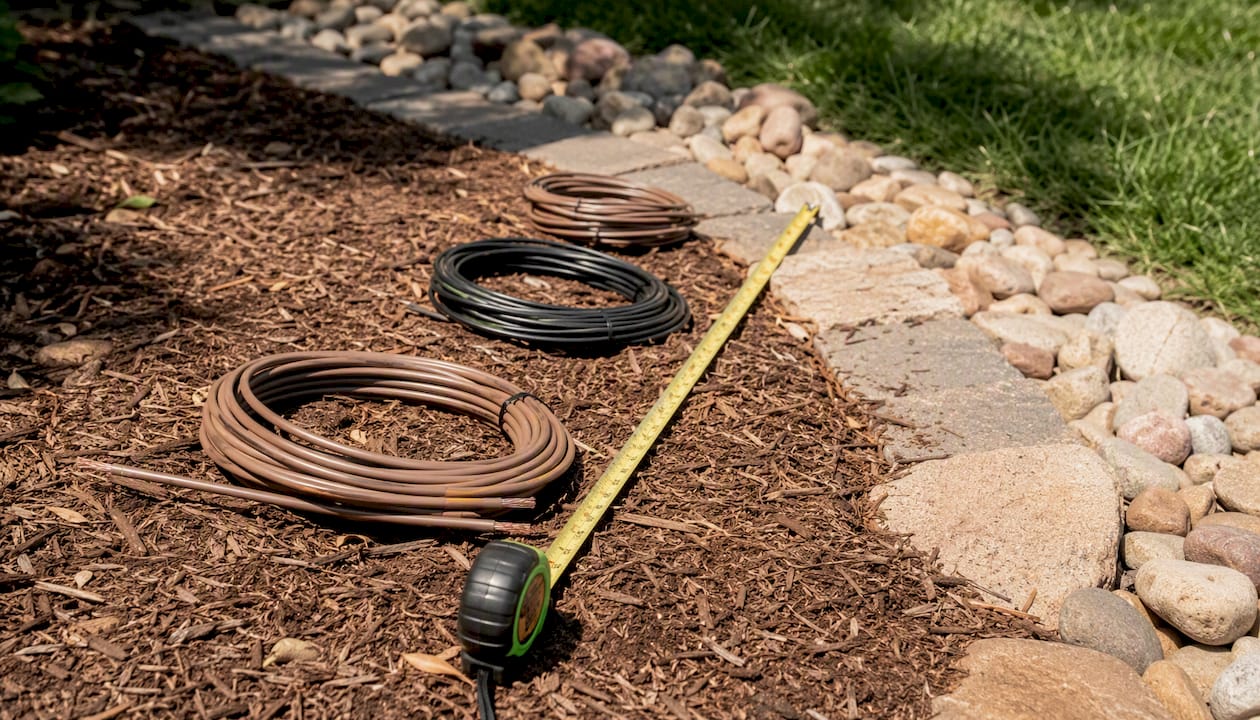
Pro Tip: Measure your actual wire run with a tape measure along the planned cable path, not straight-line distance. Curves, detours around beds, and burial depth all add length.
How to install low voltage landscape lights: a DIY checklist
A clean install takes one afternoon for a small yard. Plan the layout before you buy anything.
Installation steps
- Draw your layout. Sketch fixture positions, the transformer location, and cable runs. Mark the GFCI outlet location. Count total fixtures and measure run lengths.
- Confirm your outlet. The transformer needs a GFCI-protected, weather-resistant outdoor receptacle with an in-use cover. If you don’t have one, stop here and hire an electrician to add it.
- Check local codes. Most jurisdictions don’t require a permit for Class 2 low-voltage landscape lighting, but verify with your local authority having jurisdiction (AHJ) before you dig.
- Mount the transformer. Install it at least 12 inches above grade on a post or wall. Follow the manufacturer’s mounting instructions so it sheds water correctly.
- Lay out fixtures. Place fixtures in their planned positions without staking them yet. Run cable loosely along the planned path.
- Connect fixtures to cable. Use the connectors supplied or listed for your system. Piercing connectors work for above-ground runs; for buried splices, use listed waterproof connectors.
- Connect cable to transformer. Attach the cable leads to the transformer terminals. Double-check polarity.
- Test before burying. Power on the transformer and check voltage at each fixture with a voltmeter or clamp meter. Target 10.8V–12V at every fixture.
- Adjust transformer tap if needed. If end-of-run fixtures read below 10.8V, switch to the 13V or 14V tap and retest.
- Bury or secure cable. Bury cable at least 6 inches deep in lawn areas. In planting beds, 3 inches is typical. Use cable staples or clips where cable runs above grade.
- Stake fixtures and aim them. Final positioning, beam direction, and height adjustment.
- Set the timer or photocell. Program your on/off schedule.
Tools you’ll need
- Voltmeter or clamp meter
- Wire strippers
- Flat-blade and Phillips screwdrivers
- Spade or flat shovel (or a rented cable puller for longer runs)
- Tape measure
- Waterproof connectors (for any buried splices)
Safety checklist
- Always disconnect the transformer from the outlet before servicing connections.
- Use only listed components throughout the system.
- Never use standard indoor wire connectors for outdoor or buried connections.
- Keep the transformer’s overload protection accessible, not buried behind plantings.
Pro Tip: After the first heavy rain, recheck voltage at your end-of-run fixtures. Wet soil changes cable resistance slightly, and a connector that looked fine dry may show a voltage drop wet.
How do you choose fixtures and place them for the best effect?
Fixture type determines what you can actually do with the light. Buying a kit full of path lights and then trying to uplight a tree doesn’t work. Match the fixture to the job first.
- Spotlights (narrow beam, 15°–30°): Best for uplighting trees, grazing textured walls, and accenting sculpture. Aim them at a 45° angle to a wall surface for a grazing effect that reveals texture.
- Flood lights (wide beam, 60°+): Cover larger areas like facades, hedges, or wide planting beds. Useful for security zones where broad coverage matters more than drama.
- Path lights: Illuminate walkways and steps. Space them 6–8 feet apart on alternating sides of the path for even coverage without a runway effect.
- Well lights (in-ground): Flush-mount in lawns or beds for uplighting without a visible fixture. Good for trees near high-traffic areas where a stake-mounted spot would get kicked.
- Moonlighting fixtures: Mounted high in trees to cast a soft downward glow that mimics natural moonlight. One of the most effective techniques for large trees and seating areas.
Color temperature and beam spread
Warm white (2700K–3000K) suits most residential landscapes. It reads as natural and flattering on plants, stone, and wood. Cooler whites (4000K+) look clinical outdoors and tend to wash out warm-toned materials. For beam spread, use a narrow spot on a single specimen tree and a wider flood on a broad planting bed or fence line.
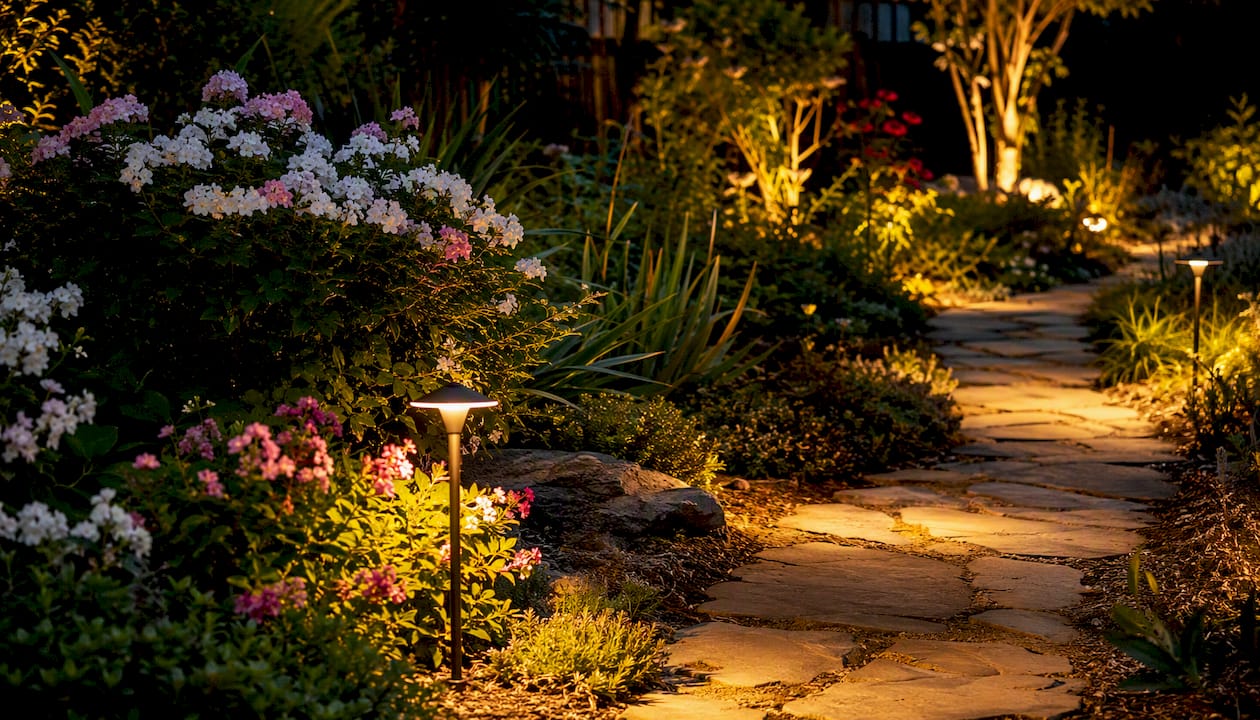
Security-focused placement targets entries, stairs, and dark corners specifically. The goal is to eliminate deep shadows where someone could stand undetected, not to flood the yard with light. Layered lighting at different heights achieves this better than a single bright fixture.
Pro Tip: Avoid aiming fixtures directly at neighbors’ windows or the street. Light trespass is a real complaint, and a simple shield or hood on the fixture solves it before it becomes a problem.
What safety rules and U.S. codes apply to low-voltage landscape lighting?
Low-voltage doesn’t mean no rules. NEC Article 411, as summarized by IAEI, covers lighting systems operating at 30 volts or less and requires listed power units and listed luminaires throughout. Secondary wiring and installation must follow the system’s listing per NEC 110.3(B). UpCodes’ summary of Article 411 adds detail on ampacity and insulation requirements for equipment connected to Class 2 sources.
Key rules homeowners often miss:
- Listed components only. The transformer, fixtures, connectors, and cable must all carry a listing mark (UL, ETL, or equivalent). Mixing unlisted components voids the system listing.
- GFCI-protected outlet required. Cord-and-plug transformers must plug into a GFCI-protected, weather-resistant outdoor receptacle with an in-use cover.
- Transformer mounting. Mount the transformer so it sheds water; don’t install it face-up or in a location where it will sit in standing water.
- Near water: tighter voltage limits apply. Per NEC Article 411.3, if wet contact with the fixture is likely, the system voltage must not exceed 15VAC or 30VDC. Near pools and spas, Article 680 rules also apply and the requirements become significantly more restrictive.
- Buried splices. Any connector used in a buried splice must be listed for direct burial. Standard snap-on connectors are not.
Code callout: NEC Article 411 applies to all lighting systems operating at 30 volts or less. “Listed” is not optional language; it’s a code requirement for every component in the system.
When in doubt about permit requirements or pool-proximity clearances, contact your local AHJ before installing. An hour of research saves a failed inspection later.
What do low voltage landscape lighting kits and installs cost?
Price ranges vary by kit size, fixture quality, and whether you DIY or hire out.
The DIY vs. pro cost gap is real, but so is the skill gap on complex projects. A homeowner who spends $300 on a kit and installs it correctly saves money. One who buys the wrong transformer size, uses unlisted connectors, and ends up with dim fixtures at the end of a 200-foot run has spent money twice.
Buying checklist
- Confirm the transformer carries a UL or ETL listing mark.
- Check the transformer VA rating against your calculated load (total watts × 1.2).
- Verify the transformer has multiple tap settings (12V, 13V, 14V, 15V).
- Confirm fixtures are rated for outdoor/wet or damp locations (IP65 or better for exposed installs).
- Check cable gauge: 12/2 is preferable to 14/2 for any run over 75 feet.
- Read the warranty: quality fixtures carry a 3–5 year warranty; budget fixtures often don’t.
Smart controls (Wi-Fi transformers, astronomical timers, app-based dimming) add $50–$200 to the transformer cost. For most homeowners, an astronomical timer is worth it from day one: it adjusts automatically for seasonal sunrise/sunset changes and eliminates the need to reprogram a dial timer twice a year.
How do you maintain and troubleshoot a low voltage system?
Most problems trace back to three causes: voltage drop at a connection, a failed LED module, or a corroded connector. A voltmeter solves the first two; a replacement connector solves the third.
Quick fixes for common problems
- Dim lights at the end of a run: Measure voltage at the last fixture. Below 10.8V means voltage drop. Try a higher transformer tap first; if that doesn’t fix it, split the run or upgrade wire gauge.
- One fixture out: Check the connection at that fixture first. Reseat the connector. If voltage is present but the fixture is dark, the LED module has failed. Replace it.
- Flickering: Usually a loose connection or an overloaded transformer. Check total load against transformer rating and tighten all connections.
- GFCI tripping repeatedly: Water has entered the transformer housing or a connector. Disconnect, dry out, and inspect. Repeated trips after drying indicate a damaged component that needs replacement.
- Corroded connectors: Cut back the cable past the corrosion and install a new listed connector. Don’t wrap corroded connections in electrical tape and call it done.
Seasonal maintenance routine
- At the start of each season, power on the system and walk every fixture. Note any that are dim, dark, or misaimed.
- Measure voltage at the transformer output terminals and at one end-of-run fixture with a clamp meter.
- Clean fixture lenses with a damp cloth. Dirt and oxidation cut output noticeably over a season.
- Trim back any plant growth that has grown over or around fixtures since the last check.
- Reseal any connectors that show signs of moisture intrusion with self-fusing silicone tape or replace with listed waterproof connectors.
- Check cable for damage from lawn equipment, edgers, or animal activity.
Call a pro when: the GFCI trips repeatedly after drying out the system, you find water inside a listed transformer enclosure, or you can’t identify the source of a voltage loss after checking all connections.
When does it make sense to hire a professional?
DIY works well for a straightforward front-yard layout: one transformer, runs under 100 feet, no water features nearby, and a GFCI outlet already in place. When any of those conditions change, the project gets harder and the cost of mistakes goes up.
Hire a professional when:
- Any cable run exceeds 150 feet.
- The design calls for multiple transformer circuits.
- The install is within the proximity zone of a pool, spa, or water feature (Article 680 rules apply).
- Your municipality requires a permit for landscape electrical work.
- You want a finished design with guaranteed fixture placement, voltage commissioning, and a service warranty.
- The yard involves significant grade changes, hardscape integration, or paver walkways and steps where fixture placement and safety lighting need to coordinate.
What a professional install includes
A pro install from Trew Landscape LLC covers site design, transformer selection and code-compliant mounting, fixture placement and aiming, full voltage commissioning with a clamp meter at every circuit, and a service warranty on the installation. The commissioning step alone separates a professional result from a casual setup: manufacturer instructions specify checking voltage at each fixture and measuring circuit current, steps that most DIYers skip.
Pro Tip: When requesting a quote, send photos of your yard from multiple angles, a rough sketch of where you want light, and the location of your existing outdoor outlet. That information cuts the back-and-forth and gets you an accurate estimate faster.
The honest trade-off between DIY and professional installation
The DIY case is strongest for small, well-scoped projects: a single transformer, a handful of path lights along a front walk, and a spotlight or two on a tree. Buy a quality kit, size the transformer correctly, use listed components, and you’ll have a system that works and meets code. The savings are real.
Where DIY loses its edge is in design. Most homeowners underestimate how much fixture placement matters. A technically correct install with fixtures aimed at the wrong angles, spaced unevenly, or using the wrong color temperature looks worse than a simpler system placed thoughtfully. Safety lighting at entries and stairs deserves the same attention as accent lighting on plantings. Layered light at multiple heights almost always reads better than a ring of path lights at ground level.
The other underestimated factor is long-term maintenance. A system installed with quality brass fixtures, properly buried cable, and listed waterproof connectors needs minimal attention for years. A budget install with plastic fixtures and piercing connectors in wet soil starts corroding within two seasons.
For Kansas City homeowners who want a design-driven result with a warranty, Trew Landscape LLC’s professional lighting service is the practical alternative to the DIY route.
Professional landscape lighting installation in Kansas City
Trew Landscape LLC designs and installs low-voltage landscape lighting systems for Kansas City homeowners who want a finished result without the guesswork of sizing transformers and chasing voltage drop. Every project starts with a site design, moves through code-compliant transformer mounting and fixture placement, and finishes with full voltage commissioning at every fixture.

Quick reasons Kansas City homeowners choose Trew Landscape LLC:
- Local licensed professionals with hands-on experience in residential landscape lighting
- Design-led approach that coordinates lighting with your existing landscape and hardscape
- Full voltage commissioning with a clamp meter at every circuit before the job is called done
- Service warranty on installation workmanship
Ready to get a quote? Contact Trew Landscape LLC through the landscape lighting service page and include a few photos of your yard and your outdoor outlet location. Most estimates turn around quickly.
Sources
- Residential Lighting under the NEC® — Why lighting isn’t located in one spot – IAEI Magazine
- Lighting Systems Operating at 30 Volts or Less and Lighting Equipment Connected to Class 2 Power Sources | UpCodes
- Landscape Transformer Install
- Low-Voltage Landscape Lighting: Installation & Tips | Philips Hue
- Landscape Lighting: Low-Voltage (12V) vs Line-Voltage (120V) | VOLT® Lighting
- 6 Compelling Benefits of Low Voltage Landscape Lighting – Malory Lighting
When code interpretation is unclear, contact your local authority having jurisdiction (AHJ) or a licensed electrician before proceeding. NEC requirements are adopted and amended at the state and local level, so the version in force in your jurisdiction may differ from the base NEC text.
FAQ
What voltage do most residential landscape lighting systems use?
Most residential systems run at 12V on the secondary side of a listed transformer, though 24V systems exist. Both qualify as low-voltage under NEC Article 411, which covers systems operating at 30 volts or less.
How far can you run low voltage landscape lighting cable?
Practical run length depends on wire gauge and total fixture wattage. With 12/2 wire at roughly 100W of load, 150 feet is a reasonable limit before voltage drop pulls fixture voltage below 10.8V. Heavier 10/2 wire extends that to around 200 feet.
Do low voltage landscape lights need a GFCI outlet?
Yes. Cord-and-plug transformers must connect to a GFCI-protected, weather-resistant outdoor receptacle with an in-use cover. This is a code requirement, not just a best practice.
What’s the difference between magnetic and electronic landscape transformers?
Magnetic transformers are heavier and more tolerant of overloads and inductive loads. Electronic transformers are lighter, often include better timer and dimming features, but are more sensitive to overloading. For permanent outdoor installs with mixed fixture types, magnetic units tend to be more reliable long-term.
When should a homeowner hire a professional for landscape lighting?
Hire a pro when any cable run exceeds 150 feet, the install is near a pool or spa, multiple transformer circuits are needed, or a local permit is required. Trew Landscape LLC handles design, code-compliant installation, and full voltage commissioning for Kansas City homeowners.