
Trew Landscape Blog
Stop Paver Creep: Paver Edging Options Homeowners Can Trust
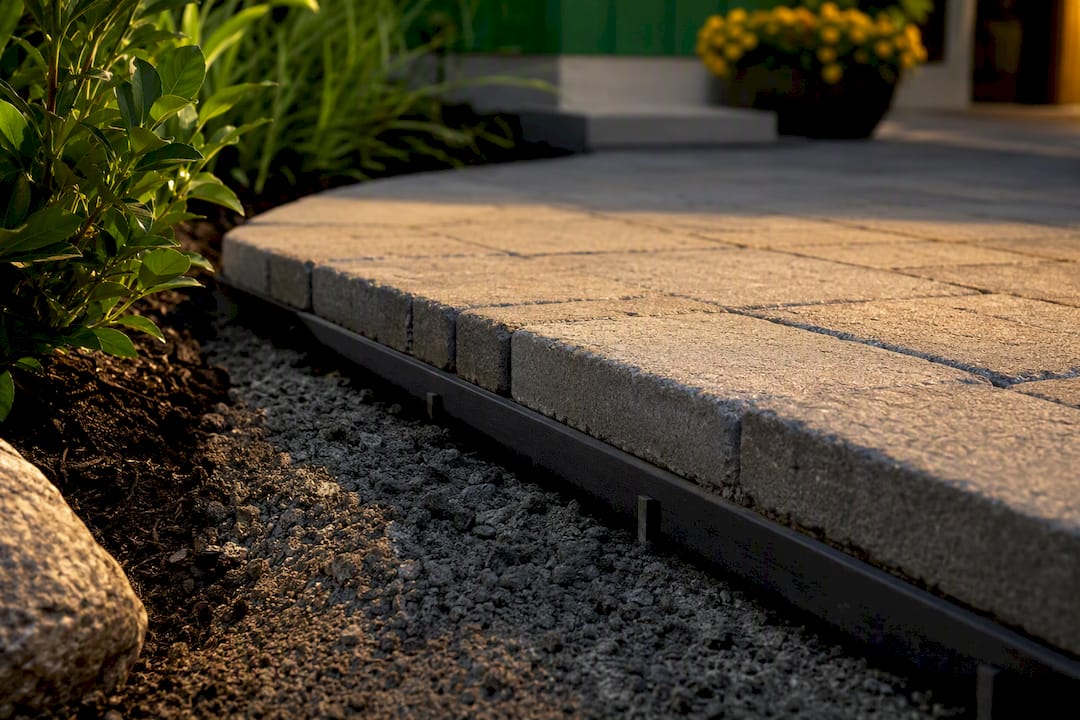
Stop Paver Creep: Paver Edging Options Homeowners Can Trust ! Paver edge restraint securing patio perimeter For patios and walkways, well-anchored aluminum or heavy-duty plastic edge restraint handles most residential loads without much fuss.
Stop Paver Creep: Paver Edging Options Homeowners Can Trust
For patios and walkways, well-anchored aluminum or heavy-duty plastic edge restraint handles most residential loads without much fuss. Driveways need more muscle: steel edging with deep pins or reinforced poured concrete stands up to vehicle weight. The material matters less than the install. Every paver edging option fails the same way when it’s pinned into loose soil or bedding sand instead of the compacted base underneath.
TL;DR:
- Proper base preparation and extension are crucial to prevent edging failure, regardless of the material used.
- Aluminum or plastic restraints require correct anchoring into a compacted base, especially on permeable or open-graded systems.
- Driveways demand steel edging with deep pins or reinforced concrete to withstand vehicle loads and sharp turning stresses.
- Sealant failure signs include gaps, sand erosion, and paver rocking, which indicate the need for repair or replacement.
- Choosing the right edging depends mainly on the load and soil conditions, with less emphasis on the material itself.
Table of Contents
- Paver Edging Options and Why Edge Restraint Matters at All
- Common Paver Edging Materials Compared
- Installation Basics That Determine Whether Edging Lasts
- Matching Edging to Your Project: Patio, Walkway, or Driveway
- What Paver Edging Actually Costs to Install
- What We’ve Learned Installing Hundreds of Feet of Edge Restraint
- The Edging Debate Misses the Real Decision
- Get Your Edging Done Right the First Time
- Sources
- FAQ
Paver Edging Options and Why Edge Restraint Matters at All
Pavers aren’t glued down. They interlock, held in place by friction and by whatever is holding the perimeter. Without a restraint, traffic and seasonal freeze-thaw cycles push the outer pavers outward a little at a time, a process installers call paver creep. Joints widen, polymeric sand washes out, and eventually the whole field starts to wobble.
CMHA’s technical guidance is blunt about it: any interlocking paver installation that doesn’t butt against a fixed structure like a house foundation needs a restraint capable of resisting horizontal forces from both traffic and ground movement. Skip that step and you’re relying on luck.
Signs the edge has already failed:
- Gaps opening between the outer row of pavers and the restraint
- Sand or gravel visibly eroding from the perimeter joints
- Pavers rocking underfoot near the edge
- Visible tilting or lifting of the border material itself
Common Paver Edging Materials Compared
Plastic restraint is the workhorse of residential patios. It’s inexpensive, bends around curves without kinking, and a crew can install a hundred feet of it in an afternoon. The catch: it only works when anchored properly into a compacted aggregate base, and it’s a poor match for permeable or open-graded systems, where the base lacks the fine material needed to hold a spike in place.
Aluminum edging bends cleanly for tight radiuses and shrugs off rust, which makes it popular for low-profile borders where you don’t want the edging itself competing visually with the pavers. Steel does the same job but carries more strength for heavy applications, though it needs galvanizing or a protective coating to avoid corrosion over time. Contractors tend to favor manufactured L-shaped restraints in general because they install fast and hold their strength consistently around curves once buried.
Concrete comes in three flavors: poured in place, modified engineered mixes, and precast curb sections. Standard poured concrete offers serious strength but can crack in freeze-thaw regions without rebar reinforcement. Modified concrete mixes are formulated specifically to resist that freeze-thaw damage and are one of the only reliable options for permeable paver systems, where plastic simply won’t hold.
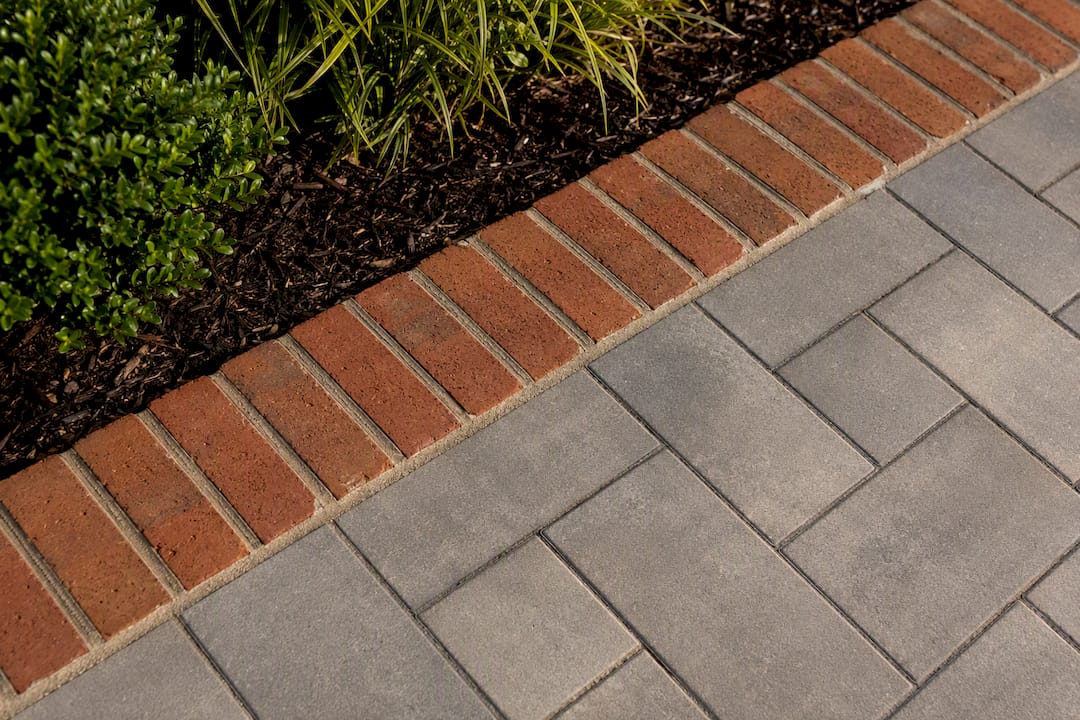
Brick and stone edging, along with poured bond-beam curbs, double as both restraint and design statement. A soldier course of brick set in a mortar bed does real structural work while giving a patio a finished, intentional border. These options need solid base support underneath, not just around the paver field, or they’ll settle unevenly.
Pro Tip: Don’t confuse structural edge restraint with the plastic or metal landscape edging sold for garden beds. That stuff has no flange to anchor into the base, and it will not hold a paver field in place no matter how many stakes you drive.
Installation Basics That Determine Whether Edging Lasts
Every solid paver edging option shares one feature: an L-shaped flange, a horizontal foot that lets spikes drive down through it into the compacted aggregate base rather than the loose bedding sand sitting under the pavers themselves. Spikes anchored in sand or raw soil will walk loose within a season or two.
- Drive spikes every 12 inches on straight runs, tighter on curves, long enough to reach 6 to 8 inches into compacted base.
- Extend the compacted base outward past the paver field by roughly the same thickness as the base itself, so the restraint has solid material to grip.
- Reinforce poured concrete edges with rebar or wire mesh in any region that sees regular freeze-thaw cycling.
- Let concrete cure fully before backfilling, and grade the base to shed water away from the restraint rather than pooling against it.
- Match the restraint to the base type. Standard restraints don’t belong on permeable or open-graded systems.
CMHA’s installation standard calls for a minimum of 1 inch of vertical restraining surface in contact with the side of the paver, with more surface area recommended for heavy-duty applications like driveways carrying vehicle traffic.
Permeable paver systems raise a specific problem. Open-graded bases skip the fine aggregate that gives a spike something to bite into, so engineered restraints or modified concrete are the only dependable choice there. Standard plastic edging on a permeable base is a callback waiting to happen.
Matching Edging to Your Project: Patio, Walkway, or Driveway
The right call changes with what’s rolling or walking over it. A patio only has to survive foot traffic and furniture legs. A driveway has to survive a loaded SUV turning sharply near the edge, which puts far more lateral stress on the restraint.
- Patios and walkways: aluminum or quality plastic, anchored correctly, handles the load fine. Brick edging works well when you want the border to read as a design feature, not just a restraint.
- Driveways: steel edging with deep pins, or reinforced and poured concrete, holds up better under vehicle weight; precast curb sections are a strong middle ground when you want a finished look without a full pour.
- Freeze-thaw regions: go deeper on pins and wider on base extension than the minimum spec, since frost heave puts extra strain on every anchor point.
- Permeable installations: modified concrete or purpose-built PICP restraints, never standard plastic.
Before you settle on anything, run through load, curve radius, how visible you want the edge to be, and how much maintenance you’re willing to do. Those four questions eliminate most of the wrong choices fast.
What Paver Edging Actually Costs to Install
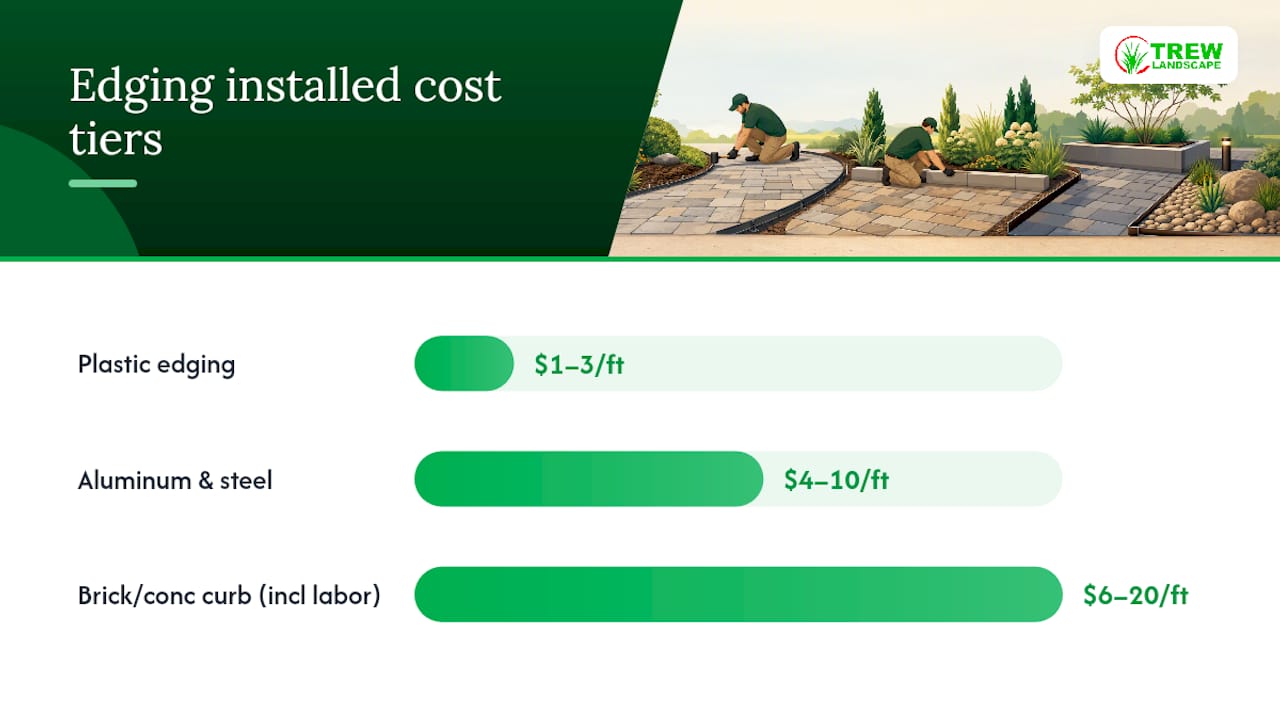
Material costs run in fairly predictable tiers. Plastic typically lands around $1 to $3 per linear foot, aluminum and steel fall in the $4 to $10 range depending on gauge, and brick or poured and precast concrete run $6 to $20 per foot once you’re paying for both material and the labor to place it properly.
Labor time scales with the material. Plastic goes down fast. Concrete curb work takes longer because of forming, pouring, and cure time, and it’s harder to fix once it’s set.
Expect to inspect edging seasonally for the same failure signs mentioned earlier: gaps, sand loss, rocking pavers. Maintenance is usually minor:
- Re-drive or replace loose spikes on plastic and metal restraints
- Top up polymeric sand in perimeter joints after heavy rain seasons
- Swap out any cracked cut pavers along the border
- Check concrete curbs for hairline cracks after the first freeze-thaw cycle
Well-installed edging in the plastic-to-aluminum range typically lasts a decade or more before needing attention; concrete and precast curb, done right, can outlast the paver field itself.
What We’ve Learned Installing Hundreds of Feet of Edge Restraint
We’ve installed paver patios and driveways across the Kansas City area long enough to know that edging failures almost never come down to the material. They come down to the base. A crew in a hurry that skips proper compaction, or drives spikes into whatever’s easiest to punch through, sets up a callback regardless of whether the restraint is plastic or steel.
Driveways, tight curve radii, bond-beam curb work, and anything involving drainage complications are where we tell homeowners to bring in a professional rather than DIY it. Getting the base compaction and grading wrong on a driveway edge means redoing the whole thing, not just the border.
On more than one project, we’ve changed the specified edging mid-plan after test digs showed sandier soil than expected or a drainage path that would undercut a standard restraint. The paver itself was never the variable. The ground underneath it always was.
Homeowners planning a paver patio installation get more consistent results when base prep and edging choice are planned together from day one, not bolted on after the pavers are already ordered.
The Edging Debate Misses the Real Decision
Most guides to paver edging spend their word count arguing plastic versus metal versus concrete like it’s a personality quiz. That framing undersells the actual decision. The material is genuinely the smaller variable. Whether the flange lands in compacted base or in loose fill is what separates a border that lasts fifteen years from one that’s loose by the second summer.
Conventional advice also tends to treat freeze-thaw regions as an afterthought footnote rather than a design input. If you live somewhere the ground heaves every winter, that should shape your pin depth and base extension from the start, not get patched in after the first spring thaw pulls your edging loose.
If you take one thing from this guide, prioritize the base work over the material catalog. Compact it right, extend it past the paver field, and confirm your restraint type actually suits your soil and drainage before you fall in love with a look. The prettiest brick border in the world won’t survive a base that wasn’t built for it.
— Trew Landscape LLC
Get Your Edging Done Right the First Time
Trew Landscape LLC is the alternative to guessing your way through a DIY edge restraint job. We build the compacted base first, match the restraint to your soil and drainage, and pin it deep enough to survive a Kansas City winter, not just the first season.

Our paver installer crews handle everything from patio borders to driveway curb work, and our hardscape designs team can work brick or bond-beam edging into the layout as a design feature rather than an afterthought. If your project involves a driveway, a permeable base, or a curve radius tighter than a few feet, that’s exactly when a site visit beats a weekend of trial and error. We also handle poured and reinforced concrete edging through our concrete contractor services for driveways that need to carry real weight.
Request a site assessment and we’ll tell you straight whether your project is a solid DIY candidate or one that needs a crew.
Sources
- CMHA technical guidance (PAV-TEC-003) — Edge restraints and interlocking concrete pavements
- Plastic vs. Concrete Paver Edge Restraints | Unilock
- What is the Best Paver Edging for Your Project? | Western Interlock
- Best paver edging for patios, walkways, and driveways — Rivendell Distribution
FAQ
What type of edging is best for pavers?
For patios and walkways, correctly anchored aluminum or quality plastic restraint handles standard loads well. Driveways need steel with deep pins or reinforced concrete to withstand vehicle weight.
What to use as a border for pavers?
Brick, stone, or poured bond-beam curbs work as both structural restraint and visible design border, provided the base underneath is properly compacted and extended past the paver field.
What is the 3 inch edging rule?
There’s no universal 3 inch standard in the technical guidance; the reliable rule instead is a minimum of 1 inch of vertical restraint surface in contact with the paver, per CMHA guidance, with more surface recommended for heavy-duty applications.
What are some ideas for edging pavers?
Beyond standard plastic or metal restraint, consider a soldier course of brick, a low poured concrete curb, or precast concrete curb sections when you want the edging to also serve as a visible design line, an approach Trew Landscape LLC’s hardscape design team builds into layouts from the start.
Can I install paver edging myself?
Plastic or aluminum restraint on a simple patio is a reasonable DIY project if you compact the base properly and pin into it, not the bedding sand. Driveways, permeable systems, and bond-beam curb work are better left to a professional installer.