
Trew Landscape Blog
Small Backyard Privacy: Fast Fixes That Actually Work
Small Backyard Privacy: Fast Fixes That Actually Work ! Person installing bamboo privacy screen in backyard The fastest way to get real privacy in a small backyard is targeted, vertical screening paired with at least one movable panel or planter, not a full perimeter fence.
Small Backyard Privacy: Fast Fixes That Actually Work
The fastest way to get real privacy in a small backyard is targeted, vertical screening paired with at least one movable panel or planter, not a full perimeter fence. You do not need to enclose the whole yard. You need to block the two or three sightlines that actually bother you.
Start this weekend with whichever of these fits your space and budget:
- A cluster of potted narrow evergreens (arborvitae or Sky Pencil holly) near your seating area
- A freestanding slatted screen or lattice panel anchored in planters
- A retractable outdoor curtain or shade sail over a patio or deck
- A trellis with fast climbers like clematis or annual vines
- An outdoor curtain hung from an existing pergola or overhang
The single best move: figure out exactly where your neighbor can see you sit, then screen only that spot. Screening an entire property line wastes money and still misses the view that matters.
Key Takeaways
Targeted, layered screening around your seating area solves small-yard privacy problems faster and cheaper than fencing the entire perimeter.
| Point | Details |
|---|---|
| Map the privacy zone first | Focus screening on the 8 to 15 foot area around your main seating spot, not the whole yard. |
| Start with quick, cheap fixes | Bamboo rolls, curtains, and potted plants under $200 solve immediate needs in a weekend. |
| Choose plants for the timeline | Columnar evergreens fill in within two to three years and can cut noise by roughly 5 to 10 decibels. |
| Check codes before permanent builds | Fence height limits, setbacks, and HOA rules vary, so confirm them before digging or anchoring. |
| Bring in a pro for complex builds | Trew Landscape LLC designs staged privacy plans covering plantings, hardscape screens, and lighting for lasting results. |
Table of Contents
- Small Backyard Privacy Solutions Grouped by Speed
- The Best Plants for Screening a Tight Backyard
- Building or Buying a Freestanding Privacy Screen
- Map Your Privacy Zone Before You Build Anything
- Budget, Timeline, and the Permit Question
- When a DIY Weekend Isn’t Enough
- Overhead Privacy: Shade Sails, Pergolas, and Curtains
- Container Gardens and Vertical Planting for Tight Spaces
- Using Outdoor Lighting to Add Privacy After Dark
- Making Privacy Features Look Like They Belong
- Our Take on Small-Yard Privacy Projects
- How Trew Landscape LLC Helps With Small-Yard Privacy Projects
- Sources
- FAQ
Small Backyard Privacy Solutions Grouped by Speed
Not every fix needs the same timeline or budget, so it helps to sort your options by how fast they work and how permanent they are.
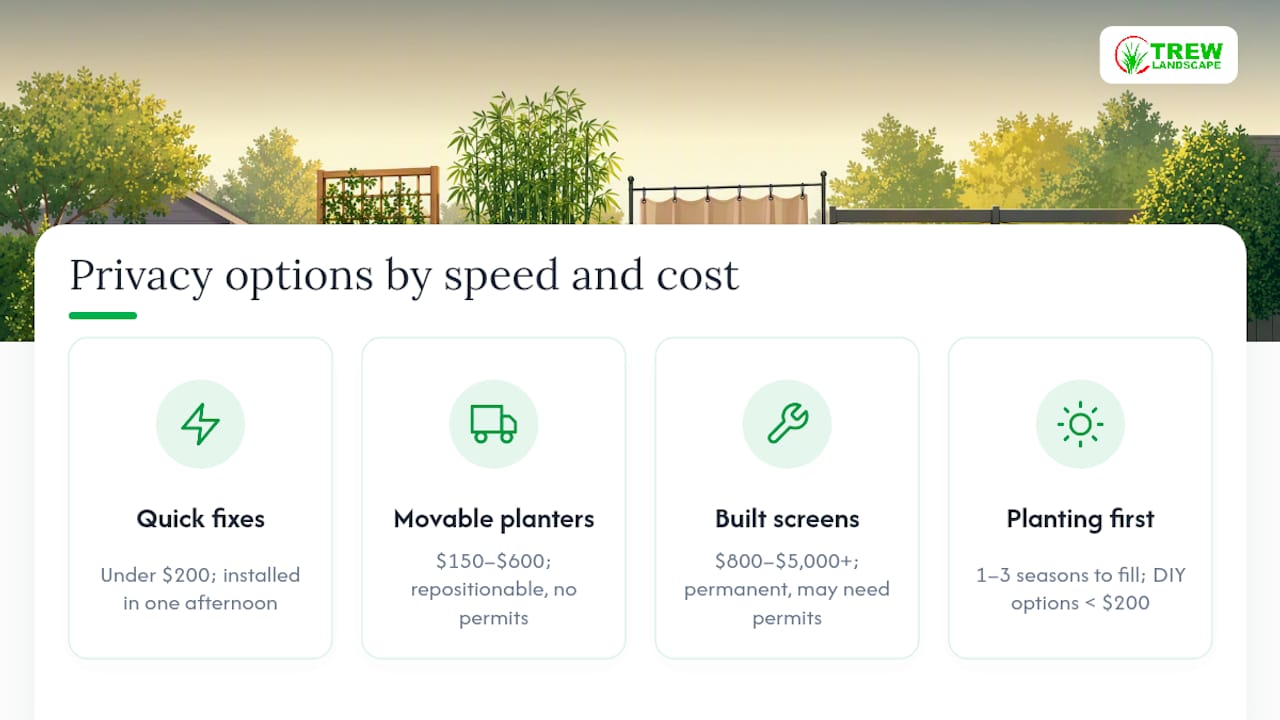
Quick and temporary fixes cost under $200 and go up in a single afternoon. Think tension-rod outdoor curtains, a roll of bamboo fencing zip-tied to an existing rail, or a folding lattice screen you prop against a wall. These are ideal for renters or anyone who wants privacy before a weekend party.
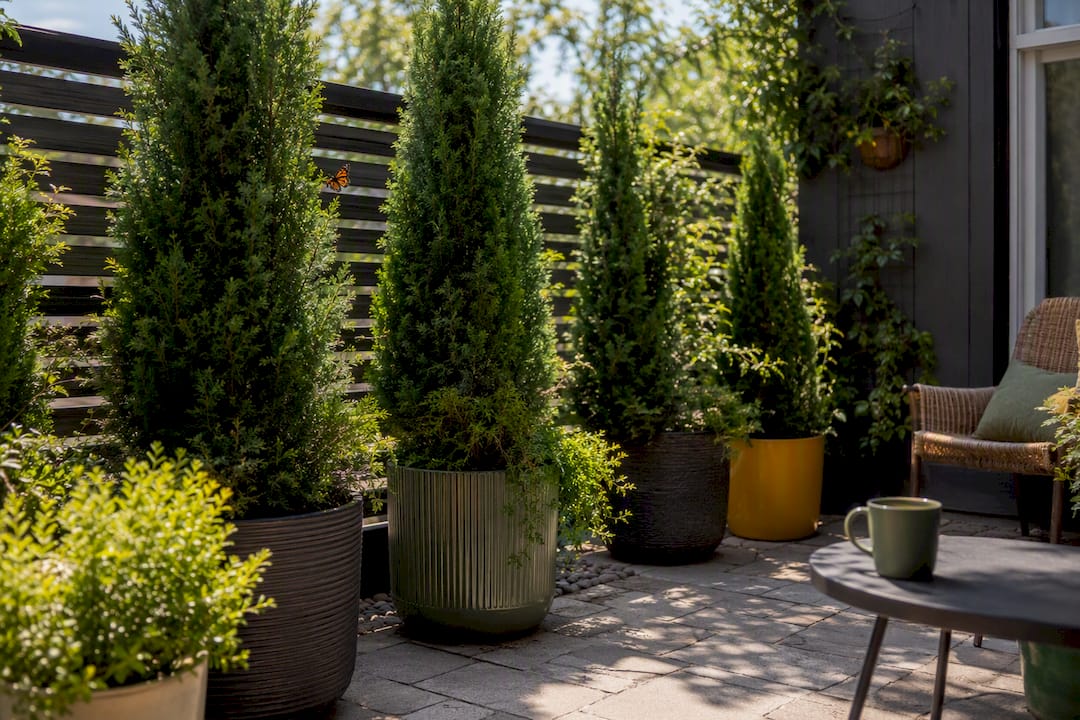
Container and movable solutions run $150 to $600 depending on plant size and pot quality. A row of large planters with columnar evergreens or bamboo gives you a screen you can reposition as the sun moves or as your layout changes. Nothing goes in the ground, so there is no permit conversation.
Built screens and permanent structures, like slatted cedar walls, pergolas, or vinyl privacy fencing, land in the $800 to $5,000+ range depending on size and material. These solve the problem for good but take longer to plan and often need at least a quick check of local setback rules.
Planting-first, long-term screening is the cheapest per square foot of coverage over time, but it takes one to three growing seasons to fill in. Budget-friendly DIY combinations like bamboo rolls, pallet trellises, and potted trees can be assembled for under $200 total and installed in a weekend, which makes this the category most homeowners underestimate.
Renter-friendly options overlap heavily with the quick and container categories, since neither requires digging, drilling into a shared structure, or anything that outlasts a lease.
The Best Plants for Screening a Tight Backyard
Columnar and narrow-growing species do the heavy lifting in small yards because they add height without eating up ground space. Sky Pencil holly, Emerald Green arborvitae, and compact magnolia varieties are the standbys landscapers reach for first, and for good reason: tightly spaced columnar plantings can reduce perceived noise by roughly 5 to 10 decibels once they fill in, on top of the visual screen they provide.
Spacing matters more than most homeowners expect. Plant too far apart and you get gaps; too close and you get competition for root space and stunted growth. A few working rules:
- Space columnar evergreens closely for a solid wall within a few years
- Stagger a second row behind the first to eliminate see-through gaps at eye level
- Build a low berm (even 12 to 18 inches) under new plantings to add instant screening height
- Use containers along a fence line or patio edge where in-ground planting is not possible
Growth timelines vary by species and starting size. A five-gallon arborvitae can add noticeable density within one season, but a full six-foot screen usually takes two to three years. Maintenance is light: annual pruning to keep shape, consistent watering through the first two summers while roots establish, and winter protection (burlap wrap or anti-desiccant spray) for evergreens in exposed spots.
Pro Tip: Buy one size larger than you think you need. The jump from a 3-gallon to a 7-gallon arborvitae often saves a full year of waiting for privacy.
Building or Buying a Freestanding Privacy Screen
Material choice changes both the cost and the maintenance load, so it is worth comparing before you commit.
- Wood slats (cedar or pine): Warm look, easy to customize, but needs sealing every two to three years to resist rot
- Bamboo rolls: Cheapest option and installs fast, though it fades and gets brittle within a few years in full sun
- Laser-cut metal panels: Durable and low maintenance, but pricier and harder to modify once installed
- Outdoor fabric panels or curtains: Instant privacy, easy to remove for storms or seasons, but less durable long-term
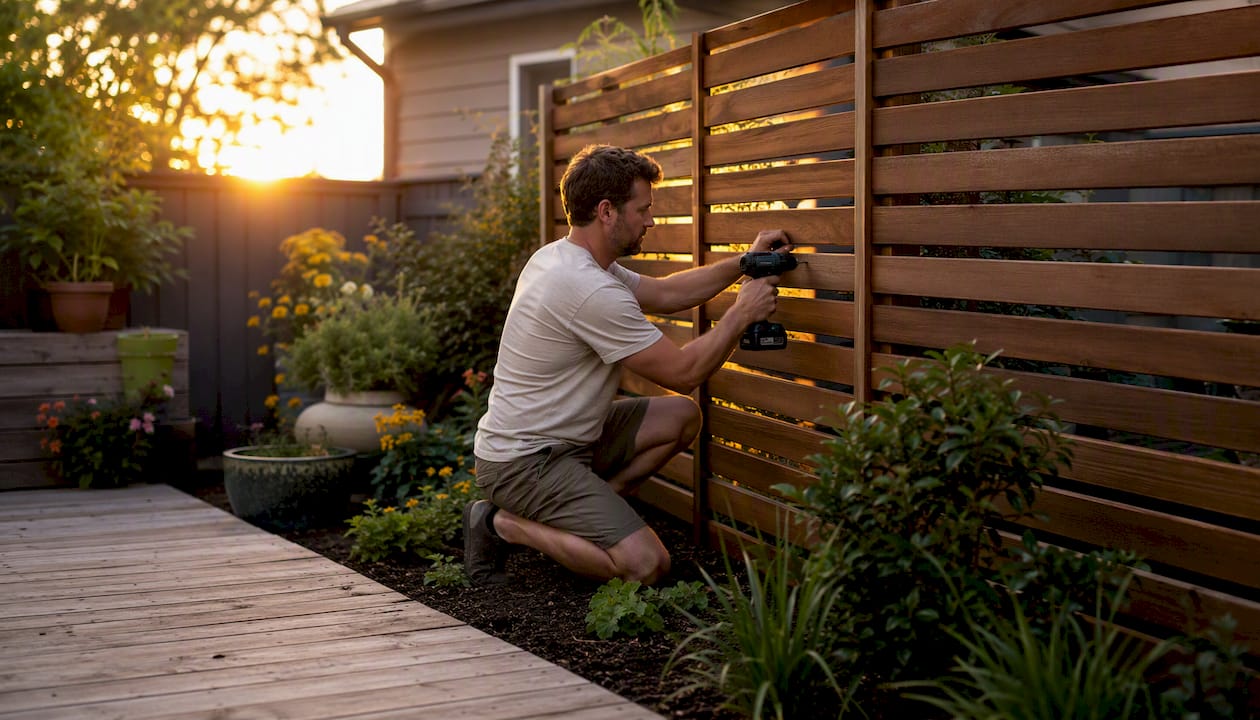
Freestanding, movable screens make sense when you rent, when your layout might change, or when you just want privacy for a few months a season. Permanent slatted walls or trellis structures make more sense when the sightline problem is not going away, like a two-story neighboring house with a direct view into your patio. Slatted wall and hardscape screening built into a broader patio plan tends to outlast a freestanding panel by years.
A basic weekend DIY screen comes together in four steps:
- Cut and space vertical slats (cedar 1x4s work well) on two horizontal rails
- Attach the panel to 4x4 posts set in weighted planter bases, not concrete, if you want it movable
- Seal or stain all wood surfaces before installation to prevent warping
- Anchor the base with gravel or sandbags in windy spots so the panel does not tip
Pro Tip: Paint or stain the back side of the screen the same color as your fence or house trim so it visually disappears from your neighbor’s side. It reads as intentional, not defensive.
Map Your Privacy Zone Before You Build Anything
Most small yards don’t need screening around the entire perimeter. They need it around one specific spot: the seating area where you actually spend time. Walk out to your patio chair, sit down, and look around. The window, deck, or fence gap that catches your eye is the only sightline worth solving.
Define an 8 to 15 foot radius around your main seating spot and concentrate your budget there instead of spreading it thin along the fence line. This single planning step is what separates a privacy project that feels finished from one that feels like it is never quite done.
Noise is part of the privacy equation too, and it is the part most people skip. A small tabletop fountain or a compact water feature creates a sound buffer that makes a yard feel enclosed even when the visual screening is only partial. Layered planting adds a secondary benefit here, softening hard reflections between fences and patios.
Pro Tip: Pair a visual screen with a small fountain near your seating area. The moving water masks conversation and street noise more effectively than a taller screen alone.
Budget, Timeline, and the Permit Question
Set your budget by category, not by guessing at a total project cost. Quick fixes stay under $200. Medium projects (a designed planting bed, a mid-size screen, a shade sail setup) run $200 to $1,500. Permanent installs like fencing, slatted hardscape walls, or a pergola typically start around $800 and climb from there depending on materials and labor.
Timeline expectations should match the category: temporary fixes go up same-day, container plantings look established within a season, and in-ground privacy hedges need one to three years to reach full height.
Before anything goes in the ground or gets permanently anchored, run through this short checklist:
- Check your municipal code for fence height limits, which commonly cap residential side and rear fences around 6 feet
- Confirm setback requirements if you’re planting near a property line, since some jurisdictions restrict plantings close to shared boundaries
- Review any HOA rules on fence materials, colors, or screen visibility from the street
- Give neighbors a heads-up before installing anything tall near a shared fence line, even when it is fully within code
Fences remain effective for full-perimeter privacy, but they carry the most red tape of any option here, which is exactly why so many small-yard projects start with plants and movable screens instead.
When a DIY Weekend Isn’t Enough
Some privacy problems are simple weekend fixes. Others involve grading, retaining walls, irrigation lines, or a second-story sightline that no amount of potted arborvitae will solve. That is the line between DIY and calling a professional.
Bring in a landscaper when your project involves:
- Grade changes or retaining walls to raise planting height
- Permanent hardscape structures like pergolas or slatted walls tied into a patio
- Irrigation planning for a hedge that needs to survive its first two summers
- Integrated lighting that needs to be wired, not just plugged in
A professional design handles the parts that are hard to undo: permits, proper anchoring, drainage around new plantings, and materials that hold up through Midwest winters. Trew Landscape LLC often recommends a staged approach for clients in a hurry, temporary screening this week while a permanent plan gets designed and permitted properly.
Pro Tip: If you’re not sure whether your project needs a permit, ask before you dig. It’s a five-minute phone call that can save you from tearing out a fence you just installed.
Overhead Privacy: Shade Sails, Pergolas, and Curtains
Ground-level screens solve a lot of problems, but they do nothing for the neighbor with a second-story window looking straight down into your patio. That is where overhead privacy takes over.
A shade sail stretched between two anchor points blocks a downward view while doubling as sun protection, and it is one of the fastest overhead upgrades you can install without any structural work. Retractable versions let you open the yard back up on cloudy days, which matters if you like sun in spring and shade in July.
A pergola is the more permanent version of the same idea. Add a lattice top, climbing vines, or retractable canvas panels, and you get overhead screening that also structures the space visually, turning an open patio into something that feels like a room. It costs more than a sail and takes longer to build, but it solves the second-story problem permanently and adds real value to a small backyard’s layout.
Outdoor curtains are the middle ground. Hung from a pergola beam, a deck overhang, or even a simple PVC frame, heavy outdoor fabric panels block both overhead and side views depending on how you position the rod. They pull back in seconds when you want light and close in minutes when you don’t, which makes them one of the more flexible upgrades on this list.
If your privacy problem is specifically a taller structure next door rather than a fence-line neighbor, overhead solutions should come before another few feet of ground-level screening. A six-foot hedge does nothing for a window twelve feet up.
Container Gardens and Vertical Planting for Tight Spaces
When there is no ground to plant in, or when a lease means nothing permanent goes in the soil, vertical container gardening does the same job a hedge would in a fraction of the footprint.
Large planters (20 inches or wider) holding columnar evergreens or ornamental grasses create a movable wall you can reposition as sightlines change or as the sun shifts through the season. Group three or four planters in a line rather than spacing them out. A row reads as an intentional screen; scattered pots just look like decoration.
Vertical structures multiply what a small footprint can hold. A simple wooden pallet mounted upright and packed with pocket planters, or a modular wall-mounted planter system, lets you stack climbing vines, trailing plants, and small shrubs in a two-foot-wide strip along a fence or wall. This works especially well on a patio where floor space is already tight.
Living walls look striking in photos, but they carry real upkeep: irrigation lines, more frequent feeding, and plant replacement when a section dies back. If you want the vertical-garden look without the maintenance load, a simpler trellis with one or two vigorous climbers, clematis or a fast annual vine, gets you 80 percent of the visual effect for a fraction of the ongoing work.
Container plantings also solve the winter problem that in-ground hedges create in exposed spots, since you can move pots against a wall or into a garage during hard freezes instead of wrapping everything in burlap.
Using Outdoor Lighting to Add Privacy After Dark
Privacy during the day is a daytime problem. After sunset, the equation flips: bright light aimed outward toward your yard actually makes it easier for anyone outside to see in, while light aimed inward and downward can make your patio feel enclosed without adding a single new physical barrier.
Path lights, low uplights on privacy plantings, and warm-toned string lights strung at eye level all pull attention downward and inward rather than illuminating the whole yard like a stage. This has a side effect worth knowing: dimmer, warmer light at night reduces how visible your patio is from a neighboring window, since there is simply less contrast for anyone looking in from a darker vantage point.
Uplighting a screening hedge or a slatted wall from below also does double duty. It highlights the texture of the plant or structure you already installed for privacy, and it draws the eye to that feature instead of past it into your seating area. Layered outdoor lighting integrated into a privacy plan tends to outperform lighting added as an afterthought, mainly because fixtures get placed to work with the screening instead of competing against it.
Avoid one common mistake: a single bright floodlight on the house corner. It floods the whole yard evenly, which erases the shadow and depth that make a small space feel private, and it often shines directly into your own eyes when you’re trying to enjoy the patio at night.
Making Privacy Features Look Like They Belong
The privacy features that work best are the ones that read as part of the yard’s design, not an afterthought bolted onto a fence. A slatted screen painted to match your house trim disappears into the architecture. A columnar hedge planted in the same bed line as your existing shrubs looks like it was always part of the plan.
Layering is the technique that ties it together: a low border planting in front, a mid-height shrub or screen in the middle, and a taller element (a tree, pergola, or trellis) behind it. This staggered approach at different heights maintains light and airflow through the yard instead of creating a flat wall that blocks everything, including the breeze you actually want on your patio.
Match materials to what already exists. If your patio uses natural stone or warm-toned pavers, a cedar slat screen or a bamboo panel reads as intentional. A stark metal panel next to a cottage-style garden looks like it was dropped in from a different project. Think about sightlines from inside the house too, not just from the patio; a well-placed screen that blocks the neighbor’s view should not also block your own kitchen window view of the yard.
Small yards benefit from repetition more than variety. Repeating the same plant, the same pot style, or the same screen material two or three times reads as a cohesive design, while five different privacy solutions scattered around a small space tends to look like a series of unrelated fixes rather than one plan.
Our Take on Small-Yard Privacy Projects
We see the same mistake constantly: homeowners plan for a fence around the whole yard when the actual problem is one window, one deck, one sightline. Layering a few plantings with one well-placed screen almost always beats a full perimeter build, in both cost and how fast it looks finished.
If your situation involves grading, a second-story sightline, or anything permanent, it’s worth a quick conversation with our landscape design team before you commit to a DIY plan.
How Trew Landscape LLC Helps With Small-Yard Privacy Projects
DIY screens and potted evergreens solve a lot of privacy problems, but they hit their limit fast when a project needs grading, permanent anchoring, or a design that actually fits the rest of your yard. Trew Landscape LLC works with Kansas City area homeowners on exactly that gap, combining plant selection, hardscape screens, and integrated lighting into one plan instead of a pile of separate fixes.

Our landscape design service starts with mapping your actual sightlines, the same privacy-zone approach covered above, then builds a phased plan so you get temporary relief now and a permanent solution on a realistic timeline. If you’re weighing a slatted wall, a pergola, or a full privacy hedge, request a design consultation and we’ll walk the yard with you before recommending anything.
Sources
- 10 Backyard Privacy Ideas on a Budget That Actually Work - Plantparadiso
- Easy ways to add privacy to a deck or patio - HGTV
- Privacy in yard - The Spruce
- Privacy Solutions for Small Backyards: Best Plants - TreeCareZone
FAQ
What is the cheapest way to add privacy to a small backyard?
Bamboo rolls, tension-rod outdoor curtains, and potted evergreens are the least expensive options, often totaling under $200 and installable in a single afternoon.
How do I block a neighbor’s view of my backyard?
Identify the exact sightline, usually a window or deck, and place a targeted screen, tall planting, or trellis directly in that line of sight rather than screening the entire property line.
What are good privacy ideas for a small backyard?
Container plantings, freestanding slatted screens, shade sails, and outdoor curtains all work well because they add screening without eating up ground space you don’t have.
How can I make my yard private without building a fence?
Layered plantings, movable panels, pergolas with retractable curtains, and strategically placed containers create effective privacy without the cost or permitting hassle of a full fence, and checking local fence ordinances becomes unnecessary if you skip fencing altogether.
When should I hire a professional instead of doing it myself?
Bring in a landscaper when your project involves grading, retaining walls, irrigation, or permanent hardscape like a pergola. Trew Landscape LLC’s design team handles these builds with proper permits and anchoring.