
Trew Landscape Blog
Concrete Patio Resurfacing: Options, Costs, and DIY Steps
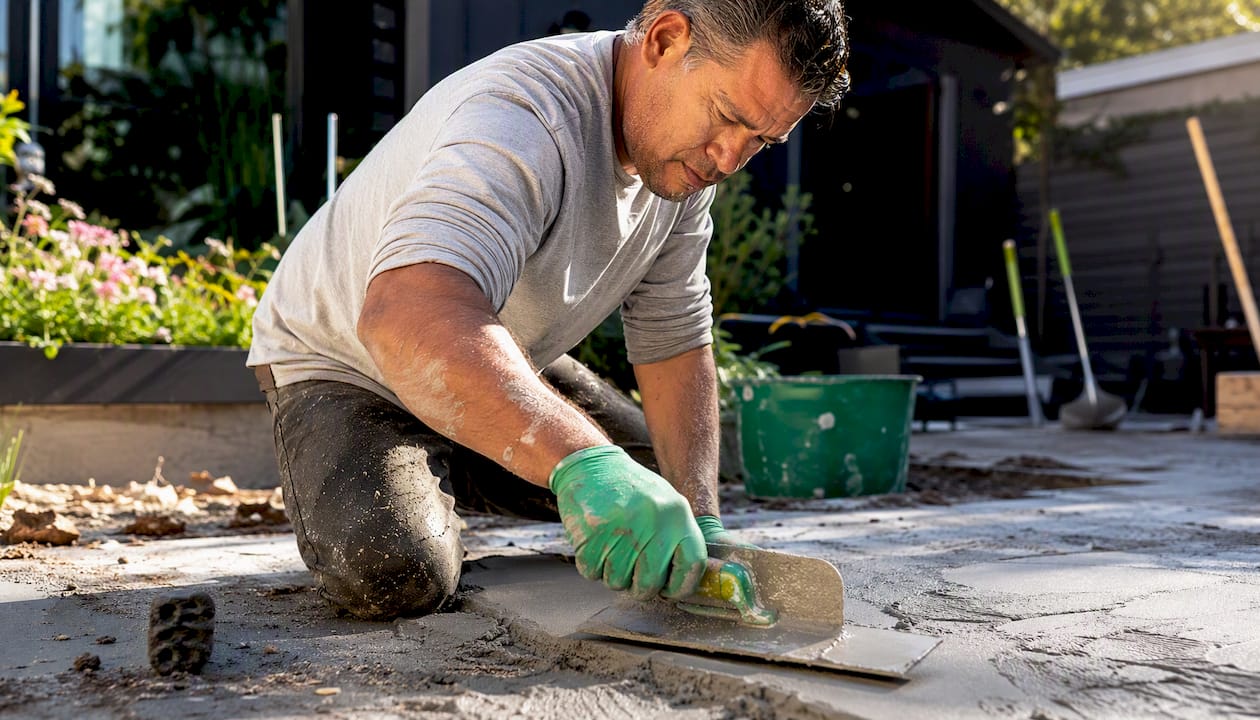
Concrete Patio Resurfacing: Options, Costs, and DIY Steps ! Man applying overlay on concrete patio outdoors > TL;DR: > > - Most concrete patios that are structurally sound can be resurfaced using exterior-rated overlays or coatings at a lower cost than full replacement.
Concrete Patio Resurfacing: Options, Costs, and DIY Steps
TL;DR:
- Most concrete patios that are structurally sound can be resurfaced using exterior-rated overlays or coatings at a lower cost than full replacement. Different overlay options, such as polymer-modified cement, stampable finishes, or coatings like epoxy, suit various aesthetic and durability needs, provided proper surface preparation and repair are made beforehand. DIY resurfacing is feasible on small, stable slabs with thorough prep, but larger or structurally affected patios benefit from professional expertise to ensure long-lasting results.
Most concrete patios can be resurfaced rather than replaced. If your slab is structurally sound — no active settling, no wide offset cracks, no exposed rebar — an exterior-rated overlay or coating can give it a fresh surface at a fraction of replacement cost. The three most practical options for homeowners are:
- Polymer-modified cementitious overlay or microtopping: Thin (1/8"–1/2"), bonds directly to existing concrete, works well for cosmetic repairs and a clean modern look. Best for sound slabs with surface spalling or staining.
- Stampable decorative overlay: Thicker mix that accepts stamps, stencils, and color. Closest thing to new stamped concrete without tearing out the slab.
- Exterior coatings (epoxy, urethane, or solid-color acrylic): Fastest to apply, lowest prep burden for small patios, good for adding color and slip resistance.
Cost runs $3–$7 per square foot for plain overlays and $6–$20 per square foot for decorative finishes. A typical project takes two to four days from prep through final seal, though cure time before furniture traffic is usually 24–48 hours.
One warning up front: many DIY guides skip the most important distinction. Indoor self-leveling compounds are not the same as exterior-rated overlays. Using the wrong product outdoors almost always ends in cracking within a season. More on that below.
Table of Contents
- Why would you resurface instead of replace a patio?
- What are your realistic patio resurfacing options?
- Is your patio actually a good candidate for resurfacing?
- What preparation and repairs does resurfacing actually require?
- DIY vs. hiring a professional: how do you decide?
- How much does concrete patio resurfacing cost?
- Step-by-step DIY resurfacing workflow
- What materials and tools do you need for patio resurfacing?
- How do you maintain a resurfaced patio so it lasts?
- Why does resurfacing sometimes fail?
- Why indoor self-leveling products fail outdoors
- Key Takeaways
- Why Trew Landscape LLC often recommends professional resurfacing
- Trew Landscape LLC patio and concrete services in Kansas City
- Useful sources
- FAQ
Why would you resurface instead of replace a patio?
Resurfacing makes sense when the underlying slab is stable and the problems are at the surface. A full concrete replacement in the U.S. typically costs several times more than an overlay project, and it involves demolition, disposal, and a longer cure window before you can use the space.
Problems resurfacing reliably fixes:
- Surface spalling (flaking or pitting from freeze-thaw cycles or deicing salt damage)
- Hairline cracks and minor surface crazing
- Stubborn stains from rust, grease, or tannins
- Shallow scaling from weathering
- Mild surface unevenness that doesn’t involve settlement
What resurfacing cannot fix is equally worth knowing. Active settlement, large structural cracks, and drainage problems will cause any overlay to crack in the same locations, usually within a year. Resurfacing over a slab that’s still moving is a cosmetic measure at best. If your patio has sections that have shifted vertically relative to each other, or if water pools against the house after rain, address those issues first.
Pro Tip: Before/after photos of resurfaced patios are one of the best ways to calibrate expectations. Search for examples that match your patio’s current condition — a heavily spalled slab and a lightly stained one look very different after the same overlay.
What are your realistic patio resurfacing options?
Each method suits a different combination of budget, condition, and aesthetic goal. Here’s how they compare:
| Method | Durability | Aesthetics | DIY-Friendly | Prep Intensity | Typical $/ft² |
|---|---|---|---|---|---|
| Polymer-modified overlay | High | Clean/modern | Moderate | Medium | $3–$7 |
| Stampable decorative overlay | High | Decorative | Low–Moderate | Medium–High | $7–$20 |
| Epoxy/urethane coating | Medium–High | Color/gloss | Moderate | Medium | $3–$10 |
| Decorative acid stain | Medium | Variegated/natural | Low | High | $2–$6 |
| Penetrating sealer (refresh) | Low | Subtle sheen | High | Low | — |
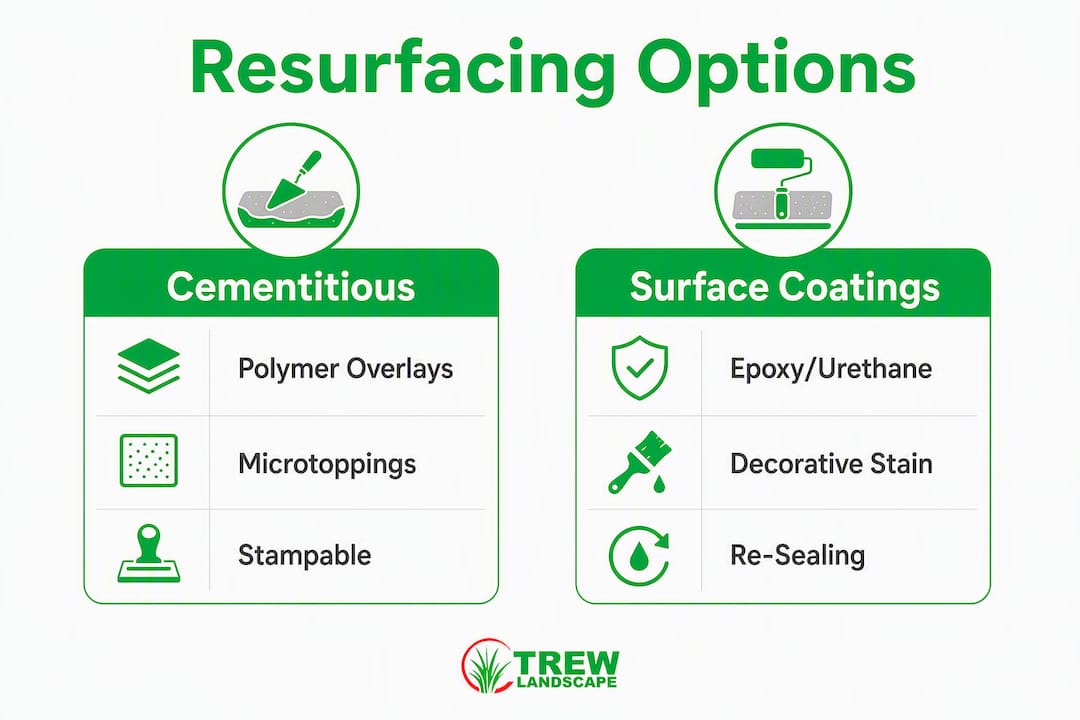
Polymer-modified cementitious overlays and microtoppings are the workhorse option. They bond chemically and mechanically to existing concrete, accept color, and can be textured with a broom or trowel. The polymer content is what makes them flex slightly with temperature swings rather than cracking like a rigid topping would.
Stampable overlays use a thicker mix that stays workable long enough to press stamps into. The result looks like new stamped concrete. These require more skill and speed to apply than a simple microtopping, and they’re harder to pull off solo on a large patio.
Epoxy and urethane coatings sit on top of the concrete rather than bonding into it the way a cementitious overlay does. They’re faster to apply and come in a wide range of colors, but they can peel if the surface isn’t profiled correctly or if moisture vapor is pushing up through the slab.
Decorative staining (acid stain or water-based reactive stain) penetrates the surface and creates a mottled, natural-looking color. It doesn’t add thickness or hide surface defects, so it works best on patios that are already in decent shape.
Re-sealing alone is only appropriate when the existing surface is sound and the sealer has worn off. It won’t hide damage, but it does protect against future staining and moisture intrusion.
One rule applies to all of these: use outdoor-rated, polymer-modified products for any exterior application. Indoor self-leveling compounds lack the polymer modifiers that allow controlled flexibility through freeze-thaw cycles. They will crack.
Is your patio actually a good candidate for resurfacing?
Run through this checklist before buying a single bag of overlay mix.
Green-light conditions (resurfacing is likely appropriate):
- Cracks are hairline width (under 1/8") with no vertical offset between sides
- Spalling is shallow, affecting only the top 1/4" or less
- The slab drains away from the house and doesn’t hold standing water
- No rebar is visible or corroding at the surface
- The slab feels solid underfoot — no hollow “drum” sound when you walk it
Yellow-flag conditions (repair first, then resurface):
- Cracks wider than 1/4" but with no offset — route and fill before overlaying
- Isolated spalled areas deeper than 1/4" — patch with polymer-modified mortar first
- Minor slope issues — can sometimes be corrected with a thicker overlay build-up
Red-flag conditions (consult a professional before proceeding):
- Cracks with vertical offset greater than 1/4" between slabs
- Sections that rock or flex when you step on them
- Water draining toward the foundation or pooling at the center
- Visible rebar corrosion or large sections of delamination
- Evidence of ongoing soil movement or frost heave
The water drop test is the simplest field check for adhesion readiness. After pressure washing, drop water on the surface. If it absorbs within a few seconds, the slab is ready. If water beads and sits on the surface, residual sealer or oil is present and will prevent bonding. You’ll need additional cleaning, chemical degreasing, or mechanical etching before any overlay will stick.
For drainage issues that go beyond the patio itself, stormwater drainage solutions may need to be addressed before resurfacing makes sense.
What preparation and repairs does resurfacing actually require?
Surface prep is where most DIY resurfacing projects succeed or fail. A beautiful overlay on a poorly prepared slab will delaminate within a season. Here’s the sequence:
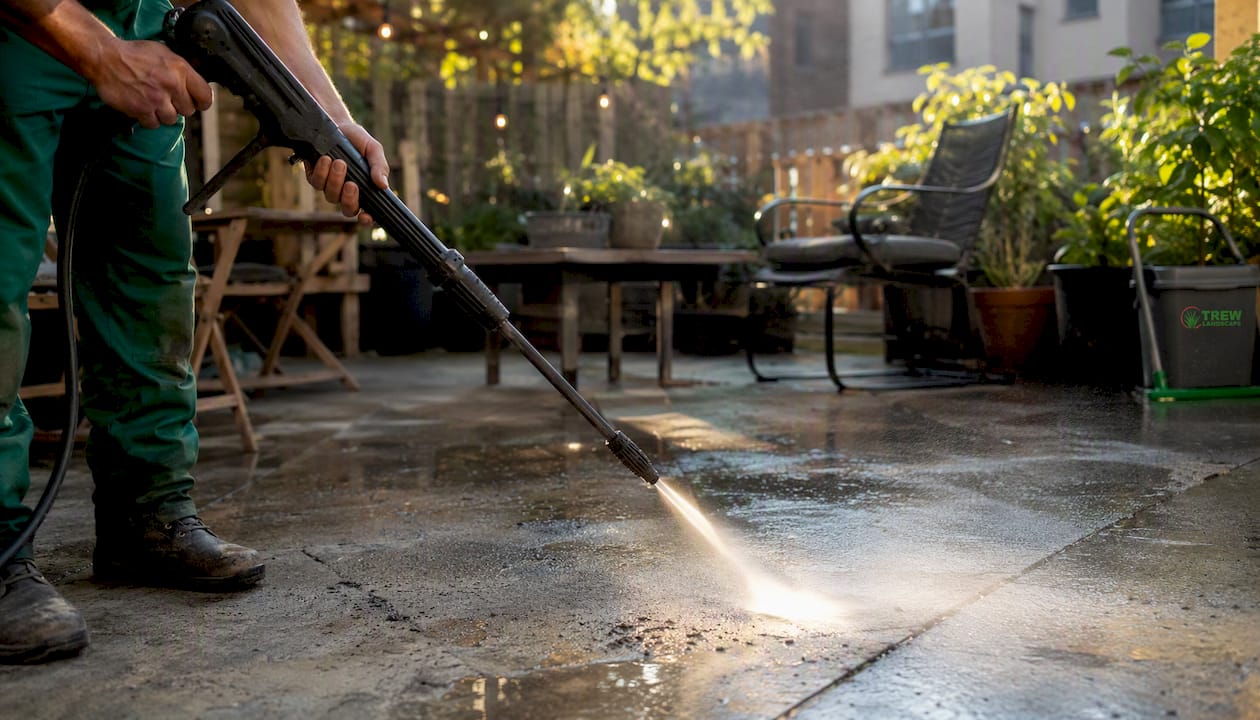
Step 1: Pressure wash thoroughly. Use at least 3,000 PSI to remove dirt, algae, and loose material. Let the slab dry completely (24–48 hours minimum in warm weather).
Step 2: Degrease. Apply a concrete degreaser to any oil or grease spots. Scrub and rinse. Repeat the water drop test.
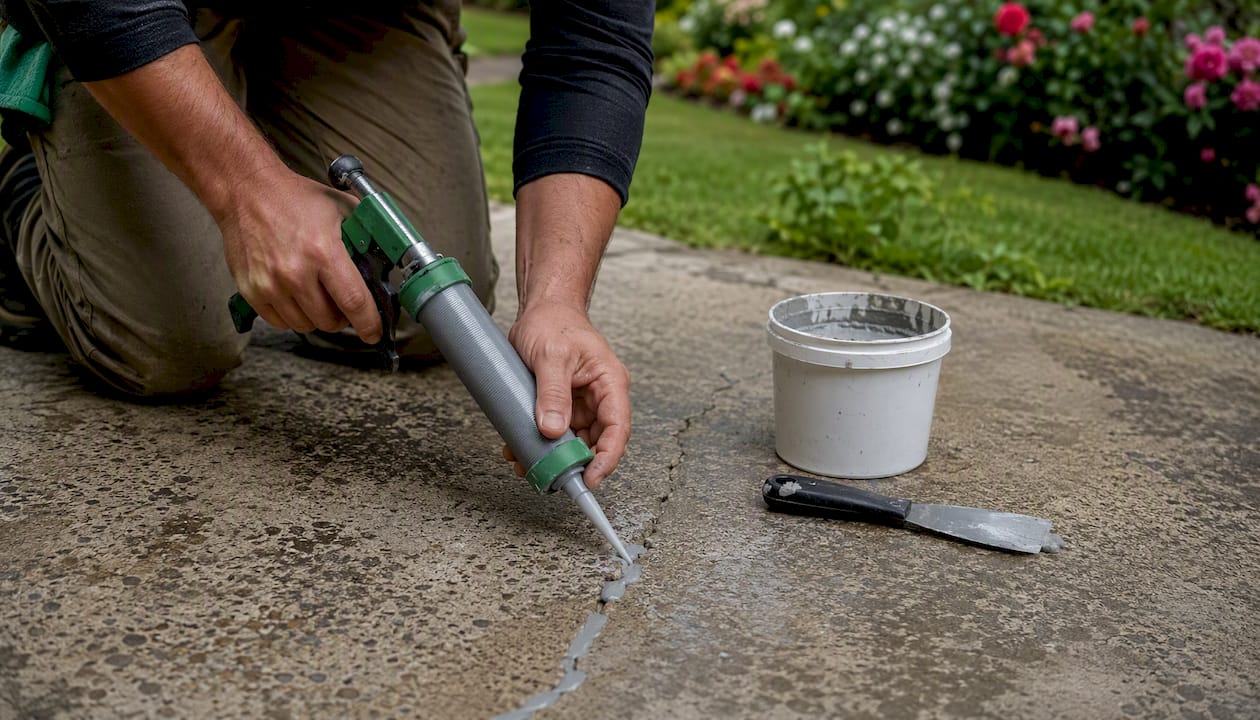
Step 3: Repair cracks. Hairline cracks can be filled with a flexible polyurethane caulk or crack filler rated for concrete. Cracks wider than 1/4" should be routed (cut wider with an angle grinder) and filled with a semi-rigid epoxy or polyurethane filler. This prevents the crack from reflecting through the new overlay.
Step 4: Patch spalls. Fill spalled areas with a polymer-modified patching mortar. Feather the edges and let cure per manufacturer instructions before overlaying.
Step 5: Profile the surface. This is the step most DIYers skip. Concrete needs a surface profile (roughness) for an overlay to grip. Light acid etching works for thin coatings; mechanical grinding or shot-blasting is better for thicker overlays. The International Concrete Repair Institute (ICRI) defines surface profiles from CSP 1 (lightest) to CSP 10 (most aggressive) — most overlays call for CSP 3–5.
Step 6: Apply primer or bonding agent. Most polymer-modified overlays require a primer coat. Follow the product’s data sheet exactly — wrong dilution or skipped primer is a leading cause of delamination.
Tools you’ll need:
- Pressure washer (3,000+ PSI)
- Angle grinder with diamond cup wheel, or rental planetary grinder for larger areas
- Polymer-modified patching mortar and trowel
- High-speed paddle mixer (not a drill with a mixing bit — speed matters)
- Gauge rake or squeegee for spreading overlay
- Finishing trowel or texture brush
Pro Tip: Proper surface profile is the single most common DIY failure point. If you’re unsure whether your etching or grinding achieved the right texture, do a small test patch with primer and overlay in an inconspicuous corner. Wait 24 hours and try to peel it off. If it bonds firmly, you’re ready to proceed.
For a deeper look at substrate work, Trew Landscape LLC’s guide on preparing your property for a new concrete patio covers many of the same principles.
DIY vs. hiring a professional: how do you decide?
The honest answer is that scope and condition drive the decision more than skill level does.
DIY is reasonable when:
- The patio is under 300–400 square feet
- The surface needs only cosmetic repair (light spalling, staining, worn sealer)
- You’re applying a single-color microtopping or simple coating
- You have a helper available for mixing and placing
Hire a professional when:
- The patio is over 400–500 square feet (larger areas require faster, more coordinated work)
- Crack repair is extensive or involves structural concerns
- You want stamped patterns, stenciling, or multi-color decorative work
- The slab has drainage or slope issues that need correction
- You want a warranty on materials and labor
The benefits of professional concrete installation go beyond finish quality. Contractors carry liability insurance, use commercial-grade equipment, and typically offer a workmanship guarantee that a DIY project can’t replicate.
Questions to ask any contractor before signing:
- What specific overlay product and primer will you use? Can I see the data sheet?
- What surface profile are you targeting, and how will you achieve it?
- What is the cure time before foot traffic, furniture, and vehicle traffic?
- What does your warranty cover, and for how long?
- Are you licensed and insured in Missouri/Kansas?
- Can you provide a line-item estimate (labor, materials, prep, sealer)?
How much does concrete patio resurfacing cost?
National averages from Angi put plain overlay projects at $3–$7 per square foot and decorative or stamped overlays at $7–$20 per square foot. HomeGuide data confirms that range, with stamped and premium decorative finishes reaching the higher end. Thumbtack marketplace data shows national project averages commonly near $1,900–$2,400, though small patios often hit contractor minimum charges regardless of square footage.
Main cost drivers:
- Extent of crack repair and patching needed before overlay
- Overlay type (plain microtopping vs. full decorative stamped finish)
- Sealer type (penetrating sealers cost less than film-forming urethane topcoats)
- Local labor rates (Kansas City sits near the national midpoint)
- Accessibility and site conditions
Three example budget scenarios:
| Scenario | Patio Size | Scope | Estimated Total |
|---|---|---|---|
| Small DIY refresh | — | Microtopping + sealer, minor patching | $300 |
| Mid-size pro plain overlay | 400 sq ft | Full prep, plain overlay, sealer | $1,900–$2,400 |
| Large decorative stamped finish | 600 sq ft | Extensive prep, stampable overlay, color, sealer | — |
Timeline breakdown:
- Day 1: Pressure wash, degrease, crack repair, patching
- Day 2: Surface profiling (grinding/etching), primer coat, cure overnight
- Day 3: Overlay application, texture, color (if applicable)
- Day 4: Sealer coat after overlay cures (typically 24 hours minimum)
- 48–72 hours after sealer: light foot traffic
- 7 days: furniture and normal use
- 28 days: full cure for heavy loads
Step-by-step DIY resurfacing workflow
This sequence applies to a polymer-modified cementitious overlay on a sound, prepared slab. Adjust timing for temperature — most overlays specify application between 50°F and 90°F, and you should avoid direct sun on hot days, which accelerates open time.
- Inspect the slab. Mark all cracks, spalls, and low spots with chalk. Decide which need repair before overlay.
- Clean and degrease. Pressure wash at 3,000+ PSI. Apply degreaser to oil spots, scrub, rinse. Allow 24–48 hours to dry.
- Run the water drop test. Water should absorb within seconds. If it beads, clean and etch again.
- Repair cracks and spalls. Route wide cracks, fill with appropriate filler, patch spalls with polymer-modified mortar. Allow full cure per product instructions.
- Profile the surface. Grind or acid-etch to achieve the target surface profile for your overlay product.
- Apply primer. Mix per data sheet, apply evenly, allow to tack (usually 30–60 minutes, not fully dry).
- Mix the overlay. Use a high-speed paddle mixer for the full recommended time. Target consistency is often described as pancake batter — pourable but not watery. Activating the polymer additives requires proper mixing speed and duration.
- Apply the overlay. Pour and spread with a gauge rake or squeegee. Work in manageable sections. Have one person mixing the next batch while the other places — most polymer-modified overlays have an open time of 20–30 minutes.
- Texture or stamp. Apply broom texture, trowel finish, or stamps while the overlay is still workable. Work quickly and consistently.
- Cure. Keep the surface damp or covered in hot/dry weather. Avoid foot traffic for the manufacturer’s specified cure window.
- Apply sealer. Once the overlay has cured (typically 24 hours minimum), apply an exterior-rated sealer. Two thin coats beat one thick coat.
Safety and PPE:
- Respirator (N95 or better) when grinding — concrete dust contains silica
- Safety glasses or face shield during grinding and mixing
- Chemical-resistant gloves when handling acid etching solutions or epoxy primers
- Knee pads for trowel work
- Non-slip footwear
Pro Tip: Buy 10–15% more overlay material than your square footage calculation suggests. Surface profiling and texture consume more product than a flat calculation accounts for, and running out mid-application creates cold joints and visible seams that are nearly impossible to hide.
What materials and tools do you need for patio resurfacing?
Material categories to know:
- Polymer-modified cementitious overlays: The core product for most patio resurfacing projects. Look for “exterior-rated,” “polymer-modified,” and a specified freeze-thaw cycle count on the data sheet. Brands like Quikrete, Sakrete, and specialty suppliers like Ardex and Mapei carry exterior-grade options.
- Stampable overlay mixes: Thicker, longer open time, designed for decorative work. Available at specialty concrete suppliers more reliably than big-box stores.
- Primers and bonding agents: Required by most overlay systems. Never skip this step to save time.
- Colorants and integral pigments: Powder or liquid pigments mixed into the overlay, or broadcast color hardeners for stampable systems.
- Sealers: Penetrating sealers (silane/siloxane) protect from within and don’t change the surface appearance much. Film-forming sealers (acrylic, urethane, epoxy) add sheen and color enhancement but require periodic recoating.
Tool checklist:
- Pressure washer (3,000+ PSI)
- Angle grinder with diamond cup wheel, or rental planetary grinder for larger slabs
- High-speed paddle mixer (half-inch drill minimum, or dedicated mixer)
- Gauge rake and finishing trowels
- Pump sprayer for primer and sealer
- Texture brushes or stamps (if applicable)
- Mixing buckets, measuring containers
Where to buy: Home centers like Home Depot and Lowe’s carry Quikrete and Sakrete products, which work well for straightforward overlay projects. For stampable systems, decorative colorants, or specialty primers, a local concrete supply house will have better product selection and technical staff who can match you to the right system for your conditions. Product data sheets from specialty suppliers are also more detailed, which matters when you’re troubleshooting adhesion or freeze-thaw performance.
Product label checklist before you buy:
- “Exterior-rated” or “for exterior use”
- Freeze-thaw resistance (number of cycles tested)
- “Polymer-modified”
- Recommended thickness range
- Bond strength values and substrate requirements
How do you maintain a resurfaced patio so it lasts?
A well-applied overlay on a sound slab can last 8–15 years with basic maintenance. Neglect the sealer and that drops significantly.
Routine maintenance:
- Sweep or blow off debris regularly to prevent surface abrasion
- Clean spills promptly, especially grease, wine, and rust-producing metal furniture
- Avoid deicing salts (sodium chloride, calcium chloride) — they accelerate surface deterioration on many overlay types. Use sand for traction in winter.
- Rinse with a garden hose after heavy pollen or dust seasons
Sealer refresh intervals:
- Film-forming acrylic sealers: every 2–3 years, or when water stops beading on the surface
- Urethane or epoxy topcoats: every 3–5 years depending on traffic and UV exposure
- Penetrating sealers: every 5–7 years, less visible wear but still worth refreshing
When small cracks appear in the overlay (hairline crazing is common after a few years), fill them with a flexible concrete crack filler before they widen. A small repair done promptly is far easier than waiting until the crack allows water infiltration and freeze-thaw damage to undermine the bond.
If the overlay starts to show widespread delamination, peeling, or surface erosion, that’s a signal for a full refresh rather than spot repairs. At that point, the same prep-and-overlay process applies again, though you’ll need to assess whether the existing overlay can serve as a substrate or needs to be removed.
Why does resurfacing sometimes fail?
Most overlay failures trace back to one of five causes, and all of them are avoidable.
- Inadequate surface profile. If the concrete wasn’t ground or etched to the right roughness, the overlay has nothing to grip. The bond fails, often within the first freeze-thaw cycle.
- Residual sealer or oil. The water drop test catches this. Skipping it and proceeding anyway is the most common single mistake in DIY projects.
- Using indoor self-leveling compounds outdoors. These products are rigid and lack the polymer modification for outdoor thermal movement. They crack. See the next section for the technical details.
- Over-thinning the mix. Adding extra water to make mixing easier weakens the polymer matrix and reduces bond strength. Follow the mix ratio on the data sheet exactly.
- Working too slowly. Polymer-modified overlays have limited open time, and trying to stretch a batch past its working window creates lap marks and weak spots. This is why a helper is nearly essential for anything over 200 square feet.
For a broader look at concrete placement errors, Trew Landscape LLC’s article on common mistakes to avoid when pouring concrete covers related pitfalls that apply to overlay work as well.
Why indoor self-leveling products fail outdoors
This is the technical gap most DIY guides gloss over, and it’s worth understanding clearly.
Indoor self-leveling compounds are formulated for controlled interior environments. They’re designed to be rigid once cured, which is fine on a basement floor that stays at a stable temperature. Outdoors, concrete moves. A Kansas City patio slab can swing 80°F or more between a January night and a July afternoon. That thermal movement, combined with moisture cycling from rain and freeze-thaw, creates stress that a rigid, non-polymer-modified topping cannot absorb. The result is cracking, often within the first winter.
Exterior-rated polymer-modified overlays contain polymer additives (typically latex or acrylic) that give the cured material controlled flexibility. They also bond more aggressively to properly prepared substrates and are formulated to resist moisture vapor transmission at levels typical of outdoor slabs.
What to verify on a product data sheet before buying:
- “Exterior-rated” or “suitable for exterior applications” stated explicitly
- Freeze-thaw resistance: look for a tested cycle count (ASTM C666 or equivalent)
- Polymer-modified: listed in the product description or ingredients
- Bond strength: minimum 200 psi tensile bond to concrete substrate is a common benchmark
- Substrate moisture tolerance: some products specify maximum moisture vapor emission rates
Pro Tip: Ask your concrete supplier for the technical data sheet before purchasing, not just the product label. If a supplier can’t produce a data sheet, that’s a signal to look elsewhere. Specialty concrete suppliers typically stock products with more complete documentation than big-box store options.
Key Takeaways
Most sound concrete patios can be resurfaced cost-effectively with an exterior-rated, polymer-modified overlay — but only after thorough prep, proper surface profiling, and an honest assessment of the slab’s structural condition.
| Point | Details |
|---|---|
| Assess the slab first | Check for offset cracks, delamination, drainage issues, and rebar exposure before committing to resurfacing. |
| Use exterior-rated products | Indoor self-leveling compounds lack freeze-thaw resistance and will crack outdoors; always verify “polymer-modified” and “exterior-rated” on the data sheet. |
| Budget realistically | Plain overlays run $3–$7/ft²; decorative stamped finishes reach $7–$20/ft²; national project averages sit near $1,900–$2,400. |
| Prep is the job | Surface profiling, crack repair, and the water drop test determine whether the overlay bonds — skipping any step is the leading cause of early failure. |
| Trew Landscape LLC for Kansas City projects | For patios over 400 sq ft, complex decorative work, or structural concerns, Trew Landscape LLC offers professional concrete resurfacing and hardscaping in the Kansas City area. |
Why Trew Landscape LLC often recommends professional resurfacing
There’s a pattern we see regularly in Kansas City: a homeowner does a solid job on prep, applies a quality overlay, and gets a great result on a 200-square-foot patio. Then a neighbor tries the same approach on a 600-square-foot slab with a few settlement cracks, works alone, runs out of material mid-pour, and ends up with a surface that looks worse than what they started with.
The difference isn’t the product. It’s the scope and the conditions. Larger patios, decorative finishes, and slabs with any structural history are genuinely harder to execute well without commercial equipment and experience. A professional crew can profile a slab in an hour with a planetary grinder that would take a homeowner half a day with a rental angle grinder. They also carry the product knowledge to match the right overlay system to your specific slab conditions, which matters more than most DIY guides acknowledge.
If you’re in the Kansas City area and your patio has any of the red-flag conditions described above, or if you want a stamped or decorative finish that needs to look right the first time, getting a professional assessment before you buy materials is worth the conversation.
Trew Landscape LLC patio and concrete services in Kansas City

A resurfaced patio is only as good as the work behind it. Trew Landscape LLC handles the full scope of concrete patio work in the Kansas City area: surface assessment, crack repair, exterior-rated overlay application, stamped and decorative concrete finishes, and drainage corrections that make resurfacing last. The difference from a DIY kit from a home center is the equipment, the product selection, and the guarantee that the work holds up through a Kansas City winter.
For homeowners who want a decorative upgrade, Trew Landscape LLC’s hardscape design services cover everything from stamped overlays to full patio redesigns with pavers and integrated landscaping. For straightforward concrete repair and resurfacing, the concrete contractor services page covers what’s included and how to request a quote.
Contact Trew Landscape LLC to schedule an on-site assessment and get a line-item estimate for your patio project.
Useful sources
- Concrete Resurfacing Cost (Angi)
- Concrete Resurfacing Cost (HomeGuide)
- Concrete Resurfacing Cost (Thumbtack)
- Can You Pour Self-Leveling Concrete Over Existing Concrete? (A1 Concrete)
- Concrete Restoration Guidance (ConcreteNetwork)
- Resurfacing a Concrete Slab (Sakrete)
- How to Resurface a Concrete Patio (FixUpFirst)
- Backyard Drainage Solutions (Pave-N-Turf)
FAQ
How much does it cost to resurface a concrete patio?
Plain overlays typically cost $3–$7 per square foot, and decorative or stamped finishes cost $7–$20 per square foot. Most professionally completed projects have a national average cost near $1,900–$2,400, though small patios often hit contractor minimum charges.
Can a concrete patio be resurfaced?
Yes, as long as the slab is structurally sound with no active settlement, large offset cracks, or severe delamination. Surface problems like spalling, staining, and hairline cracks are exactly what resurfacing is designed to fix.
Can you pour self-leveling concrete over an existing patio?
Outdoor-rated, polymer-modified overlays can be applied over existing concrete with proper prep. Standard indoor self-leveling compounds should not be used outdoors — they lack freeze-thaw resistance and will crack through seasonal temperature swings.
What can you put over a concrete patio to make it look better?
The most effective options are a polymer-modified cementitious overlay (for a clean, modern surface), a stampable decorative overlay (for patterns and color), or an epoxy or urethane coating (for color and gloss). Decorative staining works well on patios that are already in good condition but need a color refresh.