
Trew Landscape Blog
Retaining Wall Materials: Compare Cost and DIY Limits
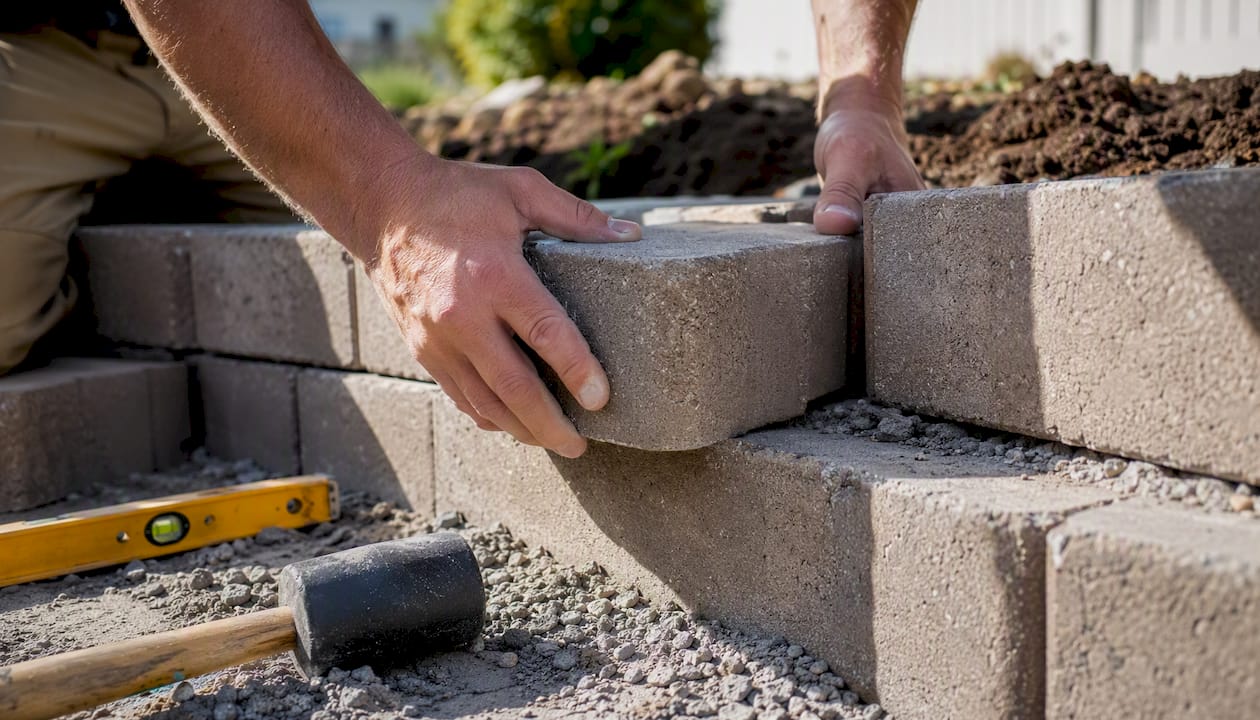
Retaining Wall Materials: Compare Cost and DIY Limits ! Hands installing segmental concrete blocks outdoors Segmental concrete block is the best all-around choice for most homeowners.
Retaining Wall Materials: Compare Cost and DIY Limits
Segmental concrete block is the best all-around choice for most homeowners. It stacks dry, drains well, comes in dozens of finishes, and works for both DIY projects and contractor-built walls. Poured concrete leads on raw structural strength; natural stone wins on longevity and curb appeal. Timber costs the least upfront but typically needs full replacement within 10–20 years. Gabion and sheet pile serve specific niche conditions rather than typical yard projects.
Three things to know before you read further:
- DIY height limit: Keep walls at or under 3 ft without geogrid reinforcement or a permit. Taller walls need engineering.
- Drainage is non-negotiable: Inadequate drainage is the leading cause of retaining wall failure across every material. Plan for it from the start.
- When to hire a pro: Walls over roughly 3–4 ft, walls near structures or driveways, and walls in poor soil conditions require a licensed contractor and, often, engineered drawings aligned with International Building Code standards. Trew Landscape LLC handles permitting and engineering coordination for Kansas City homeowners.
Key Takeaways
Segmental concrete block is the most practical all-around retaining wall material for homeowners, but drainage quality determines whether any wall succeeds or fails regardless of material.
| Point | Details |
|---|---|
| Best material for most homes | Segmental concrete block balances installed cost, DIY accessibility, and long lifespan appropriate for most residential walls. |
| Drainage is structural | Gravel backfill, perforated pipe, and filter fabric are required on every wall, not optional upgrades. |
| DIY vs. pro threshold | Walls under ~3 ft are DIY-feasible; walls over 3–4 ft need geogrid, permits, and often a licensed contractor. |
| Compare lifecycle cost | Timber at $15–$30/sq ft lasts 10–20 years; stone at $35–$90+/sq ft can last 75–100+ years. |
| Trew Landscape LLC | Handles retaining wall design, drainage, permitting, and construction for Kansas City homeowners. |
Table of Contents
- How do common retaining wall materials compare?
- A closer look at each retaining wall material
- What parts does a retaining wall actually need?
- What does a retaining wall actually cost?
- Which walls can you build yourself, and what mistakes should you avoid?
- When should you hire a contractor or engineer?
- What most homeowners get wrong about retaining walls
- Trew Landscape LLC builds retaining walls that last in Kansas City
- Sources
- FAQ
How do common retaining wall materials compare?
The table below covers the seven materials most homeowners encounter, rated across the dimensions that actually drive decisions.
Cost data sourced from the FixaPros Retaining Wall Cost Guide.
Pro Tip: Drainage failure, not material weakness, ends most retaining walls early. Budget for gravel backfill and perforated pipe on every project, regardless of material.
A closer look at each retaining wall material
Segmental concrete block (interlocking SRW)
Segmental retaining wall systems are the most versatile option for residential projects. Units interlock dry without mortar, which means they flex slightly with freeze-thaw cycles rather than cracking. Drainage happens naturally through the joints, though you still need gravel backfill and a perforated pipe at the base.
Pros: Wide finish selection, DIY-accessible, geogrid-upgradeable for taller walls, widely available at home centers. Cons: Requires precise base compaction; taller walls need geogrid and often permits.
Typical installed cost varies depending on project specifics. Lifespan generally extends several decades with proper installation. DIY feasible up to about 3 ft in height.
Poured concrete
Poured concrete delivers the highest structural strength of any wall type. It handles heavy surcharges from driveways and structures that would stress other materials. The tradeoff: the solid face traps water unless you engineer drainage from the start, and forming and pouring concrete is not a realistic DIY task for most homeowners.
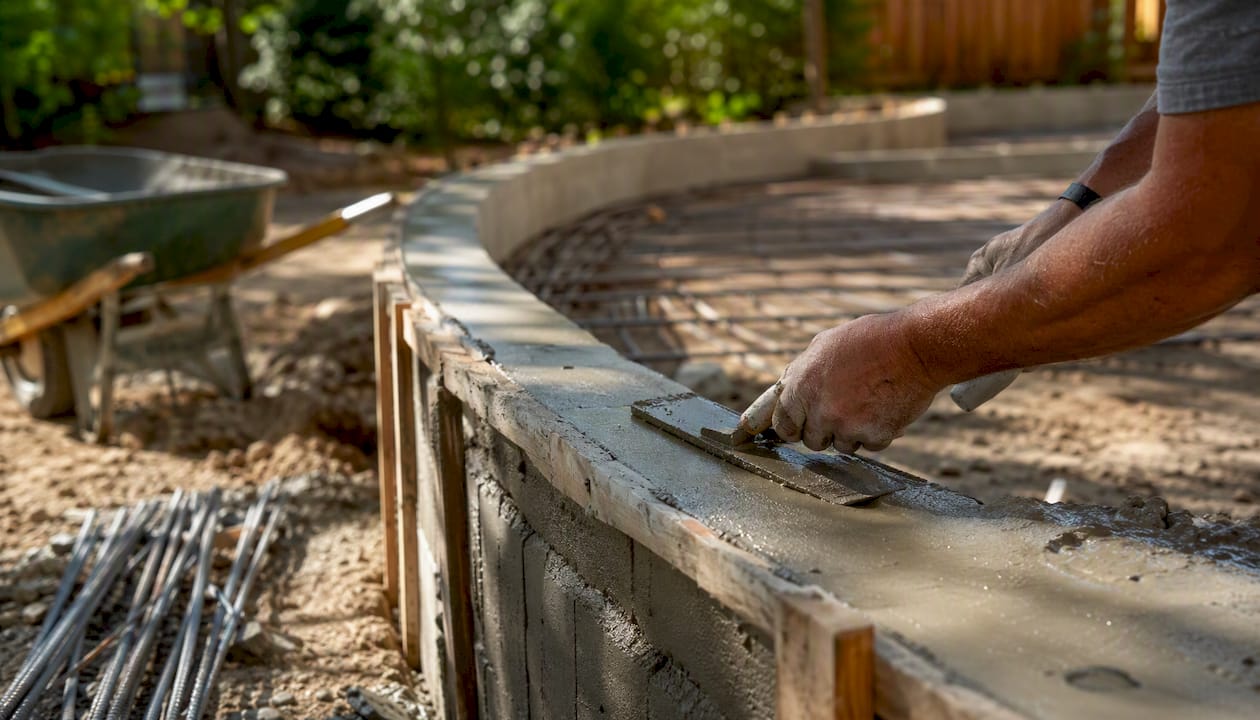
Pros: Maximum strength, low long-term maintenance, can be stamped or finished. Cons: Requires professional forming and pour, engineered drainage mandatory, expansion joints needed.
Typical installed cost: $30–$60+/sq ft. Lifespan: 50–100 years. DIY: Not recommended.
Natural stone (dry-stack and mortared)
Natural stone can last 75–100+ years with minimal maintenance, which is why it remains the premium choice for homeowners who plan to stay long-term. Dry-stack stone allows water to pass through the gaps naturally. Mortared stone looks more formal and handles higher loads, but it needs weep holes and skilled masonry to avoid cracking.
Pros: Exceptional longevity, premium aesthetics, dry-stack drains naturally. Cons: High labor cost, mortared work requires skilled mason, heavy material to move.
Typical installed cost: $35–$90+/sq ft. Lifespan: 75–100+ years. DIY: Dry-stack only, up to ~2–3 ft.
Brick and CMU (concrete masonry unit)
Brick and CMU walls suit formal residential settings and match existing masonry on the home. Both materials are nearly impermeable, so weep holes every 4–6 ft are required to relieve hydrostatic pressure. CMU is faster to lay than brick and often used as a structural core with a brick veneer face.
Pros: Classic look, durable, pairs well with brick homes. Cons: Mortar joints can crack over time, weep holes mandatory, skilled labor required.
Typical installed cost: $20–$45/sq ft. Lifespan: 50–100 years. DIY: Low walls only.
Timber and pressure-treated wood
Timber is the entry point for homeowners on a tight budget. Pressure-treated lumber resists rot longer than untreated wood, but even the best-treated timber retaining walls typically last 10–20 years before the wood softens and the wall starts to lean. Avoid timber for any wall supporting a structure, driveway, or heavy soil load.
Pros: Lowest upfront cost, easy to cut and work with basic tools. Cons: Shortest lifespan, susceptible to rot and insect damage, not suitable for structural applications.
Typical installed cost: $15–$30/sq ft. Lifespan: 10–20 years. DIY: Yes, up to ~3 ft.
Pro Tip: Compare lifecycle cost, not just installed price. A timber wall at $15/sq ft that needs full replacement in 15 years often costs more over 30 years than a segmental block wall at $35/sq ft that lasts 50.
Gabion baskets
Gabion walls are wire mesh cages filled with rock. They drain freely by nature, which makes them well-suited for erosion-prone slopes, stream banks, and areas with high groundwater. The industrial look suits naturalistic or rural settings better than formal suburban yards.
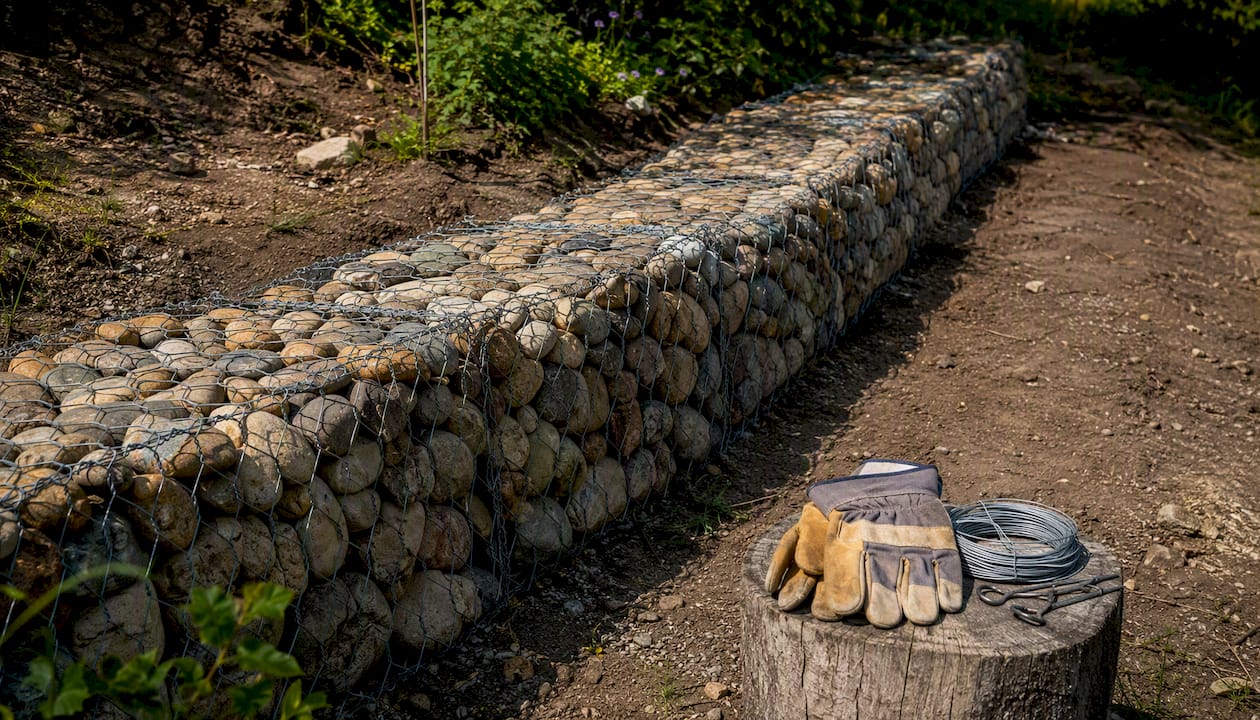
Pros: Excellent drainage, handles erosion well, no mortar needed. Cons: Industrial appearance, wire mesh can corrode over time, rock fill adds material cost.
Typical installed cost: $25–$50/sq ft. Lifespan: 30–50 years. DIY: Moderate, manageable for low walls.
Sheet pile (steel and vinyl)
Sheet pile walls are driven vertically into the ground rather than built up in courses. Steel sheet pile handles heavy loads and waterfront conditions; vinyl sheet pile suits lighter residential applications near water. Neither is a DIY option.
Pros: Works in soft soils and tight spaces, good for waterfront. Cons: Requires specialized equipment, utilitarian appearance, higher cost.
Typical installed cost: $30–$70+/sq ft. Lifespan: 25–50 years. DIY: No.
What parts does a retaining wall actually need?
Every retaining wall, regardless of material, shares the same basic anatomy. Skipping any component is where failures begin.
Core components and their roles:
- Leveling pad: Compacted gravel or concrete base that distributes load evenly. A poorly leveled pad causes uneven settling.
- Wall units or face: The visible material (block, stone, timber, etc.) that holds back the soil.
- Gravel backfill: The SRW design manual recommends 12 in. of free-draining gravel directly behind the wall face to reduce hydrostatic pressure.
- Perforated collector pipe: Sits at the base of the gravel zone and carries water to a positive outlet away from the wall.
- Filter fabric (geotextile): Wraps the gravel zone to keep native soil fines from migrating into the drainage layer and clogging it.
- Geogrid reinforcement: Horizontal layers of polymer mesh buried in the backfill at specified intervals for walls over ~3 ft. ICPI best practices for segmental retaining wall units document geogrid placement requirements for engineered SRW systems.
- Batter: The slight backward lean (typically 1 in. per foot of height) built into the wall face to counteract soil pressure.
The drainage rule that matters most: Industry standards identify inadequate drainage as the primary cause of retaining wall failure. Water trapped behind a wall builds hydrostatic pressure that can push even a well-built wall forward.
Height and permit thresholds to know:
- Walls under ~3 ft: typically DIY-feasible with proper base and drainage, no permit required in most jurisdictions.
- Walls 3–4 ft: reinforcement (geogrid or rebar) generally required; check local permit requirements.
- Walls over 4 ft: most jurisdictions require a building permit and engineered drawings.
- Walls supporting driveways, structures, or surcharges: engineer required regardless of height.
Planning checklist before you start:
- Mark all utilities (call 811 before any excavation).
- Measure total face area (length × height) for material estimates.
- Identify the outlet point for your perforated drain pipe.
- Check local permit requirements based on wall height.
- Test or observe soil type. Granular, free-draining soils are ideal; high-clay soils increase drainage demands and may need geotechnical review.
What does a retaining wall actually cost?
Material choice is only one cost variable. Labor and site conditions often equal or exceed material costs on their own.
Typical installed cost ranges by material:
- Timber: $15–$30/sq ft
- Segmental concrete block: $25–$50/sq ft
- Gabion: $25–$50/sq ft
- Brick / CMU: $20–$45/sq ft
- Poured concrete: $30–$60+/sq ft
- Natural stone: $35–$90+/sq ft
- Sheet pile: $30–$70+/sq ft
These ranges come from the FixaPros Retaining Wall Cost Guide and reflect installed prices including labor. Material-only costs run roughly half those figures, but that gap is where most DIY budget surprises hide.
Primary cost drivers:
- Wall height: Taller walls need more material, more gravel backfill, geogrid, and often engineering fees.
- Site access: Tight access means hand-carrying materials or renting smaller equipment, both of which add labor hours.
- Grading and excavation: Rocky or heavily sloped sites cost more to prep. See land grading and excavation considerations for what site prep involves.
- Drainage system: Perforated pipe, gravel, and filter fabric add $3–$8/linear ft but prevent far more expensive failures.
- Geogrid and engineering: Required for taller walls; engineering fees alone can run $500–$2,000+ depending on complexity.
- Permits: Fees vary by municipality. Kansas City homeowners can review local permit requirements before budgeting.
- Finish and veneer: A CMU core with natural stone veneer costs more than plain block but dramatically changes the look.
Quick budget estimate method:
- Measure wall face area (length × height in sq ft).
- Multiply by the low end of your chosen material’s installed range for a floor estimate.
- Add 15–25% contingency for site unknowns (rock, poor soil, drainage complications).
Pro Tip: Ask every contractor for an itemized bid broken down by unit price per sq ft of face, drainage system, base prep, and permits separately. A lump-sum bid makes it nearly impossible to compare proposals or spot scope gaps.
Which walls can you build yourself, and what mistakes should you avoid?
Short segmental block walls and low dry-stack stone walls under ~3 ft are the most realistic DIY projects for homeowners with basic construction experience. Both materials are forgiving, widely available, and don’t require mortar.
Essential tools and materials for a DIY block wall:
- Plate compactor (rent one; hand tamping is not adequate)
- 4-ft level and string line
- Rubber mallet
- Crushed gravel (base and backfill)
- Perforated drain pipe and filter fabric
- Segmental retaining wall blocks
- Geogrid (if building over 2 ft)
Seven mistakes that cause early failure:
- Skipping base compaction. A soft base settles unevenly and the wall tilts within a season.
- No drainage system. Building without gravel backfill and a perforated pipe is the single most common cause of wall failure.
- Insufficient batter. A perfectly vertical wall fights soil pressure directly. Build in that backward lean from course one.
- Ignoring soil type. Clay-heavy soil holds water and expands. It demands more drainage capacity than sandy soil.
- Underestimating frost depth. In Kansas City, frost depth reaches roughly 24 in. A base set above frost depth will heave.
- Skipping geogrid over 3 ft. Geogrid is not optional for taller walls. It ties the wall into the backfill mass and prevents rotation.
- Poor backfill compaction. Loose backfill settles and pulls the wall back. Compact in 6–8 in. lifts.
Safety note: Excavation deeper than 5 ft requires shoring or sloping per OSHA standards. Always call 811 before digging to locate buried utilities. Walls over 4 ft or near property lines typically require a permit. If your project involves heavy equipment, deep cuts, or unstable slopes, hire a professional. A leaning or failing wall is a safety hazard, not just a cosmetic problem.
When should you hire a contractor or engineer?
Some projects are straightforward DIY. Others carry real structural and legal risk if they go wrong. Here are the clear triggers for professional involvement.
Hire a licensed contractor when:
- The wall exceeds ~3–4 ft in height
- The wall supports a driveway, structure, or any significant surcharge load
- Soil conditions include high clay content, high water table, or unstable fill
- The site requires deep excavation or heavy equipment
- The wall runs near a property line, public sidewalk, or easement
- You need permits and don’t want to navigate the process alone
Designing to IBC and ASCE standards requires soil property data, load calculations, and reinforcement specifications that go well beyond what most homeowners can assess on their own.
What a professional installation typically includes:
- Site survey and soil assessment
- Geotechnical recommendations (for complex sites)
- Engineered drawings and permit application
- Excavation and leveling pad installation
- Drainage system layout and installation
- Wall construction with proper batter and geogrid placement
- Backfill compaction in lifts
- Final grading and cleanup
Questions to ask every contractor before signing:
- Are you licensed and insured in Missouri?
- Who pulls the permits, and is that included in your bid?
- Can you provide references for similar wall projects?
- Is your bid itemized by scope (base prep, drainage, wall, backfill)?
- What warranty do you offer on labor and materials?
- Will you provide engineered drawings if required?
Pro Tip: Get at least three itemized bids. A contractor who won’t itemize is either hiding markup or hasn’t thought through the scope. Either way, that’s a problem before the first shovel hits the ground.
For Kansas City-specific retaining wall construction details and what to expect regionally, Trew Landscape LLC’s local project guides cover the process step by step.
What most homeowners get wrong about retaining walls
The most consistent pattern in failed retaining walls is not material failure. It’s drainage failure. Homeowners choose a material, price it out, and then treat the drainage system as an optional line item to cut when the budget gets tight. That’s backwards. The gravel backfill and perforated pipe are structural components, not accessories.
The second pattern: underestimating what “3 ft” actually means in practice. A wall that looks modest from the street can be retaining 4–5 ft of soil on the uphill side once you account for grade change behind the face. Measure the actual retained height, not the visible face height.
One thing that rarely gets mentioned: on clay-heavy sites, size your drain pipe one step larger than the minimum spec. Clay fines migrate over time even through filter fabric, and a slightly oversized pipe buys years of drainage performance before any maintenance is needed.
Trew Landscape LLC builds retaining walls that last in Kansas City
Choosing the right material is step one. Getting the base, drainage, and backfill right is what actually determines whether a wall stands for 50 years or leans in five. Trew Landscape LLC handles every phase of retaining wall and hardscape projects in Kansas City, from initial site assessment and permit coordination through drainage installation, wall construction, and final grading.

Every estimate includes an itemized scope covering base prep, drainage system, wall construction, and backfill. Trew Landscape LLC coordinates permits and engineering when required, so you don’t have to manage that process separately. Whether you’re building a low garden wall or a structural wall on a steep slope, the team reviews your site conditions and recommends the material and design that fits your budget and long-term goals.
Request a free consultation at Trewlandscape and get an itemized estimate for your project.
Sources
- Retaining Wall Materials Compared: Block, Stone, Timber, and Concrete | FixaPros Cost Guide
- Types of Retaining Walls: How to Choose the Right One for Your Yard (Nicolock)
- Retaining Wall Materials: Block vs Stone vs Concrete | SL
- Site retaining walls — Sync standard
FAQ
What is the best material for a retaining wall?
Segmental concrete block is the best all-around choice for most homeowners. It balances installed cost ($25–$50/sq ft), DIY accessibility up to ~3 ft, long lifespan, and good drainage performance.
What is the cheapest retaining wall to build?
Timber is the least expensive option at roughly $15–$30/sq ft installed, but its 10–20 year lifespan means total lifecycle cost often exceeds that of longer-lasting materials like segmental block.
What are the most common mistakes when installing retaining wall blocks?
The most damaging mistakes are skipping base compaction, omitting a gravel drainage zone and perforated pipe, building without adequate batter, and failing to use geogrid on walls over ~3 ft. Poor backfill compaction is a close second cause of early failure.
What are the main types of retaining walls?
The four main structural types are gravity walls (rely on mass, including dry-stack stone and gabion), segmental/modular walls (interlocking block with optional geogrid), cantilever walls (poured concrete or CMU with a structural footing), and anchored walls (sheet pile or tieback systems for heavy loads or soft soils).
When do you need a permit for a retaining wall?
Most jurisdictions require a permit for walls over 4 ft in height, walls supporting surcharges like driveways, or walls near property lines. Kansas City homeowners should verify current local requirements before starting any wall project.