
Trew Landscape Blog
Avoid a Failed Patio: Kansas City Homeowners' Permeable Paver Patio Plan
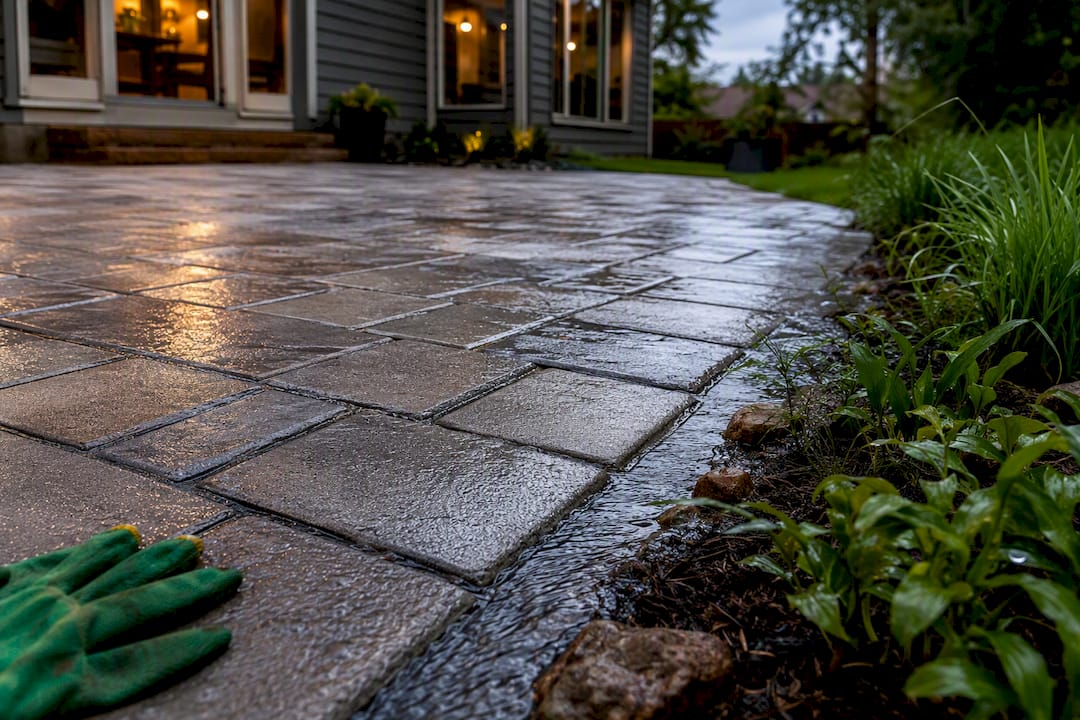
Avoid a Failed Patio: Kansas City Homeowners' Permeable Paver Patio Plan ! Permeable paver patio draining toward planted edge A permeable paver patio lets rainwater soak through the surface into a stone base below instead of running off into your yard or storm drain, giving you a durable, attractive patio that also solves standing water problems.
Avoid a Failed Patio: Kansas City Homeowners’ Permeable Paver Patio Plan
A permeable paver patio lets rainwater soak through the surface into a stone base below instead of running off into your yard or storm drain, giving you a durable, attractive patio that also solves standing water problems. Before you commit, check your soil’s infiltration rate or have a qualified installer test it, since drainage capacity and local slope determine whether a full-infiltration or underdrain design fits your property.
TL;DR:
- Proper soil testing is essential to determine whether full infiltration is feasible or if an underdrain and liner are necessary, especially in areas with slow-draining soil or high water tables.
- Routine maintenance, including vacuum sweeping and joint aggregate replenishment, is critical to restoring infiltration capacity and preventing early system failure from clogging.
- Base layer depth and materials, such as reservoir aggregate and geotextile fabric, are more influential on the system’s longevity than paver choice or surface pattern.
- Installation costs typically range from $5 to over $30 per square foot, with site conditions, base depth, and demolition impacting the final price more than paver material itself.
- Stakeholders should request a site-specific infiltration test and ensure detailed specifications on base depth, aggregate gradation, and maintenance plans to maximize the lifespan and performance of a permeable paver system.
Table of Contents
- How a Permeable Paver Patio Actually Manages Water
- Which Permeable Paver Material Fits Your Patio?
- What Goes Under Permeable Pavers: Base Depth and Aggregate
- What a Permeable Paver Patio Costs, and Where to Find Rebates
- Installation Timeline: What to Expect From Start to Finish
- Maintenance and Lifespan: Keeping the System From Clogging
- Design Choices That Balance Looks and Drainage
- When to Bring in a Professional Installer
- Why the Base Matters More Than the Paver You Choose
- Get a Site-Specific Plan From Trew Landscape LLC
- Sources
- FAQ
How a Permeable Paver Patio Actually Manages Water
The trick isn’t the pavers themselves. It’s what’s underneath them.
A working system relies on five layers stacked with a specific purpose each. The surface course (the pavers you walk on) sits on a bedding layer, usually a thin bed of small, clean aggregate that lets water pass straight through the joints. Below that is a choker course, a layer of smaller stone that stops the bedding material from washing into the reservoir below. The reservoir or subbase is the workhorse: a thick bed of open-graded stone that stores water temporarily and lets it soak into the ground. At the bottom sits the soil subgrade, which determines how fast, or whether, that stored water actually drains away.
Design guidance from the Concrete Masonry & Hardscapes Association treats this layer profile as the baseline for interlocking concrete pavement, and the EPA’s best management practices for permeable pavements frame it as a standard green stormwater infrastructure tool for both residential and commercial sites.
Not every site can handle full infiltration. When native soil drains slowly or the water table sits close to the surface, engineers add a perforated underdrain pipe in the reservoir layer, or install an impermeable liner and route overflow to a controlled outlet. That decision hinges on:
- A measured soil infiltration rate (not a guess)
- Seasonal high-water-table depth
- Slope and proximity to a foundation or basement
Here’s the number worth remembering: systems that fall behind on cleaning lose infiltration capacity fast, but a review of technical and environmental performance data confirms that routine maintenance restores that capacity rather than the material needing replacement. The base design and the upkeep schedule matter more than the paver you pick.
Which Permeable Paver Material Fits Your Patio?
Material choice depends on how much foot or vehicle traffic the space sees, your budget, and how much maintenance you’re willing to do yourself.
- Permeable interlocking concrete pavers (PICP): The standard for driveways and heavy-use patios. Interlocking joints filled with small aggregate handle vehicle loads and freeze-thaw cycling well, but installation is precise work best left to a professional.
- Concrete grid pavers: Open-cell concrete units filled with gravel or grass. Lower cost, decent DIY potential for a small patio, but the open cells can get uneven underfoot over time.
- Plastic grid systems: The most DIY-friendly option. Interlocking plastic cells filled with gravel or turf, ideal for a casual patio or overflow parking pad, though they lack the finished look of concrete or stone.
- Porous concrete or asphalt: Poured in place, not a paver at all, but part of the same category. Requires specialized batching and pro installation, and it’s less common for residential patios than driveways.
- Natural stone with open joints: The highest-end aesthetic option. Irregular stone set with wide, permeable joints looks custom but demands more precise leveling and higher material cost.
Whatever you choose, avoid jointing material with fines (the fine dust that comes with unwashed or poorly graded stone). Fines clog the void spaces that make the whole system work, and that’s one of the most common installer mistakes on a DIY job.
What Goes Under Permeable Pavers: Base Depth and Aggregate
The base you can’t see is the part that actually does the work, and it’s also the part homeowners get wrong most often when they try to shortcut a quote.
For a patio, expect a moderate base depth, depending on soil conditions and local frost depth. A driveway needs a deeper base to support vehicle loads and provide stability against rutting.
- Reservoir/subbase aggregate: Usually an open-graded stone like ASTM No. 2, chosen for its large void ratio that stores and moves water.
- Choker course: A finer stone, often ASTM No. 57, that bridges the size gap between the reservoir and the bedding layer.
- Bedding and joint stone: Small, angular aggregate such as ASTM No. 8, packed into paver joints to lock the surface in place while staying permeable.
- Geotextile fabric: Placed between the subgrade and the base (not between base layers) to keep soil from migrating up into the stone, unless soil conditions call for a different detail.
- Underdrain or liner (if needed): Added when a soil test shows poor infiltration or a high water table, per EPA guidance on permeable pavement design.
Pro Tip: Ask any contractor bidding your project for their measured infiltration rate on your specific soil, not a regional average. A number pulled from a soil survey map can be off by an order of magnitude compared to an actual on-site percolation test.
What a Permeable Paver Patio Costs, and Where to Find Rebates
Installed cost runs roughly $5 to $30+ per square foot, with most residential patio projects landing in the $7,500 to $9,500 range depending on size and site conditions, according to cost data compiled by Bob Vila. That’s a wide spread, and the reason is almost always what’s happening below grade, not the paver itself.
The line items that move your price the most:
- Base depth and soil quality: Poor native soil means deeper excavation and more imported aggregate.
- Demolition: Removing an old concrete slab or asphalt pad adds real cost before the new system even starts.
- Site access: Tight side yards or fenced backyards without equipment access mean more hand labor.
- Pattern complexity: Herringbone or custom stone layouts take longer than a running-bond pattern.
- Permitting: Some municipalities require a permit for stormwater management structures over a certain size.
Here’s the upside: some cities and counties offer stormwater credits or rebate programs that offset part of the installed cost. Most require pre-approval before construction begins, and many limit the program to certified installers, so check with your local stormwater or public works department before signing a contract. If you’re comparing options against a traditional slab, it’s worth reviewing how paver patios stack up against poured concrete on both upfront and lifetime cost.
Installation Timeline: What to Expect From Start to Finish
A permeable paver installation follows a fixed sequence, and skipping a step is exactly how systems fail early.
- Site clearing and layout. Remove existing vegetation, old hardscape, or turf, and mark the patio footprint.
- Excavation. Dig to the full base depth plus paver thickness, accounting for the finished grade you want.
- Base installation. Place and compact the reservoir aggregate in lifts, then the choker course, checking depth and compaction at each stage.
- Edge restraint. Install rigid or flexible edging to keep the whole assembly from spreading under load.
- Paver placement. Set pavers to pattern, leaving consistent joint gaps for infiltration.
- Joint fill and final compaction. Sweep in joint aggregate, then compact the surface to lock everything in place.
A small patio typically takes a few days from start to finish, while a driveway with a deeper base can stretch to a week or more depending on weather and equipment access. Wet weather delays excavation and compaction, so most installers avoid starting new bases during extended rain.
Before you sign a quote, confirm the aggregate gradation specified (not just “gravel”), the exact base depth, the edge restraint method, and whether a written maintenance schedule is included. If you want a closer look at how a professional crew sequences this work locally, Trew Landscape LLC’s paver patio installation process walks through the same stages on real Kansas City projects.
Maintenance and Lifespan: Keeping the System From Clogging
A properly maintained permeable paver patio can perform well for decades, but only if sediment stays off the surface. Most failures trace back to skipped maintenance, not a bad material choice.
- Vacuum sweeping once or twice a year pulls fine sediment out of the joints before it compacts and seals them shut.
- Occasional pressure washing loosens embedded debris that a standard sweep can’t lift, especially near tree cover.
- Joint aggregate replenishment every few years replaces material lost to wind and foot traffic.
Clogging tends to start at the upgradient edge, the side where runoff enters the system, and works its way across the surface over time. A technical review of clogging behavior confirms that regular surface cleaning restores infiltration and slows that progression before it becomes permanent.
Pro Tip: Keep mulch beds and lawn areas graded so they don’t drain directly onto the pavers. Sediment run-on from an adjacent planting bed is one of the fastest ways to clog a joint that would otherwise last for years. If you’re outsourcing the cleaning itself, a service like driveway and patio pressure washing handles the deep clean between your own vacuum sweeps.
Design Choices That Balance Looks and Drainage
Joint width has more influence on both appearance and performance than most homeowners expect. Wider joints move more water but read as more rustic; tighter joints look cleaner but need more frequent maintenance to stay clear.
- Infill material: Small gravel drains fastest, turf infill softens the look but needs mowing, and decorative stone splits the difference.
- Pattern: Herringbone resists shifting under load better than a simple running bond, which matters if the patio doubles as a walkway.
- Edging and transitions: A stable edge restraint keeps the pattern from spreading, and it’s the detail that separates a patio that lasts from one that needs re-leveling in three years.
- Lighting integration: Low-profile fixtures set into the edge restraint or adjacent beds add usability without interrupting the permeable surface.
Natural stone delivers the higher-end look; concrete pavers cost less and demand less upkeep over time.
When to Bring in a Professional Installer
Some projects are genuinely fine for a confident DIYer. Others aren’t, and getting that call wrong is expensive.
Hire a professional when you’re building a driveway, working with poor or clay-heavy soil, dealing with a sloped site, or managing complex grading near a foundation. Any of those conditions raise the engineering stakes past what a weekend project can safely handle.
- Trew Landscape LLC’s paver installer services cover base design, aggregate specification, and finish work for Kansas City patios and driveways.
- A proper contract should spell out base depth, aggregate gradation, a warranty period, and a written maintenance plan.
- If your yard already struggles with runoff beyond the patio footprint, ask about integrated stormwater drainage solutions rather than treating the patio as an isolated fix.
Why the Base Matters More Than the Paver You Choose
Most homeowners shopping for a permeable paver patio focus almost entirely on the surface: the color, the pattern, the stone versus concrete decision. That’s backwards. The base design and the maintenance commitment determine whether the system still works in year ten, and the paver on top is close to cosmetic by comparison.
Conventional advice tends to oversell “install it and forget it.” That’s not accurate. Every credible technical source on this topic, from CMHA’s design guidance to the peer-reviewed literature on clogging, points to the same conclusion: permeable systems need a real maintenance habit, not a one-time investment. Skip the annual vacuuming, and you’re looking at a system that behaves like ordinary impermeable pavement within a few years, minus the runoff benefit you paid for.
If there’s one thing worth prioritizing above all else, it’s getting an honest infiltration test before design starts. A contractor who skips that step and quotes a flat rate per square foot is guessing at your base depth, and that guess is where premature failures come from.
— Trew Landscape LLC
Get a Site-Specific Plan From Trew Landscape LLC
A permeable paver patio only performs as well as its base design, and approaches that include soil testing to specify base depth, aggregate gradation, and edge restraint to match site conditions rather than regional averages tend to perform better.

That matters most on Kansas City properties with clay-heavy soil or drainage complaints, where a poorly specified base is the most common reason a patio fails early. Trew Landscape LLC’s hardscape design services cover the full scope, from initial grading assessment through paver selection and final compaction, with a maintenance plan included so you know exactly what upkeep to expect. If your project also involves integrated lighting or planting beds, our landscape design team can fold the patio into a broader plan. Request a site assessment to get a real base spec and installed cost for your property, not a placeholder estimate.
Sources
- CMHA technical notes (Permeable interlocking concrete pavement)
- NCSU Extension publication on permeable pavement systems (AG-588-23)
- EPA BMP: Permeable Pavements
- Permeable Pavements: An Integrative Review of Technical and Environmental Contributions to Sustainable Cities (MDPI)
- Permeable Pavers Cost (BobVila)
FAQ
What Are the Disadvantages of Permeable Pavers?
The main drawbacks are a higher upfront cost than standard pavement, a required maintenance habit (vacuum sweeping and periodic power washing), and the risk of clogging if sediment or fines enter the joints without regular cleaning.
What Are the Pros and Cons of Permeable Pavers?
The pros are reduced runoff, less standing water, and pollutant filtration as reviewed in recent technical literature; the cons are higher installation cost and the need for consistent upkeep to prevent clogging.
Are Permeable Pavers Expensive?
Installed cost typically runs $5 to $30+ per square foot, with most residential patios landing between $7,500 and $9,500, according to cost data from Bob Vila; base depth and soil conditions drive most of that range.
What Goes Under Permeable Pavers?
A base of open-graded aggregate (commonly ASTM No. 2), a choker course (often ASTM No. 57), and joint stone (typically ASTM No. 8) sit above the soil subgrade, with geotextile fabric and an underdrain added when soil infiltration is poor.
Can I Get a Rebate for Installing Permeable Pavers?
Some municipalities offer stormwater credits or rebate programs that offset installed cost, but most require pre-approval before construction and a certified installer, so check with your local stormwater department first.