
Trew Landscape Blog
Erosion Control Landscaping: A Homeowner's Action Plan
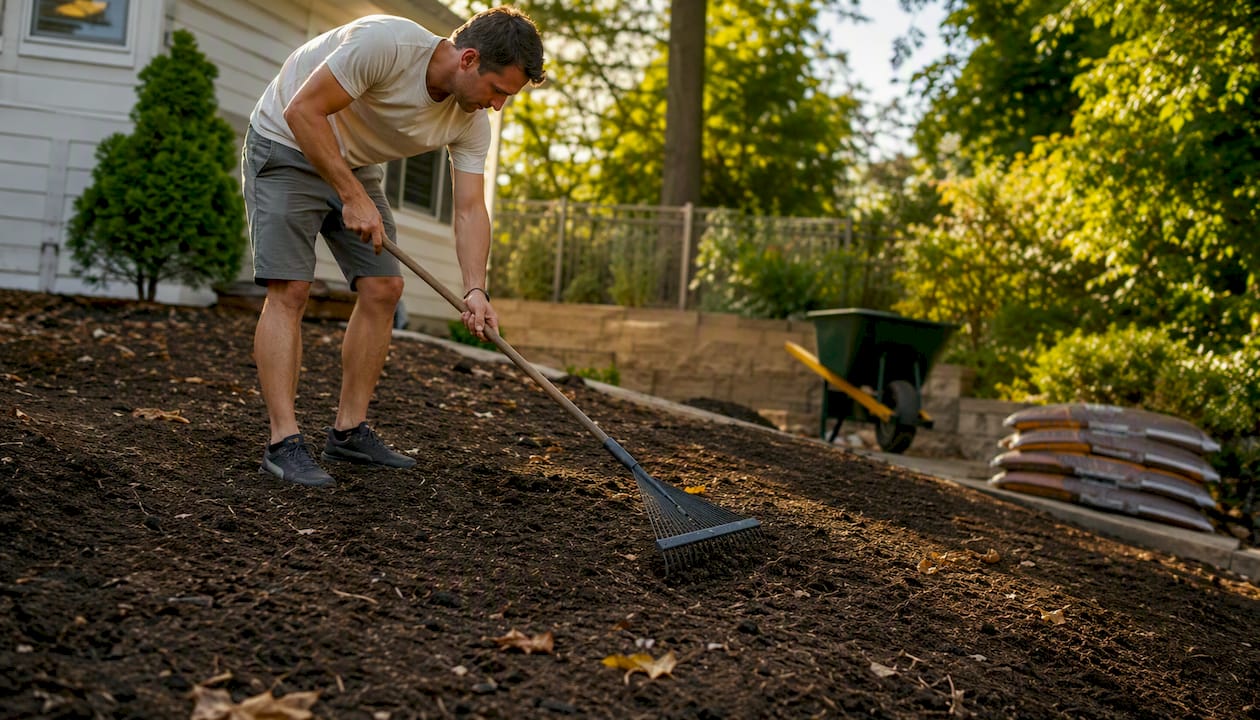
Erosion Control Landscaping: A Homeowner's Action Plan ! Homeowner grading slope soil for erosion control Stop active soil loss first, figure out how water is moving across your property, then pair fast temporary fixes with long-term plants or drainage work suited to your slope.
Erosion Control Landscaping: A Homeowner’s Action Plan
Stop active soil loss first, figure out how water is moving across your property, then pair fast temporary fixes with long-term plants or drainage work suited to your slope. That sequence, not any single product, is what makes erosion control landscaping actually work. Skip the diagnosis step and you’ll spend money on the wrong fix twice.
Here’s what to do in the next 24 to 72 hours if you’re watching soil wash away right now:
- Redirect concentrated water by extending downspouts and splash blocks at least four feet from the foundation or slope edge.
- Cover bare soil with 2 to 4 inches of mulch or an erosion-control blanket, especially before a forecasted rain.
- Break up the flow path with a row of straw wattles or a compost filter sock staked across the slope, perpendicular to water movement.
The Iowa State University Extension sets that 30% threshold as the point where slopes become too steep to safely mow, which is a useful proxy for when they’re also too steep for DIY stabilization.
Key Takeaways
Erosion control landscaping works when homeowners diagnose the water-movement type first, then pair fast temporary fixes with plants or drainage matched to the slope’s grade.
| Point | Details |
|---|---|
| Diagnose before you fix | Identify sheet wash, rills, or concentrated flow before choosing mulch, blankets, or structural options. |
| Stop the source water | Redirect downspouts and patio runoff before planting or seeding a slope. |
| Combine plants with drainage | Vegetation alone rarely holds moderate to steep slopes without a swale, berm, or drain. |
| Know the 30% threshold | Slopes at or above a 30% grade generally require professional grading or a retaining wall. |
| Time plantings to the growing season | Spring and early fall installs give roots the best window to establish before extreme weather. |
| Pair structure with planting | Trew Landscape LLC combines grading, drainage, and native plantings for erosion fixes built to last. |
Table of Contents
- What Causes Erosion and How to Assess Your Yard
- Match the Fix to the Water, Not the Symptom
- Immediate Temporary Measures to Stop Active Erosion
- Long-Term Landscape Solutions by Slope Type
- Best Plants for Erosion Control on Slopes and Yards
- How to Plant and Establish Vegetation on a Slope
- What Erosion Control Really Costs and How Long It Takes
- When to Call a Landscaping Professional
- What We See Most Often on Erosion Control Projects
- Get Erosion Under Control With Help From Trew Landscape LLC
- Sources
- FAQ
What Causes Erosion and How to Assess Your Yard
Before buying a single bag of mulch, walk the property after a rain and watch where the water actually goes. Erosion control landscaping fails most often because someone plants or builds before understanding the water pattern underneath the problem.
You don’t need survey equipment to get a usable slope reading. Here’s a simple field method:
- Measure the grade. Stretch a string between two stakes at the top and bottom of the slope, level it with a line level, then measure the string’s height above the ground at the low end and the horizontal distance. Divide rise by run and multiply by 100 for a percentage grade. A smartphone clinometer app works too, and it’s faster for spot checks.
- Classify the slope. Under 15% is gentle and easy to plant by hand. 15 to 30% is moderate and usually still workable with erosion blankets and root systems. Above 30%, you’re in territory where mowing becomes unsafe and structural help is often the smarter call.
- Identify the water-movement type. Splash erosion looks like small soil craters under eaves or downspouts. Sheet wash is a thin, even layer of soil moving downhill, often visible as a dull, compacted patch. Rills are small channels a half inch to a few inches deep. Concentrated flow shows up as a defined gully, usually tracing back to a downspout, driveway edge, or patio runoff point.
- Check the soil. Cut a small cup with both ends removed, push it two inches into the soil, pour in water, and time how long it takes to drain. Under five minutes means decent infiltration. Longer than that, and you’re dealing with compacted or clay-heavy soil that will shed water faster than plants can absorb it.
- Map it. Sketch the yard, mark where water enters (roof valleys, neighboring slopes, hardscape edges) and where it exits or pools. This fifteen-minute exercise tells you more than any plant list.
Pro Tip: Before you plant anything, find and stop the single largest point source of concentrated water, usually a downspout or a patio edge draining onto bare soil. Planting into an unresolved water source is like re-carpeting a room with a leaking roof.
Match the Fix to the Water, Not the Symptom
The fix that works depends entirely on which erosion pattern you’re dealing with. Sheet wash responds to cover. Concentrated flow needs structure. Confuse the two and you’ll watch your fix fail within a season.
Sheet erosion, the slow, even soil loss across a slope, is best addressed with anything that armors the surface: mulch, groundcovers, dense turf, or root mats that hold particles in place against raindrop impact. Rills and gullies, by contrast, carry enough energy that a groundcover alone won’t survive the flow; they need something that slows or spreads the water first, like a shallow swale, a berm, or a check dam, before vegetation gets a fighting chance to establish.
Stormwater guidance consistently recommends the same sequence for exposed soils: leave vegetated buffer zones intact where you can, temporarily divert water with berms, and use erosion-control blankets or coir rolls to hold soil in place until plants take root.
That’s the framework laid out in the Massachusetts stormwater solutions fact sheet, and it holds true whether you’re managing a two-foot slope behind a patio or a steep bank along a property line.
One design mistake shows up constantly: homeowners dig a deep trench straight down a slope, thinking it’s a “swale.” A real swale is shallow and runs level along its length, spreading water out so it infiltrates instead of channeling it downhill faster. Get that detail backward and you’ve built a gully with better landscaping around it.
Immediate Temporary Measures to Stop Active Erosion
If soil is actively washing away today, these fixes buy you time while you plan a permanent solution. None of them are meant to be the final answer, but each one stops the bleeding fast.
- Divert downspouts and extend splash blocks so water discharges at least four feet from bare or sloped soil.
- Install straw wattles across the slope, staked every three to four feet, spaced roughly every eight to ten feet down the grade on moderate slopes.
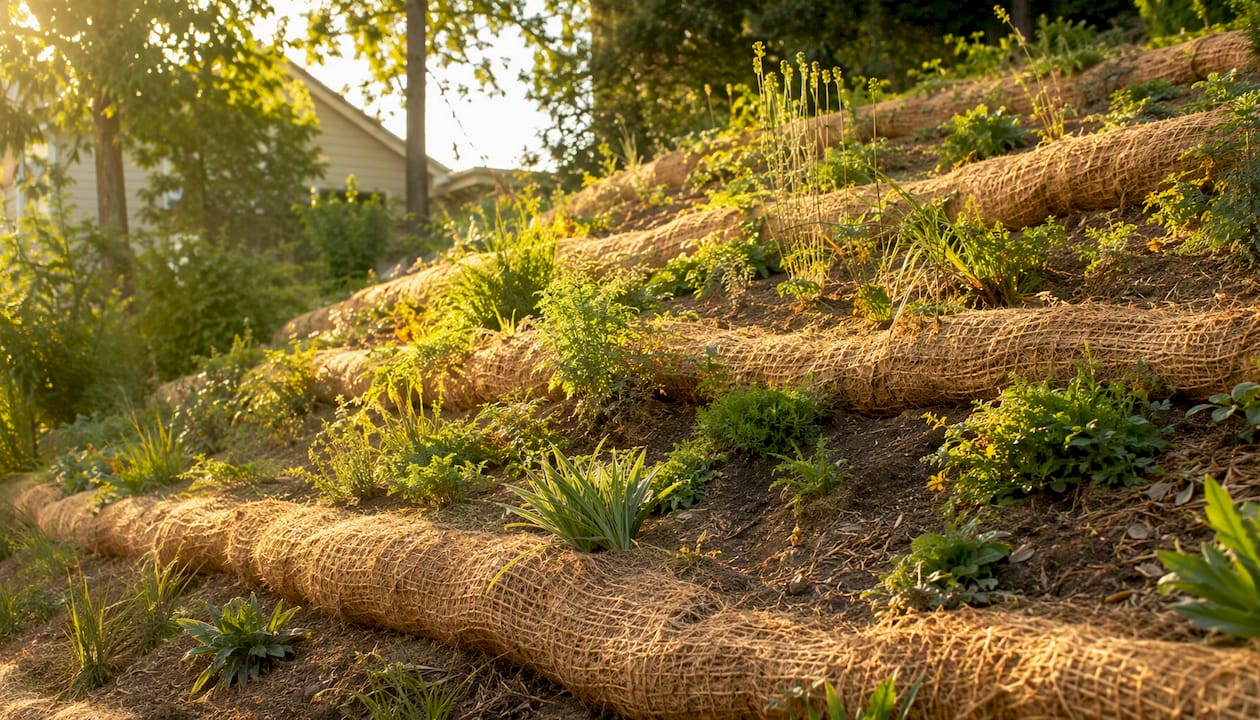
- Pin erosion-control blankets or coir matting over bare soil, overlapping seams by at least four inches and anchoring with biodegradable staples every foot or two.
- Apply 2 to 4 inches of mulch over exposed dirt, keeping it off the base of any existing plant stems.
- Place compost filter socks at the base of the slope or along a property line to catch sediment before it reaches a storm drain or neighbor’s yard.
Here’s how the two highest-leverage fixes actually go in:
- Wattles: dig a shallow trench (2 to 3 inches deep) along the contour, lay the wattle in, stake through it at an angle, and backfill lightly around the base. Expect one to two hours per 50 linear feet, and materials typically run in the low tens of dollars per wattle.
- Blankets: rake the soil smooth, unroll the blanket downhill starting at the top of the slope, staple every 12 to 18 inches, and seed underneath before laying the blanket if you’re combining it with plantings.
Watch for utility lines before staking anything into the ground, and skip DIY work entirely on slopes near retaining walls that already show cracking or leaning. That’s a structural issue, not a planting one. Avoid plastic sheeting or non-biodegradable liners as a “quick fix,” since they trap water underneath, encourage scour at the edges, and often make the erosion worse once removed.
Long-Term Landscape Solutions by Slope Type
Temporary fixes hold the line. Long-term stabilization is what actually solves erosion control landscaping for good, and on most properties that means combining vegetation with some form of drainage or structural control rather than picking one or the other.
| Solution | Best for | Slope suitability | DIY vs. contractor | Time to stabilize | Maintenance | Cost range |
|---|---|---|---|---|---|---|
| Swale (level, shallow) | Dispersing sheet flow | Gentle to moderate | DIY possible | Weeks, once vegetated | Low, occasional reshaping | Low |
| Retaining wall | Steep slopes, structural risk | Moderate to steep | Contractor | Immediate once built | Low, periodic inspection | High |
| French drain | Subsurface water, wet yards | Any | Contractor for depth/grade | Immediate | Low | Moderate to high |
| Riprap | High-energy concentrated flow | Moderate to steep | Contractor recommended | Immediate | Very low | Moderate to high |
| Hydroseeding | Large bare areas, fast cover | Gentle to moderate | Contractor | 4 weeks for cover | Watering during establishment | Moderate |
| Native plantings | Long-term stabilization, low upkeep | Gentle to moderate | DIY | One to two growing seasons | Low once established | Low to moderate |
Geotextile matting, coir rolls, and hydroseeding all buy time for roots to establish, which makes them a smart bridge on bare slopes where live plantings alone would wash out before taking hold. The general rule: choose soft solutions (planting, swales) when the slope is gentle to moderate and the water volume is manageable, and reach for hard solutions (retaining walls, riprap, engineered drains) when you’re seeing repeated rill formation, slumping, or any sign the soil mass itself is shifting.
That’s not a DIY weekend project, and a retaining wall built for slope stabilization needs proper engineering behind it or it becomes the next failure point.
Best Plants for Erosion Control on Slopes and Yards
Plants are the long-term backbone of erosion control landscaping, but the wrong plant on the wrong slope just delays the problem. Match root structure and coverage habit to your site conditions, and native species generally outperform ornamentals for the long haul because they’re adapted to your local rainfall and soil.
According to BobVila’s roundup of erosion-control plants, the common thread across sedum, creeping juniper, creeping phlox, tall fescue, switchgrass, and cotoneaster is root architecture: either dense, spreading surface roots that shield soil from raindrop impact, or deep, fibrous systems that anchor it against sliding.
- Native plants generally need less water and less maintenance once established, which extension and stormwater guidance both point to as the reason they outperform ornamentals on long-term slope projects.
- Switchgrass and other native prairie grasses tolerate a wider moisture range than most groundcovers, making them a solid pick for slopes with inconsistent drainage.
- Avoid aggressive spreaders like certain vinca cultivars, which some states now flag as invasive; check your local extension office’s list before planting anything labeled “vigorous” or “fast-spreading.”
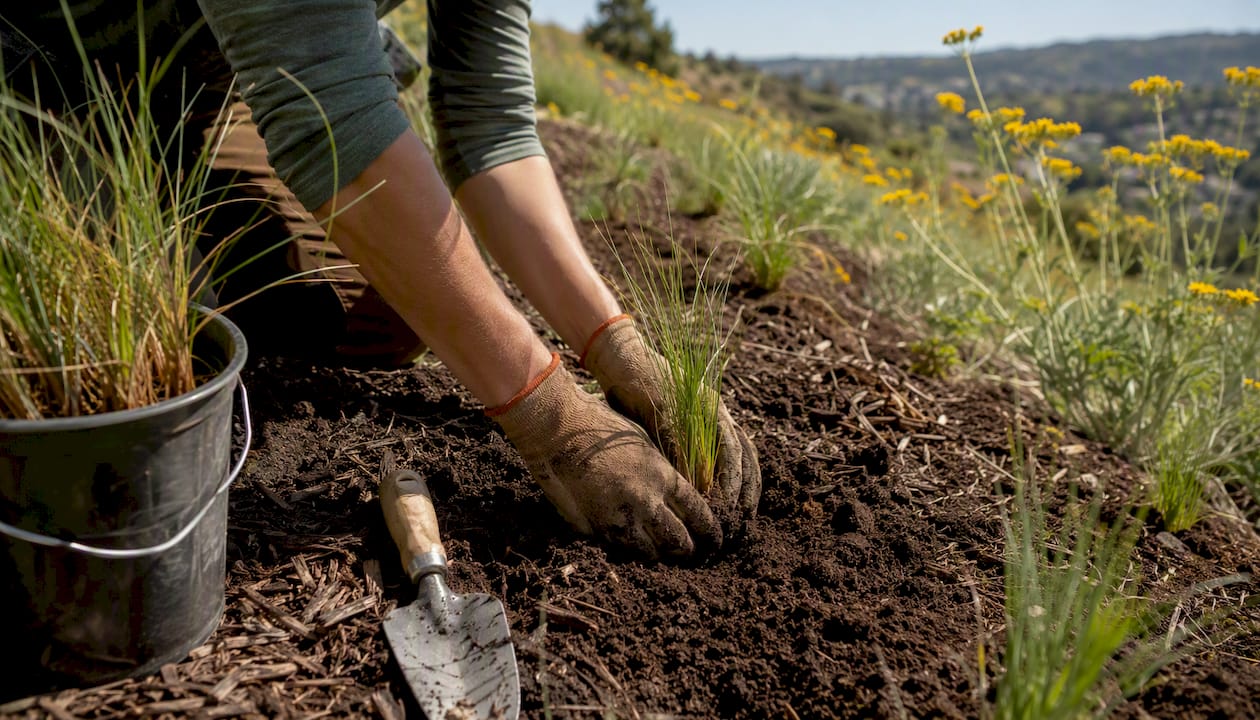
For coverage, plan on roughly one plug or plant per square foot for fast-spreading groundcovers like sedum or phlox, and slightly wider spacing (12 to 18 inches) for larger shrubs like cotoneaster. Staggered, triangular spacing closes gaps faster than straight rows and reduces the bare soil exposed between plants during establishment.
How to Plant and Establish Vegetation on a Slope
Getting plants in the ground is the easy part. Getting them to survive their first season on a slope, where every heavy rain tests root hold, is where most DIY erosion projects succeed or fail.
- Prep without tilling. Avoid deep tilling on slopes; it loosens soil and temporarily increases erosion risk. Instead, work compost into the top few inches by hand or with a light rake.
- Amend with compost. A one-inch layer worked into the surface improves both water infiltration and root establishment, according to guidance from the GrowPerma erosion prevention guide.
- Dig planting holes on contour, not straight down the slope, so each hole doesn’t become a mini channel for runoff.
- Handle roots gently and set plants slightly proud of grade so water doesn’t pool at the crown.
- Mulch 2 to 4 inches deep, keeping mulch off stems. More than that can suffocate roots and shed water rather than absorb it.
- Layer in erosion-control blankets or wattles where the slope is bare between plantings, anchoring with staples on the same visit.
- Water deeply but infrequently for the first 6 to 12 weeks, roughly twice a week barring rain, tapering off as roots establish. Overwatering on a slope just adds to the runoff problem you’re trying to solve.
Stagger plants in triangular groupings rather than straight rows; it closes canopy faster and interlocks root systems sooner, which shortens the window where bare soil is still exposed between plants.
The most common mistakes homeowners make: piling mulch too deep, seeding with an annual-only mix that dies back and leaves soil bare again by fall, and planting straight up-and-down the slope instead of along the contour. Any one of these can undo weeks of work after a single hard rain, a point This Old House makes clearly in its guidance on planting sloped yards.
What Erosion Control Really Costs and How Long It Takes
DIY fixes are cheap and fast to deploy; structural work is expensive but often immediate. Knowing which bucket your problem falls into keeps you from either overspending or underbuilding.
Straw wattles, mulch, and seed-plus-blanket combinations sit at the low end and can typically go in over a weekend. Retaining walls, engineered French drains, and large-scale hydroseeding require contractor equipment, permitting in some jurisdictions, and days to weeks of work depending on scope.
| Fix | Approximate cost range | Time to stabilize |
|---|---|---|
| Straw wattles (per 50 ft) | Low, tens of dollars | Days to weeks (temporary) |
| Erosion-control blanket | Low to moderate | Weeks (bridges to plant establishment) |
| Hydroseeding (per area) | Moderate | 4 weeks for cover |
| Native plant plugs | Low to moderate | 1 to 2 growing seasons |
| Retaining wall (per linear foot) | High | Immediate structural fix |
These are rough, regionally variable estimates, and actual pricing depends heavily on site access, soil conditions, and local labor rates. Straw wattles and blankets typically hold for one growing season, long enough for plant roots to take over the job. Retaining walls and engineered drains solve the problem immediately but come with a much higher upfront cost.
- Budget a contingency of 15 to 20% above your base estimate for site prep, especially if grading or drainage work turns up more compaction or standing water than expected.
- Factor in contractor mobilization costs separately if the project requires equipment access across a steep or narrow yard.
- Sod installation can serve as a fast, immediate surface stabilizer on gentler slopes while deeper-rooted plants establish nearby; see sod installation costs for a sense of regional pricing.
When to Call a Landscaping Professional
Some erosion problems are a weekend project. Others are a liability waiting to happen. Here’s the checklist that separates the two:
- Slope grade of 30% or more. Past this threshold, per Iowa State Extension guidance, mowing and hand-planting both become unsafe and often ineffective.
- Active slumping or large rills. If you’re seeing soil mass actually shifting, not just surface loss, that’s a structural signal, not a planting one.
- Erosion threatening a foundation, driveway, or septic system. Any erosion within a few feet of these structures needs professional grading or drainage assessment before you plant anything.
- Repeated failure after DIY fixes. If wattles, blankets, or plantings have washed out more than once, the underlying water source likely isn’t being addressed.
When you do bring in a contractor, ask pointed questions: Does the plan address the source water, or just the visible symptom? What drainage details (swale grade, pipe size, outlet location) are included? Is there a warranty on plantings or structural work? Ask for references or examples of similar slope projects, and expect a professional scope to include a basic grade assessment, drainage plan, and, for slopes at the steeper end, input from a geotechnical engineer.
A properly scoped project usually starts with yard grading to correct the water source, followed by drainage installation like a French drain or dry creek bed, and finishes with either a retaining wall or plantings depending on slope severity. If a wall is already showing signs of trouble, our leaning retaining wall triage guide covers what to check before it becomes an emergency.
What We See Most Often on Erosion Control Projects
Most of the erosion calls we field start the same way: a homeowner tried mulch or seed on its own, watched it wash out after one storm, and assumed the plants were the problem. Almost always, the real issue is upstream, a downspout dumping onto bare soil, a patio sloped the wrong direction, or a swale that was dug too steep to actually spread water.
Our default recommendation, and the one that holds up over years rather than months, pairs drainage correction with plant-based stabilization instead of leaning on either alone. Grading and a swale or French drain manage where the water goes; native grasses, sedum, or shrubs like cotoneaster hold the soil once the water load is under control. Skip the drainage step and even the best plant list will struggle.
Typical timelines run a few days for grading and drainage work, followed by one to two growing seasons before plantings reach full root density. Maintenance after that drops off sharply, usually to seasonal inspection and the occasional mulch top-up, which is a much better long-term deal than re-fixing the same washed-out slope every spring.
Get Erosion Under Control With Help From Trew Landscape LLC
Diagnosing water movement and matching it to the right fix is doable on your own for smaller yards, but once grading, drainage, or a retaining wall enters the picture, the margin for error narrows fast. Trew Landscape LLC handles the full sequence for Kansas City homeowners, not just one piece of it.

That means a proper site assessment to identify where water actually enters and exits your yard, followed by grading corrections, engineered retaining walls where slopes demand structure, swales or French drains for subsurface and surface flow, and either hydroseeding or full sod installation depending on how fast you need coverage. We build the drainage and the planting plan together, which is the difference between a fix that lasts one season and one that lasts a decade.
If your slope is showing rills, standing water, or a wall that’s starting to lean, start with a site assessment. Reach out through our landscape design services page to get a plan scoped for your yard’s actual grade and soil, not a generic template.
Sources
- Iowa State University Extension and Outreach — safe mowing and slope guidance
- Stormwater solutions for homeowners fact sheet — Massachusetts
- Soil Erosion Prevention: Gardener’s Guide — GrowPerma
- BobVila — Plants good for erosion control
Check with your regional extension office for plant lists and technical assistance specific to your soil type and climate zone; recommendations can shift meaningfully by region even within the same state.
FAQ
How do I prevent erosion on a sloped yard?
Start by stopping concentrated water sources like downspouts, then cover bare soil with mulch or an erosion-control blanket while deep-rooted plants like switchgrass or native grasses establish.
What are effective landscaping ideas for controlling erosion?
Combining groundcovers or native grasses with a shallow, level swale or berm handles most yard-scale erosion, while steeper areas benefit from terracing or a retaining wall paired with plantings. Erosion-control blankets and straw wattles bridge the gap while new plants take root.
What is the best low-maintenance hillside landscaping?
Native grasses like switchgrass, along with spreading groundcovers such as sedum and creeping juniper, require little upkeep once established because their root systems are adapted to local rainfall and soil conditions. Mixing in cotoneaster or creeping phlox adds variety without raising maintenance demands.
Can I put mulch down to stop erosion?
Yes, 2 to 4 inches of mulch over bare soil significantly reduces surface erosion and helps plants establish, but more than 4 inches can suffocate roots and increase runoff instead of absorbing it. Mulch works best as a bridge measure alongside plantings, not as a standalone permanent fix.
When should I hire a professional instead of doing it myself?
Repeated failure of DIY fixes like wattles or blankets is also a sign the underlying water source needs professional grading or drainage work.